ActiveSync in Exchange 2007 allows for an
unprecedented level of control over the security and management of
devices. It allows an administrator to create ActiveSync mailbox
policies that force devices to comply with specific restrictions, such
as requiring a complex password, or requiring file encryption.
In addition, Exchange
2007 ActiveSync now allows an administrator to create multiple policies
in an organization. This allows specific types of users to have more
restrictive policies placed on their handheld devices, while other users
are not as restricted. For example, a hospital could stipulate that all
of the devices that have confidential patient data on them be forced to
be encrypted and password protected, while other users are not forced
to the same standards.
Creating ActiveSync Mailbox Policies
Creating a new ActiveSync mailbox policy in Exchange Server 2007 is not a complex task. To do so, follow this procedure:
1. | From Exchange Management Console, expand Organization Configuration in the console pane, and click Client Access.
|
2. | In the tasks pane, click the New Exchange ActiveSync Mailbox Policy link.
|
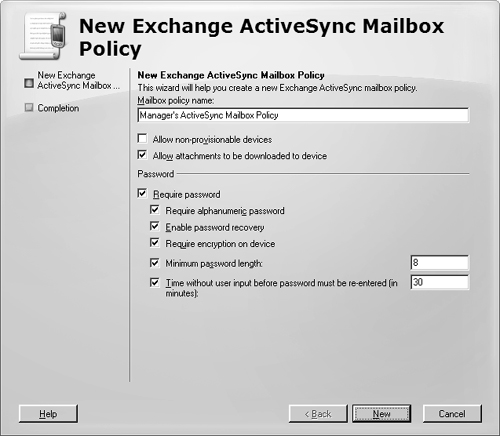
3. | Enter
a descriptive name for the policy, such as Manager’s ActiveSync Mailbox
Policy. Set password settings, such as that shown in Figure 1, and click New.

|
4. | Click Finish.
|
Applying Mailbox Policies to Users
After a specific policy
has been created, it can be added to mailboxes, either during the
provisioning process or after the mailbox has already been created. For
existing mailboxes, perform the following steps:
1. | From the Exchange Management Console, expand Recipient Configuration, and then click Mailbox.
|
2. | Right-click on the mailbox to be added, and click Properties.
|
3. | Select the Mailbox Features tab, click Exchange ActiveSync, and then click the Properties button.
|
4. | Check the Apply an Exchange ActiveSync Mailbox Policy check box, and then click the Browse button.
|
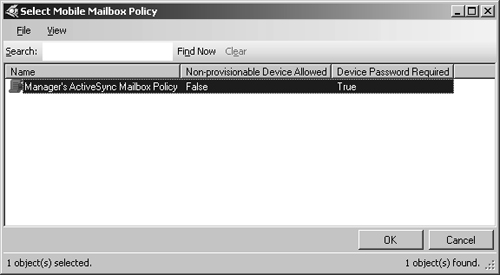
5. | Select the policy from the list, such as that shown in Figure 2, and then click OK.

|
6. | Click OK two more times to save the changes.
|
Adding multiple mailboxes to a specific mailbox policy is best done from the scripting console.
Wiping and Resetting ActiveSync Devices
One
of the advantages to Exchange 2007’s ActiveSync is the optimized
management capabilities available. With ActiveSync and the proper
Windows Mobile devices, passwords can be reset remotely, and devices can
be wiped clean of data in the event that they are lost or stolen. This
concept—combined with the encryption capabilities of the Messaging
Security Feature Pack—allows an organization to deploy ActiveSync
without fear of data compromise.
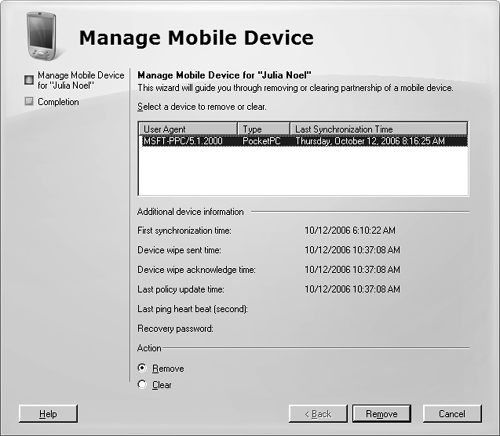
Figure 3
shows a specific device that was wiped, with verification settings and
other information clearly given. The device can be removed from the user
by clicking Remove, or it can be cleared by selecting Clear and then
clicking Clear.

Invoking
this dialog box is as simple as right-clicking on a mailbox user under
the Mailbox area of the Recipient Configuration node and choosing Manage
Mobile Device.