Sending a Digitally
Signed Email
With the email
certificate installed, you can now begin the process of sending and
receiving encrypted emails. However, to complete the process, you need
to communicate with someone who also has a certificate to send and
receive encrypted emails. Email encryption requires both the sender and
the receiver to have valid certificates.
The easiest process
for setting up encrypted email communications is to send a user a
digitally signed email with a copy of your public key certificate
attached. With a digitally signed email and a copy of your public key,
the recipient can then add your certificate to their address book, and
then they can reply to the message sending you their public key. After
you have exchanged public keys, you can send and receive encrypted
emails.
The process for sending a
person a digitally signed email with your public key is as follows:
1. | Launch Outlook 2007.
|
2. | Create a new email by selecting Actions, New Mail
Message.
|
3. | Enter the
recipient’s email address that you want to communicate with in the To
field, and enter a subject such as “Initial Email for Secured
Communications.”
|
4. | For the
body of the message, you might want to enter text such as “Here is an
email message that will help us initiate secured communications. I am
attaching a copy of my certificate for you to install; please reply to
the message with a copy of your certificate.”
Note
Writing a message in
the body of the email might not be necessary; however, in this day and
age of spam filters, if you just send a message with your digital
signature and an attachment of your public key, the message will
frequently be quarantined in the recipient’s spam filter. So, it is best
to write a few words describing what you are doing as part of the
message.
|
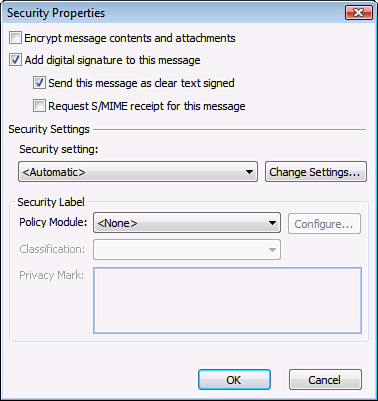
5. | On the
Options tab at the top of the page, select Sign and ensure that it is
highlighted. To see what settings this affects, you can click the arrow
at the bottom of the Options box, and then click the Security Settings
button.
|
6. | The Add
Digital Signature to This Message and Send This Message as Clear Text
Signed check boxes should already be selected, as shown in Figure 1.
|
7. | After
selecting the Change Settings button, you should see that the Send These
Certificates with Signed Messages check box is already selected. If it
is not, select the box so that your certificate is sent with the
message, and then click OK.
|
8. | Click OK and then click Close.
|
9. | Click Send to send the message.
|
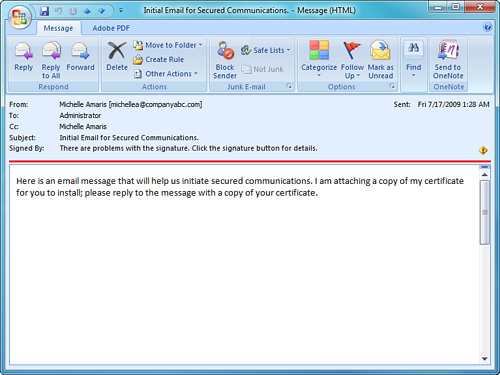
Your message will now be
sent to the recipient with a copy of your key in a digitally signed
email message. When the recipient opens the message, an error will
likely appear that says “There are problems with the signature. Click
the signature button for details,” as shown in Figure 2. This message is because the certificate being received is
from a domain with which they have not communicated in a secured or
encrypted manner in the past.
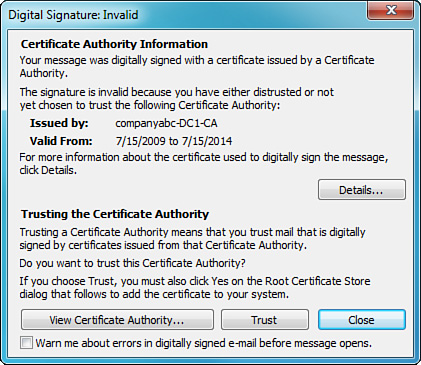
After confirming that
you indeed sent the message and deciding to trust your certificate, the
recipient should do the following:
1. | Click on the yellow warning icon on the right side of
the email message; a warning dialog box opens, as shown in Figure 3.
|
2. | Because
you (the recipient) have confirmed the validity of the sender, click
Trust.
|
3. | A message
box opens that warns and prompts that the recipient is trusting the
sender. Click Yes to accept the trust.
|
4. | Close and reopen the email. The error no longer
appears, and the digital signature is confirmed.
|
Your certificate has now
been installed on the recipient’s system; they now need to send you
their certificate so you can follow the exact same procedures to install
their certificate on your system.
Sending Encrypted
Email Messages
After you have exchanged
certificates, you can now send and receive fully encrypted email
messages with another individual. To do so, complete the following
steps:
1. | Launch Outlook 2007.
|
2. | Create a new email by selecting Actions, New Mail
Message.
|
3. | Enter the
recipient’s email address in the To field, and enter a subject such as
“Encrypted Email Message.”
|
4. | For the body of the message, you might want to enter
text such as “Here is an email message that should now be encrypted.
Please let me know if you successfully receive this message.”
|
5. | On the Options tab at the top of the page, select
Encrypt and ensure that it is highlighted. To see what settings this
affects, you can click the arrow at the bottom of the Options box, and
then click the Security Settings button.
|
6. | The Encrypt Message Contents and Attachments check box
should be selected. Click OK, and then click Close.
|
7. | Click Send to send the message.
|
The recipient will
receive an encrypted copy of your message. This process not only works
within Microsoft Outlook within an organization, but also works the same
way when you want to send and receive encrypted messages to individuals
outside of your organization. If the recipient is also running Outlook
2007 or Outlook 2003, the process to install your certificate into their
address book is the same as described previously. If the recipient is
using a different email system, they might need to detach the
certificate, save it, and manually save the certificate into their
address book.
