2. Creating Labels
After creating the basic frame for your
new wizard, the next step is to add labels. To open the Label Editor,
click Tools\Development Tools\Label\Label Editor. The Label Editor is
shown in Figure 11.
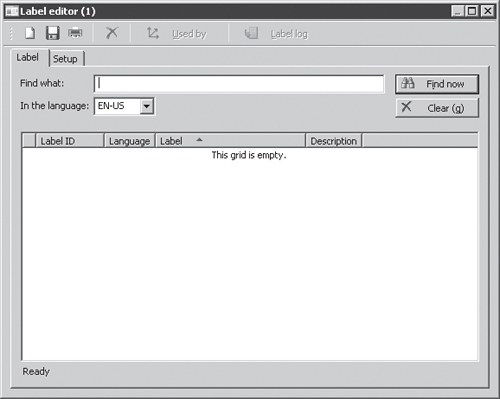
The Label Editor creates labels in your default
language. The Setup tab allows you to set the default language and
displays the default label file in which new labels are stored. (If
there is no default label file, you must create one with the Label File
Wizard, located in Tools \Development Tools\Wizards\Label File Wizard,
and then you must select it as the default on the Setup tab.)
Labels are identified with an ID consisting of
the label file name and a counter. The label IDs displayed depend on any
existing labels and your choice of label file. In Table 1, a default label file—USR—results in the label IDs @USR1, @USR2, @USR3, and so on.
Table 1. Label IDs and Labels
| Label ID | Label |
|---|
| @USR1 | Create inventory item wizard. |
| @USR2 | This wizard helps you create a new inventory item. |
| @USR3 | Item identification. |
| @USR4 | Item number and description. |
| @USR5 | Select proper group relationships for the item. |
| @USR6 | Create inventory item. |
| @USR7 | This is all the wizard needs to know to create the inventory item. |
| @USR8 | Click Finish to create and save the item. |
Press Ctrl+N to create the new labels shown in Table 1. The label ID is generated automatically when you provide text in the Label field; the Description field is optional.
Take note of the label numbers you’re
given so that you can use them in your code if you have label numbers
other than those listed in the table. You can also use the Label Editor
to search for previously created labels based on their content.
3. Adding Content to the Wizard
Next you can add selection fields to the wizard
you created and write the logic to create the inventory item. You edit
the wizard form by using the AOT. In the AOT, scroll to the name of the wizard form you want to design and right-click it. Select Properties, and then set the Caption property of the form design to @USR1.
Right-click TabPage:Step1, select Properties, and then change the Caption property from “Step 1 Title” to @USR1. Add a StaticText control to TabPage:Step1 by right-clicking it and selecting New Control\Static Text. A Text property appears in the properties list; set it to @USR2.
On TabPage:Step2, change the Caption property from “Step 2 Title” to @USR3. Set the HelpText property to @USR4.
Now you can begin adding input fields. In this
example, the user must be able to enter an item ID, item name, and item
description. Start by investigating the types of item IDs. The table in
which items are stored is called InventTable. Look up the item ID on the table, open the properties, and note that the extended data type of the field is ItemId.
Using this extended data type directly in the wizard will cause a
problem, because the extended data type has a relationship with InventTable;
the drop-down list for the extended data type displays existing item
IDs associated with the field. You must find the name of the parent of
the extended data type for use in the new wizard.
Locate the extended data type in the AOT and examine the properties. You can see that the type extends the ItemIdBase
extended data type; because this type doesn’t have any database
relationships, you can safely use it in the wizard. In other situations,
if you can’t find a suitable extended data type, you can either create
one or change the LookupButton property of the form control to Never.
Right-click TabPage:Step2, point to New Control, and then click StringEdit. Open the properties of the new field and change the Name property to ItemId, change the ExtendedDataType property to ItemIdBase, and change the AutoDeclaration property to Yes. (Setting the AutoDeclaration property to Yes
allows you to easily address the control by using X++ code later; the
runtime automatically creates an object handle, which allows access to
the control.)
Repeat this procedure to add a field for the ItemName of InventTable. The ExtendedDataType type should be Name. Remember to set the AutoDeclaration property to Yes.
Finally, add the inventory description field. Give it the name ItemDescription. The inventory item description field is in the InventTxt table, not in InventTable as in the previous case, so you must open InventTxt to determine the extended data type. As you can see from the Txt field on the table, the extended data type is ItemFreeTxt. Supply this type in the ExtendedDataType property. Again, remember to set the AutoDeclaration property to Yes.
On the third page of the wizard, the user should
be able to link the item to the mandatory item group, inventory model
group, and dimension group. To make this possible, open the properties list for TabPage:Step3 and change the Caption property from “Step 3 Title” to @SYS1177, reading “Groups,” and change the HelpText property to @USR5. Using the procedure described earlier, add three fields to the page with the following extended data types: ItemGroupId, InventModelGroupId, and InventDimGroupId. Name the fields to match the extended data type name, and remember to set the AutoDeclaration property to Yes.
The fourth page of the wizard is dedicated to prices. For this example, you add a sales price field. Change the Caption property of the fourth tab from “Step 4 Title” to @SYS73780, reading “Pricing,” and change the HelpText property to @SYS87796, reading “Set up sales prices.” Add a RealEdit control with the extended data type Price to the tab. Change the Name property to Price and remember to set the AutoDeclaration property to Yes.
On the fifth and final page, you add a short
summary that describes what the wizard does when the user clicks Finish.
Change the Caption property of the tab from “Step 5 Title” to @USR6. Add a StaticText control to the tab. Change the Name property to TxtFinish, change the AutoDeclaration property to Yes, change the Width property to Column Width, change the Height property to Column Height, and remove the text value from the Text
property. Because this summary text is composed of several sentences
with more than one label, you need to write X++ code to set the text.
You must add the code to the setTexts method on the form, as shown here.
void setTexts()
{
;

    txtFinish.text("@USR7" + '\n\n' +
                   "@USR8" + '\n'   +
                   "@SYS68351");
}
|
Next, you set up the navigation for the wizard. You need to implement three simple rules:
- The Next button must not be enabled on the Item Identification page if an item ID hasn’t been entered.
- The Next button must not be enabled on the Groups page unless all three fields have a value.
- The
Finish button must be enabled as soon as the Groups page is filled in.
It isn’t mandatory for the user to enter a price, so the user can safely
skip that step.
Start in the class declaration of the InventItemCreateWizard class by defining macro variables so that you can address the tabs by name rather than by number, as shown in this example.
public class InventItemCreateWizard extends SysWizard
{
    #define.Welcome(1)
    #define.Id(2)
    #define.Groups(3)
    #define.Prices(4)
    #define.Finish(5)
}
|
To make the Finish button available before the last page, override the hasFinishButton
method by right-clicking the InventItemCreateWizard class, clicking
Override Method, and choosing hasFinishButton. Set the return value to true, as shown here.
boolean hasFinishButton()
{
;
    return true;
}
|
The setupNavigation
method describes the initial navigation settings that apply when the
wizard is opened. To override this method, use the following code.
void setupNavigation()
{
;
    nextEnabled[#Welcome]   = true;
    backEnabled[#Welcome]   = false;
    finishEnabled[#Welcome] = false;

    nextEnabled[#Id]        = false;
    backEnabled[#Id]        = true;
    finishEnabled[#Id]      = false;

    nextEnabled[#Groups]    = false;
    backEnabled[#Groups]    = true;
    finishEnabled[#Groups]  = false;

    nextEnabled[#Prices]    = true;
    backEnabled[#Prices]    = true;
    finishEnabled[#Prices]  = true;

    nextEnabled[#Finish]    = false;
    backEnabled[#Finish]    = true;
    finishEnabled[#Finish]  = true;
}
|
To enable the Next button when an item ID has been entered, find the ItemId control on the form and override the textChange method with the following code.
public void textChange()
{
;
    super();

    if (this.text())
    {
        if (!sysWizard.isNextEnabled())
        {
            sysWizard.nextEnabled(true, sysWizard.curTab(), false);
        }
    }
    else
    {
        if (sysWizard.isNextEnabled())
        {
            sysWizard.nextEnabled(false, sysWizard.curTab(), false);
        }
    }
}
|
On the Groups page, all three fields must be
filled in before the Next button is enabled. Create a single method on
the form, in the Methods section directly under the form name node, to
control the values Next and Finish, as shown here.
void enableNextOnGroups()
{
;
    if (itemGroupId.text()         &&
        inventModelGroupId.text()  &&
        inventDimGroupId.text())
    {
        if (!sysWizard.isNextEnabled())
        {
            sysWizard.nextEnabled(true, sysWizard.curTab(), false);
        }

        if (!sysWizard.isFinishEnabled())
        {
            sysWizard.finishEnabled(true, sysWizard.curTab(), false);
        }
    }
    else
    {
        if (sysWizard.isNextEnabled())
        {
            sysWizard.nextEnabled(false, sysWizard.curTab(), false);
        }
        if (sysWizard.isFinishEnabled())
        {
            sysWizard.finishEnabled(false, sysWizard.curTab(), false);
        }
    }
}
|
Override the textChange method of each of the three controls on the Groups page as follows.
public void textChange()
{
;
    super();

    element.enableNextOnGroups();
}
|
Also override the modified method of each of the three controls as follows.
public boolean modified()
{
    boolean ret;
    ;
    ret = super();

    element.enableNextOnGroups();

    return ret;
}
|
Before you can write the business logic to
create the inventory item, you must create methods on the form to return
the selected values from the controls you’ve added, as shown in the
following code.
public ItemId itemId()
{
;
    return itemId.text();
}

public ItemName itemName()
{
    ;
    return itemName.text();
}
public ItemFreeTxt itemDescription()
{
;
    return itemDescription.text();
}

public itemGroupId itemGroupId()
{
;
    return itemGroupId.text();
}

public InventModelGroupId inventModelGroupId()
{
;
    return inventModelGroupId.text();
}

public InventDimGroupId inventDimGroupId()
{
;
    return inventDimGroupId.text();
}

public Price price()
{
;
    return price.realValue();
}
|
You can now write the
X++ code that uses the selections made in the wizard and creates the
inventory item. You insert the following code in the run method of the Wizard class.
void run()
{
    InventTable         inventTable;
    InventTxt           inventTxt;
    InventTableModule   inventTableModule;
    InventItemLocation  inventItemLocation;
    ;

    ttsBegin;

    inventTable.initValue();
    inventTable.ItemId      = formRun.itemId();
    inventTable.ItemName    = formRun.itemName();
    inventTable.ItemGroupId = formRun.itemGroupId();
    inventTable.ModelGroupId= formRun.inventModelGroupId();
    inventTable.DimGroupId  = formRun.inventDimGroupId();
    inventTable.insert();
    inventTxt.initValue();
    inventTxt.ItemId        = formRun.itemId();
    inventTxt.LanguageId    = CompanyInfo::find().LanguageId;
    inventTxt.Txt           = formRun.itemDescription();
    inventTxt.insert();

    inventTableModule.initValue();
    inventTableModule.ItemId        = formRun.itemId();
    inventTableModule.ModuleType    = ModuleInventPurchSales::Invent;
    inventTableModule.insert();

    inventTableModule.ItemId        = formRun.itemId();
    inventTableModule.ModuleType    = ModuleInventPurchSales::Purch;
    inventTableModule.insert();

    inventTableModule.ItemId        = formRun.itemId();
    inventTableModule.ModuleType    = ModuleInventPurchSales::Sales;
    inventTableModule.Price         = formRun.price();
    inventTableModule.insert();

    inventItemLocation.initValue();
    inventItemLocation.ItemId       = formRun.itemId();
    inventItemLocation.InventDimId  = InventDim::inventDimIdBlank();
    inventItemLocation.insert();

    ttsCommit;
}
|
You could include calls to validateWrite
of the tables to ensure that the wizard uses the same validation rules
that are used when a user creates a new item from the Item form. This
ensures that the validations required to create an item are consistent,
regardless of where you create a new item.
Adding the Wizard to the Navigation Pane and the Area Page
To make the wizard available from the area page
and the navigation pane in Dynamics AX, you must add the menu item to
the main menu in the AOT. First, you must associate the menu item with a
configuration key and a security key.
Open properties for the menu item, and change the ConfigurationKey property to LogisticsBasic. The SecurityKey property must match the position of the menu item on the main menu or navigation pane, so set SecurityKey to InventPeriodic. Because the wizard adds data to the system, you must also change the NeededAccessLevel property to Add. Finally, change the Label property of the menu item to @USR1 and the HelpText property to @USR2.
Now
you can add the menu item to the main menu. The main menu consists of
several submenus; you add the wizard menu item to the Inventory
Management submenu. In the AOT, expand Menus, right-click Invent, point
to New, and then click Menu Item. Right-click the new menu item, and
then select Properties. Make sure that MenuItemType is set to Display, and set MenuItemName to InventItemCreateWizard.
Then drag the menu item to the Periodic folder. Save the menu, and then
restart the Dynamics AX client to make the new menu item appear in the
navigation pane and the area page. When the menu item is saved in the
main menu, it is visible in the navigation pane and the area page, which
are different views of the main menu.
Tip
You could also add the menu item to the menu by simply dragging it from the Menu Items node and dropping it on the Invent node in the AOT. |
4. Creating a Default Data Wizard
Default data wizards are targeted especially for
creating base data in the system. An example is the Unit Creation
Wizard available from Basic\Setup\Units\Units\Functions\Unit Creation
Wizard. A default data wizard has one step more than a standard wizard.
In this additional step, you must choose from two types of default data
wizards:
If you select the first type of default data
wizard, a grid on the second tab allows the user to select the areas in
which to run the wizard. You typically use the second type of default
data wizard for complex wizards that will operate on only a few tables.
This kind of wizard is typically started from the main form for the
table for which it creates data, and not from the menu.
Note
Dynamics AX includes a sample default data wizard named TutorialDefaultData Wizard. |
