Modifying the list page in the previous example is
neat, but you might not want to do that on the actual list page.
Instead, you may want to create a custom list page that performs similar
functionality.
To create a custom list page, follow these steps:
1. | Create a new view for your list that only displays the main column (for example, Office).
|
2. | Create a new web part page in your SharePoint site using a template that has a left column.
|
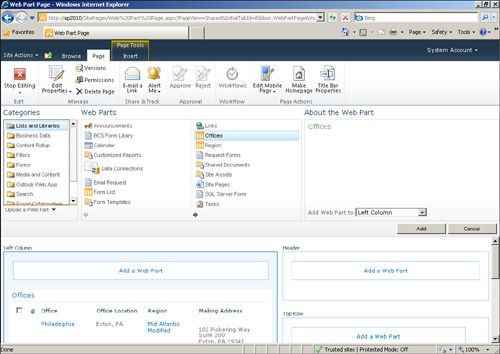
3. | Click Add Web Part in the left column zone and select the list from the Library and Lists category, as shown in Figure 1, to add the list web part onto the page. Click Add.
|
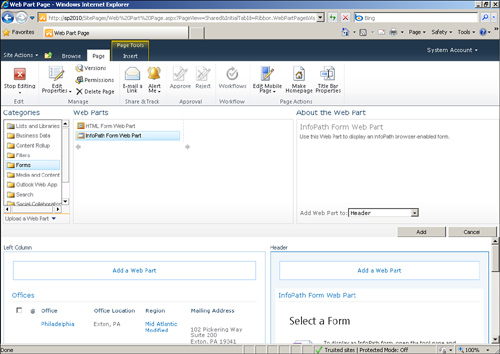
4. | Click Add Web Part in the right or header column zone and select InfoPath Form Web Part, as shown in Figure 2, to add the InfoPath Form web part onto the page. Click Add.
|
5. | Select Edit Web Part from the list web part item menu. The web part tool pane appears.
|
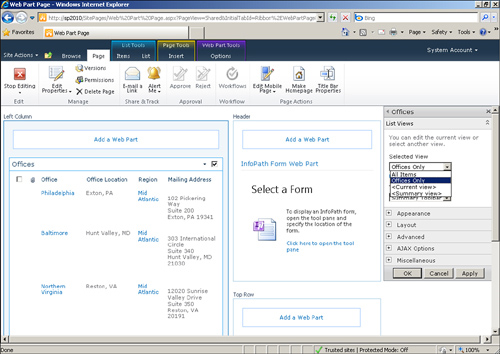
6. | In the web part tool pane, change the view to the main column view, as shown in Figure 3, such that only the main column is displayed in the list web part. Click OK.
|
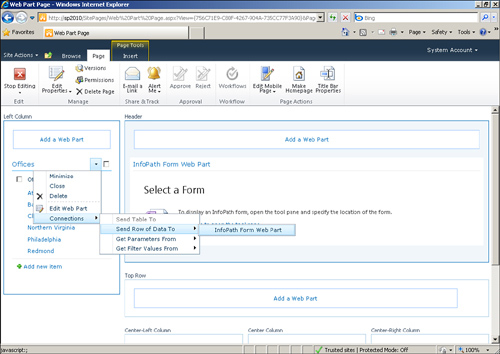
7. | From the list web part on the page, select Connections, Send Row of Data To, InfoPath Form Web Part, as shown in Figure 4, to create the connection between the two web parts.
|
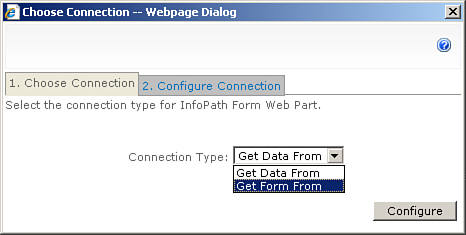
8. | In the Choose Connection dialog, select Get Form From, as shown in Figure 5. The InfoPath Form web part will receive the edit form from the list web part. Click Finish.
|
9. | Click Stop Editing on the Page ribbon bar.
|
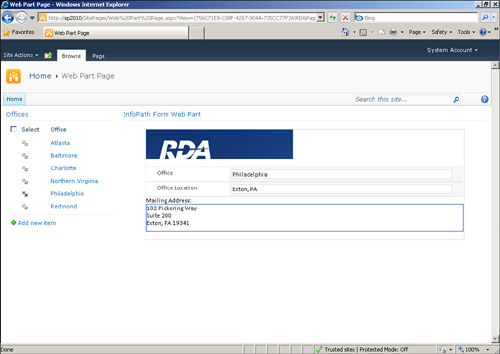
10. | Selecting an item from the list displays the list edit form in the InfoPath Form web part on the page, as shown in Figure 6.
|
Tip
Change
the Chrome to None on the InfoPath Form web part to hide the web part
title or change the title to something more meaningful (for example,
Office Details).