Expose Form Fields as Web Part Connection Parameters
There are many
opportunities to promote fields as parameters during publishing of the
form or creating a “send data to web part” rule action. However, at any
time, you may promote fields as web parameters using the form options:
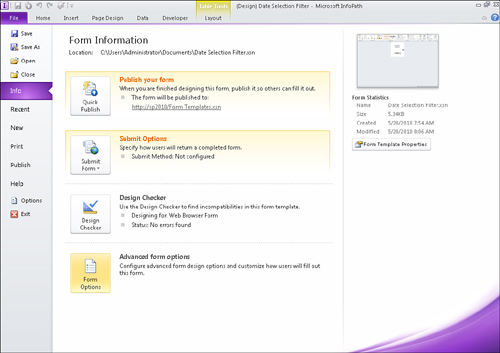
1. | From File, Info, click the Form Options button, as shown in Figure 1, to access the form settings.
| 2. | Select the Property Promotion category in the Form Options dialog.
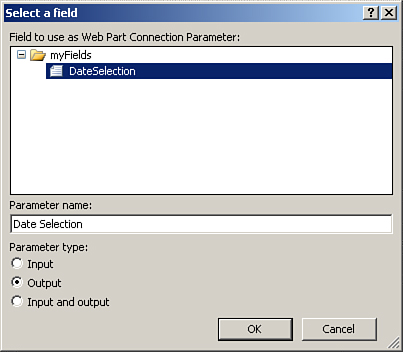
| 3. | Click Add in the bottom section and select a field from your form, as shown in Figure 2, to use the field as a web part parameter. Select the parameter type and click OK to create the web part parameter.
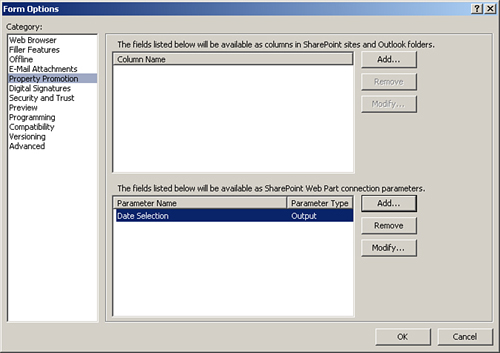
| 4. | All the fields listed in the box will be available for web part usage, as shown in Figure 3. Click OK to save the changes.
|
Create a Form to Send Data to Web Parts
With the InfoPath Form web part, you may create forms
that are used solely for input purposes and submit the entered data as
parameters to other web parts on the page. A simple example of this is
using a form to filter items displayed in a list.
First let’s create the form:
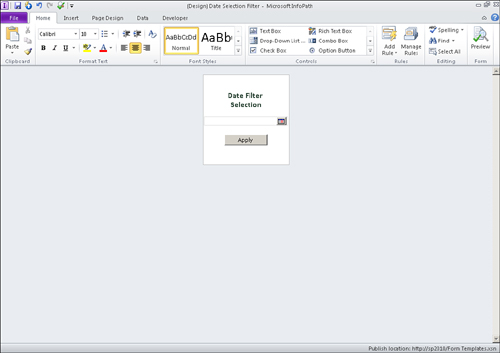
1. | Create
a new form with a date picker control and a button. Name the date field
DateSelection and change the button label to Apply. Because this is for
a web part, resize the form as shown in Figure 4.
| 2. | From File, Info, click the Form Options button.
| 3. | Select the Property Promotion category in the Form Options dialog.
| 4. | Click
Add in the bottom section and select the Date field from your form.
Select Output as the parameter type and click OK to create the web part
parameter.
| 5. | Click OK in the Form Options dialog.
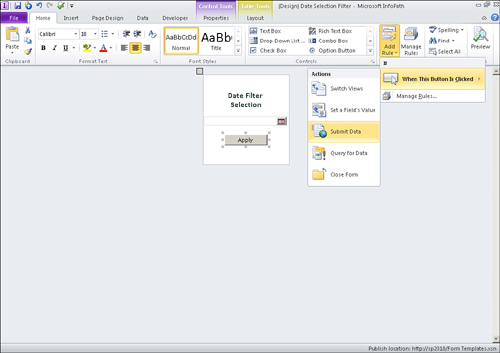
| 6. | Select the Apply button and on the ribbon bar select Add Rule, When This Button Is Clicked, Submit Data, as shown in Figure 5, to create a new button rule. The Rule Details dialog appears.
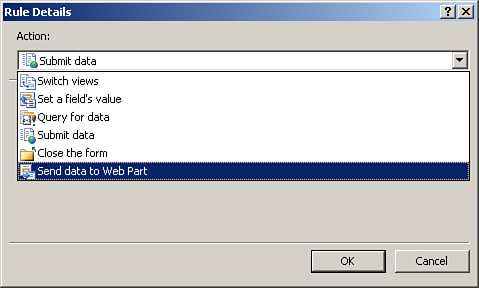
| 7. | In the Rule Details dialog, change the Action to Send Data to Web Part, as shown in Figure 6, such that the rule sends the parameters to a connected web part.
| 8. | Optionally,
click the Property Promotion button to ensure the Date Selection field
is being promoted as a SharePoint web part parameter.
| 9. | Click OK.
| 10. | Publish the form to a SharePoint library or as a content type. If using a content type, add it to an existing form library.
|
Now let’s create the page:
1. | Create a new web part page in your SharePoint site. Use a template that has a left column.
| 2. | Add an InfoPath Form web part to the Left Column zone and configure it to use the form you created in the previous steps.
| 3. | Add a List View web part to the Body zone of the page by selecting a form library.
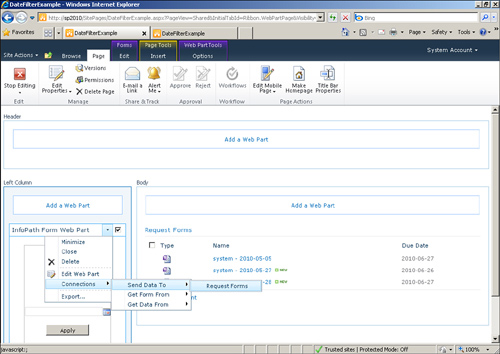
| 4. | From the InfoPath Form Web Part item menu, select Connections, Send Data To, List Name, as shown in Figure 7, to create a web part connection between the web parts. The Choose Connection dialog appears.
| 5. | We are using the connection as a filter, so in the Choose Connection dialog, click the Configure button.
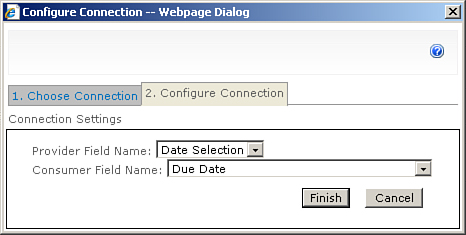
| 6. | Select the Date column from the list web part in the Consumer Field Name, as shown in Figure 8, to send the Date Selection as a filter to that field.
| 7. | Click Finish.
| 8. | On the Page ribbon bar, click the Stop Editing button.
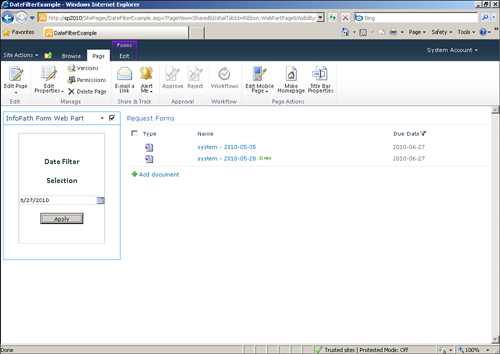
| 9. | Enter
a date into the form and click Apply. The list shows only (filters) the
items with a due date of the entered date, as shown in Figure 9.
|
|