Once you’ve got your Virtual Server environment set
up and ready, it’s time to actually create a virtual machine (VM). The
wizard will walk you through creating the virtual machine and let you
make some basic choices. You can then adjust them as appropriate for
your particular environment.
To create a basic Windows XP Virtual Machine, follow these steps:
1. | Log on to the Virtual Server Administration Website if you aren’t already logged on.
|
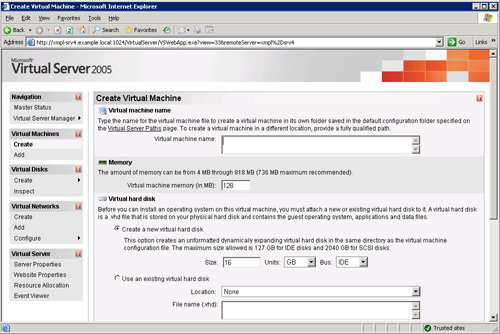
2. | Click Create in the Virtual Machines section of the leftmost frame to open the Create Virtual Machine page, shown in Figure 1.
|
3. | Enter
a name for the virtual machine. The name should be as descriptive as
possible, especially if you’ll be running several different but similar
virtual machines on the same host. The machine will be created in its
own subfolder of the default shared virtual machine folder you specified
previously. If you want this machine to be in a different location,
specify a fully qualified path name to the location for the machine.
|
4. | Enter the amount of RAM to make available to the virtual machine.
|
5. | Specify
the maximum size of the first hard disk for this virtual machine and
the type of virtual hard disk to create (IDE or SCSI). If you already
have a virtual hard disk you want to reuse, you can specify that instead
of a new hard drive.
|
6. | Specify the initial network adapter to connect to. You can add more network adapters later.
|
7. | Click
Create. the virtual machine will be created and added to the Master
Status panel of the Administration Website, and you’ll see the status
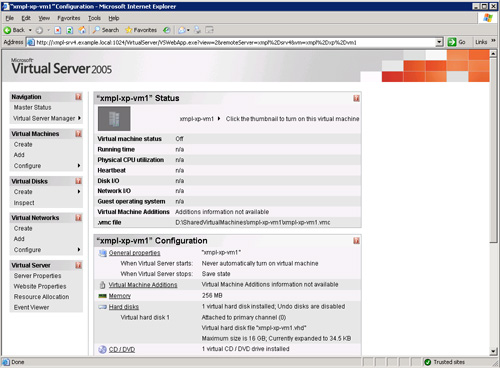
page for the virtual machine as shown in Figure 2.
|
Initial Configuration of a Virtual Machine
When you first create a virtual machine, you’ll see the status page for that machine as shown in Figure 2.
From here, you can start the virtual machine immediately or set
additional configuration details for the machine before starting it.
Some configuration details can be set only on virtual machines that are
shut down, so now is a good time to take care of those items. The
default settings are listed in Table 1.
Table 1. Default Virtual Machine Settings
| Property | Initial Default |
|---|
| General Properties | Don’t start automatically. |
| | Save state when the virtual machine stops. |
| Virtual Machine Additions | Not installed by default. |
| Memory | Depends on the guest operating system. |
| Hard Disks | 1 virtual IDE hard disk. |
| | Automatically expands to 16 GB maximum size. |
| CD/DVD | 1 virtual CD/DVD drive. Attached to the first physical CD/DVD drive in the host computer. |
| SCSI Adapters | None, unless you specified a SCSI virtual hard disk. |
| Network Adapters | 1 virtual network adapter, with a dynamic MAC address. |
| Scripts | Initially disabled. |
| Floppy Drive | 1 virtual floppy drive, but not connected to any device |
| COM Ports | 2 initial virtual COM ports. Not connected by default. |
| LPT Ports | 1 initial virtual LPT port. Not connected by default. |
|
Virtual
machines use a combination of the existing physical hardware on the
host machine and virtual hardware that is generated by Virtual Server.
The default hard disks are examples of virtual hardware—they are created
on the host’s hard disks as a simple file, but they appear to the
virtual machine as a hard disk, with partitions, files, and folders on
it. Using the physical devices of the host computer, however, requires
that the device first be “captured” by the virtual machine. Once a
device is captured by a virtual machine, it isn’t available for any
other virtual machine until it is released from the first virtual
machine.
Captures can be
changed while a virtual machine is running, but you can’t add or remove
devices. So you can capture the physical CD/DVD drive, for example,
while the virtual machine is running, or change to capture an .ISO file,
without having to stop and start the virtual machine. When a physical
CD/DVD drive is captured, you can insert or remove CDs and DVDs and they
will behave as you would expect on the virtual machine where the drive
is captured.
Devices that can be captured include a CD/DVD drive, a floppy drive, COM ports, and LPT ports.
|
Configuring CD/DVD
The default configuration
for a virtual machine has a single CD/DVD drive attached to the master
position on the second virtual IDE channel. This virtual CD/DVD drive is
set to capture the first physical CD/DVD drive on the host machine. You
can change this to capture a different physical CD/DVD if you have more
than one CD/DVD drive on the host computer, or you can capture a CD or
DVD image
file. An image file, usually with the extension of .ISO, is an actual
image of what the CD or DVD contains. It can be captured and used by
Virtual Server just as if it were a physical CD or DVD drive. This is
extremely useful for rapid access to operating system CDs, for example,
where you have multiple VMs running different operating systems on the
same host. You don’t need to have physical access to the host computer
to swap out CDs; just capture the appropriate .ISO file for the
operating system used by that virtual machine.
To configure a Virtual CD/DVD Drive, perform the following steps:
1. | Log on to the Virtual Server Administration Website if you aren’t already logged on.
|
2. | Click Master Status in the Navigation section of the leftmost frame.
|
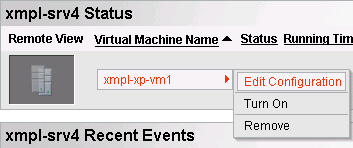
3. | Highlight the virtual machine you want to configure the CD/DVD drive for, and select Edit Configuration, as shown in Figure 3.
|
4. | The
status page for the virtual machine will open. Click CD/DVD in the
configuration section to open the CD/DVD Properties page for the virtual
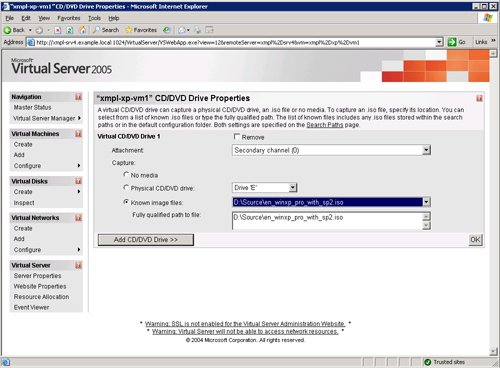
machine, as shown in Figure 4.
|
5. | Select
No Media to release any existing captures. Select Physical CD/DVD
Drive, and specify which physical drive to capture. Or select Known
Image Files to specify the path to an .ISO file to capture.
|
6. | If
you’re capturing an .ISO image and it is on your search path,
you can select it from the drop-down list under Known image files, or
you can enter the exact, fully qualified path name for the .ISO file you
want to capture.
|
7. | Click OK to capture the file.
|
Starting the Virtual Machine for the First Time
OK, you’ve got
everything configured and ready to go, and you really want to create
that first virtual machine. There are two ways to start the machine and
install the operating system:
- Click the image of the virtual machine in the Master Status window.
- Connect directly to it with the Virtual Machine Remote Control (VMRC) client.
Personally, we like the
second option that allows us to do it directly from our main desktop,
but there are significant security implications if you’re not certain of
who might be listening to your network. Definitely don’t use that
method over a wireless connection from a remote machine, for example.
The more usual method is to open the Virtual Server Administration
Website and click the image of the target virtual machine. This will
start the virtual machine and leave it as a thumbnail on the Master
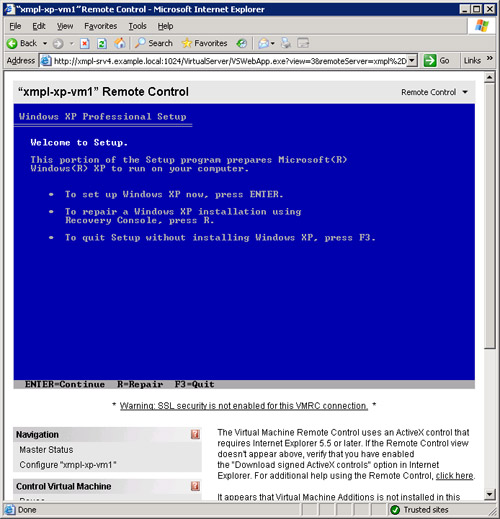
Status page. Choose Remote Control from the action menu to open the
remote control page for a particular virtual machine—you’ll see your
virtual machine running directly in the Web page, as shown in Figure 5.
Note
The first time you
launch this remote control page, you’ll be prompted to install the
necessary ActiveX control in Internet Explorer. And some good news for
x64 Edition users—there are both 64-bit and 32-bit ActiveX controls, so
either version of Internet Explorer will work just fine.
To connect to a Virtual Machine with VMRC, follow these steps:
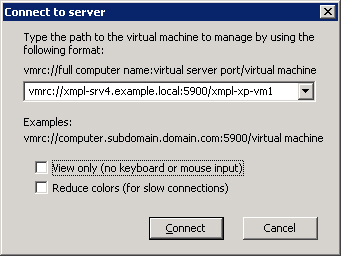
1. | Open the VMRC from the Start, All Programs, Microsoft Virtual Server menu to open the VMRC as shown in Figure 6.
|
2. | Enter
the information for the virtual machine to connect to. You need to use
the fully qualified host name, the port number (5900 by default) and the
virtual machine name, as shown in Figure 6—for example: vmrc://xmpl-srv4.example.local:5900/xmpl-xp-vm1.
|
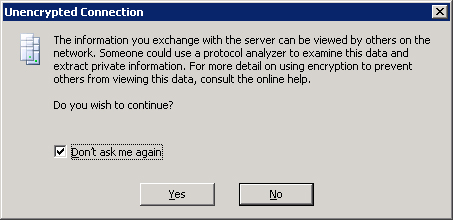
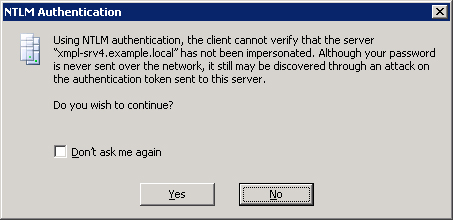
3. | You’ll be warned about the security implications with two separate messages, as shown in Figure 7, and Figure 8. Click Yes in each message box to proceed.
|
4. | Finally,
you’ll be prompted for credentials to connect to the remote host
machine. Enter your credentials, and click OK to open the VMRC and
connect to the virtual machine.
|
Installing an Operating System
Once your virtual
machine starts, it behaves exactly like any other physical machine. You
will see the standard power-on self test (POST) messages from the BIOS,
the enumeration of your hard drives—including any SCSI devices—and the
machine will boot from the available media. Follow the standard
operating system installation instructions for your guest operating
system.
Note
To configure the
BIOS settings on your virtual machine, including the boot priority,
press the Delete key as soon as the virtual machine starts to open the
AMI BIOS for the virtual machine. The default boot priority is Floppy,
CD/DVD drive, PXE, and then the first hard drive.
Installing SCSI Shunt Driver
If you’re installing
Windows Server 2003, Windows XP Professional, or Windows 2000 and you
want to use a virtual SCSI hard disk, it can be installed without extra
drivers, but it will be faster with the Virtual Machine SCSI Shunt
drivers installed. To load these during the setup process, use the
standard Windows technique of pressing the F6 key when the first blue
installation screen is displayed. When prompted to specify additional
drivers, go to the configuration screen for the VM, click Floppy drive,
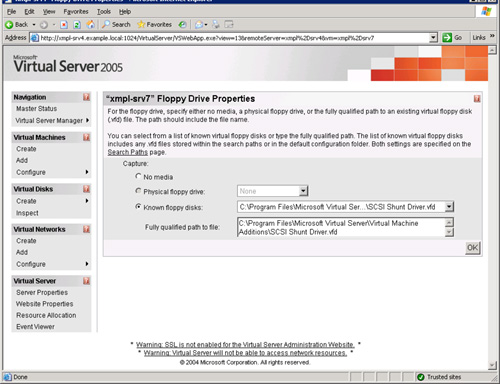
and select Known Floppy Disks, and then select the SCSI Shunt Driver
from the drop-down list, as shown in Figure 9. Click OK to capture the floppy image.
