The installation procedure of the BizTalk Adapter
Pack 2010 is not complicated, but as with everything BizTalk, requires
accuracy and some patience. The very first thing to do is make sure your
system meets the prerequisite requirements. You have to have the
following components installed on your computer:
Windows XP SP2, Windows Server 2003, Windows Server 2008, Windows Vista, or Windows 7
Visual Studio 2010 for development purposes
BizTalk
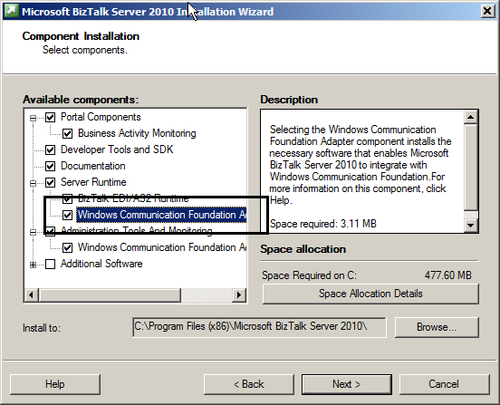
Server 2010 with Windows Communication Foundation Adapter. The WCF
adapter is not installed by default; you have to explicitly enable it
upon installing BizTalk Server 2010.

Once you've completed the
verification, you can proceed with the installation, which essentially
is a sequence of the following steps:
Installing WCF LOB Adapter SDK.
Installing BizTalk Adapter Pack 2010.
Installing
additional client libraries to enable communication between adapters
and their target LOB systems. The only adapter that doesn't require any
additional components is the SQL adapter.
From the steps above,
installation of the additional client libraries is the most time
consuming and error prone process.
Even though installing the WCF
LOB Adapter SDK and BizTalk Adapter Pack are straightforward procedures,
there is a pitfall in a 64-bit environment. If your computer is running
under a 32-bit operating system, you have to install only 32-bit
versions of the WCF LOB Adapter SDK and BizTalk Adapter Pack. In a
64-bit environment, the picture is a bit more complicated. First you
have to install 64-bit version of the WCF LOB Adapter SDK and 64-bit
version of the BizTalk Adapter Pack 2010. Then, if you are using design
time tools like Visual Studio and BizTalk Admin Console or 32-bit
BizTalk host instances at the runtime, you will have to install 32-bit
version of the BizTalk Adapter pack and the client libraries. This
probably sounds counterintuitive, but if you take into account that
Visual Studio and BizTalk Admin Console are 32-bit applications and
therefore can interact only with 32-bit components, such requirement
becomes clear. So, don't be surprised if the BizTalk setup program run
in a 64-bit environment offers you to install both 32 and 64-bit
versions of the BizTalk Adapter pack 2010. Now that we are familiar with
the requirements, we can begin the installation of the ASDK Adapters.
Installing the WCF LOB Adapter SDK
The first step is to lay the foundation, that is install the WCF LOB Adapter SDK.
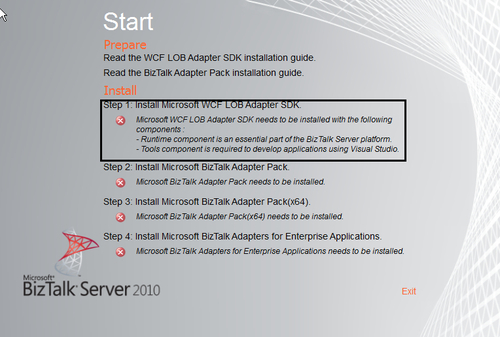
From the \Setup\BT Setup folder of the BizTalk installation DVD or ISO, launch setup.exe, then select Install Microsoft BizTalk Adapters.
Select Step 1: Install Microsoft WCF LOB Adapter SDK. Note that setup automatically installs the correct version; you don't have to explicitly choose between 32 and 64-bit.

On the Welcome screen, click the Next button.
Accept the license terms and click Next.
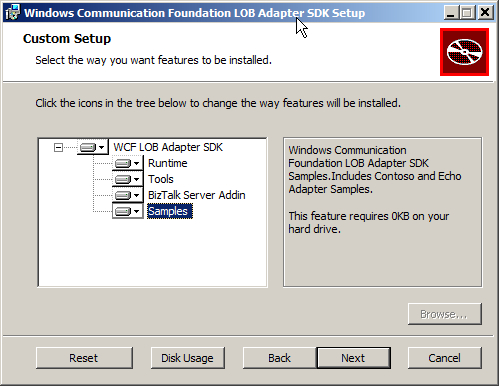
On the Installation Type screen, click the Custom button. The Custom Setup screen will show up.
You
always have to install the runtime components, despite whether you are
planning to use the UI tools or not. If you are installing on the
computer where you are planning to use the UI design-time components,
such as Add Adapter Service Reference plug-in for Visual Studio, and BizTalk Server Add-in for BizTalk Administration Console, you have to enable the installation of the Tools, and the BizTalk Server Add-in components.

Click Next, then click Install to start installation.
When the installation completes, click the Finish button to close the WCF LOB Adapter SDK setup and return to the main adapter setup window.
Installing the BizTalk Adapter Pack 2010
We will now install the
BizTalk Adapter Pack 2010. Note, that if you are in a 64-bit
environment, the setup offers to install both 32 and 64-bit versions of
the BizTalk Adapter Pack 2010.

Here is the process to follow:
In the main adapter setup window, click the link to install the relevant version of the BizTalk Adapter Pack.
On the Welcome screen, click Next.
Accept the license terms and click Next.
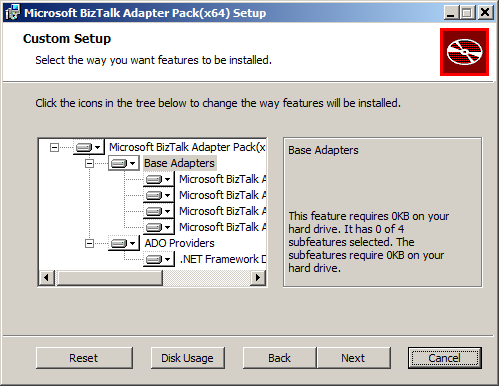
On the Choose Setup Type screen, click the Custom button.
On the Custom Setup screen, select the adapters you want to use and click Next.

Click Install to begin installation.
When the installation completes, click Finish to finalize the procedure and close the setup window.
To complete the
installation of the BizTalk Adapter Pack 2010, you have to install
additional client components for all adapters except SQL. If you are planning to use the SQL adapter only, no further
steps are required and at this point, you have everything you need for
using and developing with the SQL adapter.