1. Perform a Windows Server 2008 R2 Full Installation
In this section, you will
take a step-by-step look at the installation process for a Windows
Server 2008 R2 full installation. We'll cover the key decisions you need
to be aware of as you install the operating system.
Insert the DVD media into the drive, and reboot the system. Upon reboot, you will see the screen shown in Figure 1.

Select your chosen language, time/currency, and keyboard method, and then click Next. You will see the screen shown in Figure 2.
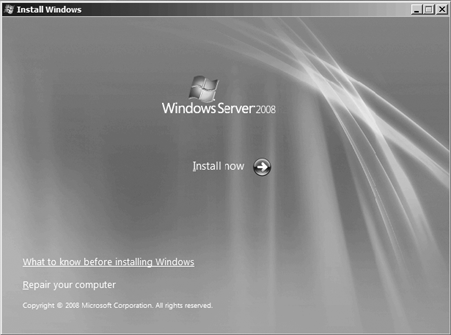
This screen provides
the option to install Windows Server 2008 R2 by clicking the Install
Now button. There are also two other options to notice. The What To Know
Before Installing Windows option provides some last-minute help
documentation. The Repair Your Computer option takes you to the repair
and diagnostics functions of Windows Server 2008 R2. To continue the
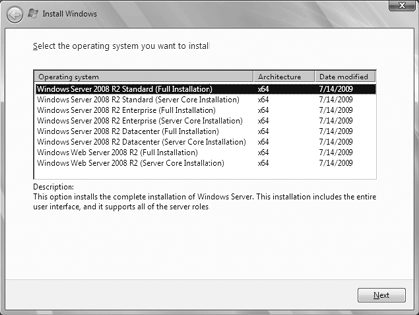
installation, click the Install Now button. The next window you see (Figure 3)
provides you with the choice to install your edition of Windows Server
2008 R2. You can choose to install the full edition of Windows Server
2008 R2 or the Server Core version. Select your version, and click Next.
|
If you choose Server Core, you
will not be able to upgrade to a full version directly without
performing a full reinstall of the server. You will, however, have the
ability to use migration tools to migrate the server's functions to a
full installation of Windows Server 2008 R2.
|
|
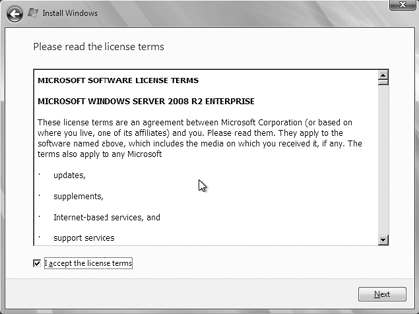
Clicking the Next button will take you to the license agreement screen. This screen, shown in Figure 4,
allows you to read, print, and agree to the license terms. Select the
check box on the bottom left of the dialog box to agree to the license
terms, and click Next to continue.
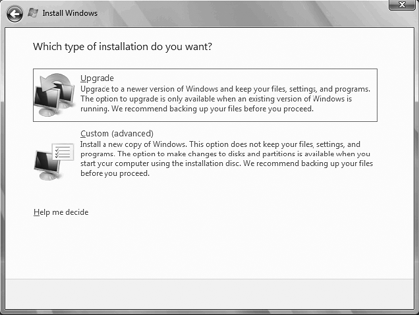
The screen shown in Figure 5
provides you with the choice between performing an upgrade or custom
installation of Windows Server 2008 R2. To perform a new installation,
click Custom, and you will be taken to the next step.
The next screen, displayed in Figure 6,
allows you to choose the location for your Windows Server 2008 R2
installation. This screen also allows you to load drivers for your SCSI
hard drives. If
you are installing on a hard drive connected to a SCSI controller,
select Load Driver, and insert the media with the drivers on it. You
also have a full set of drive partitioning and formatting options. When
you click the drive on which you want to install Windows Server 2008 R2,
you are presented with the options to create new partitions or delete,
format, or extend existing partitions, as shown in Figure 1.6.
Choose the appropriate option, and click Next. If you do not select a
partition and the only option you have is unallocated space, then the
Windows Server 2008 R2 installation will create a partition on that
drive by taking all the unallocated space and formatting it for you
automatically with NTFS. Windows Server 2008 R2 will also automatically
make a system partition of 200MB in size during this step. The 200MB
partition is not assigned a drive and will not be visible in the OS. The
partition holds the Windows boot files for the Windows recovery
environment (winRE).

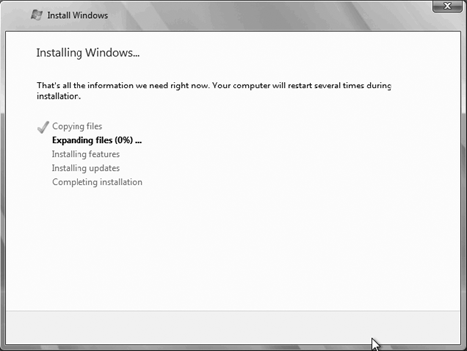
When you select your partition, the installation will begin, and you will see a screen similar to Figure 7. The system may also reboot several times during this phase of installation.
After the final system reboot, you will be asked to configure the administrator's password, and you will see screen similar to Figure 8.

After you click OK, you will see a screen similar to Figure 9.
Now you will set your administrator password. The password needs to be
complex. This means the initial password needs to meet the following
requirements: Cannot contain the user's account name or parts of the user's full name that exceed two consecutive characters Be at least six characters in length Contain characters from three of the following four categories: English uppercase characters (A through Z) English lowercase characters (a through z) Base 10 digits (0 through 9) Nonalphabetic characters (for example !, $, #, or %)
There
is also an option for you to create a password reset disk. By clicking
this option, you can create a recovery disk, which allows you to create a
new password for the user ID. You have to create this disk only once,
no matter how many times the password for the account changes.

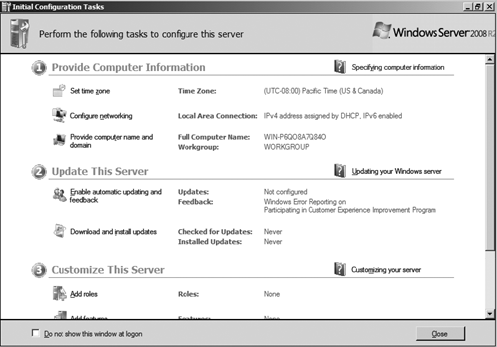
After you have set
the password, the Windows Server 2008 R2 installation will complete, and
you will see a screen with the initial configuration tasks, as shown in
Figure 10.
Click the link Create A Password Recovery Disk. This will start the Forgotten Password Wizard. Read the welcome screen, and click Next. Select the drive for the password recovery disk, and click Next. Type
in the password for the existing user. If one exists during install,
chances are you will leave this field blank and click Next. You will briefly see a progress screen. When the progress reaches 100 percent, click Next. Read the summary screen, and click Finish.
|
|
Although I hope you should
never need the password recovery disk, it is nice to have in case of an
emergency. However, it is also very important to keep the disk in a safe
and secure location. It is important because anyone who can access the
disk can use it to recover the password and therefore gain access to the
account.
|
|
|
