4. Install Windows Server 2008 R2 Server Unattended
You can also perform an
unattended installation of Windows Server 2008 R2. This provides a
useful method to rapidly deploy new servers in your environment.
Unattended installs are completed by creating an answer file. The answer
file is the file containing the main configurations for the Windows
Server 2008 R2 installation. Settings can include application
configuration, such as configuring the home page in Internet Explorer
and controlling the desktop look-and-feel settings. To create an answer
file, you first need to install the Windows Automated Installation Kit
(WAIK).
4.1. Install the WAIK
The WAIK is a flexibility
utility tool that allows you to customize your Windows 7 and Windows
Server 2008 R2 installs. You can also create the necessary files to
assist with configuration and deployments. To run the WAIK, you need to
be running either Windows Server 2003 SP1, Windows Vista SP1, Windows
Server 2008, Windows 7, or Windows Server 2008 R2.
Burn the .iso file to a DVD.
Insert the DVD to install the WAIK tools; you should see Figure 1.16.
Click Windows AIK Setup to begin the installation.
Click Next on the welcome screen.
Click Next after you accept the license agreement.

Pick a drive and directory to install the tools to. The tools require about 1.2GB of drive space. Then click Next.
Click Next to begin to the installation, and click Close on the final screen.
4.2. Create an Answer File
After you have installed
the WAIK tools, then your next step is to create an answer file. The
file contains configuration settings for Windows and provides the
settings to your preferred desktop. To create an answer file, you will
use the Windows System Image Manager (SIM). Before you create an answer
file, you will need to the load the install.wim
file from the Windows Server 2008 R2 DVD. The file is located in the
sources directory. Copy the file to a local directory, for example c:\source.
Start Windows SIM by selecting Start => All Programs => Microsoft Windows AIK. Then click Windows System Image Manager.
In Windows SIM, select File => Select Windows Image, and navigate to the directory you copied the install.wim file to.
After you select the install.wim file you used in step 2, you will be presented with Figure 17, where you will choose the edition of Windows Server 2008 R2 for which you are creating the answer file.

After you select the edition, you will be asked to create a catalog file; click Yes. This process can take several minutes.
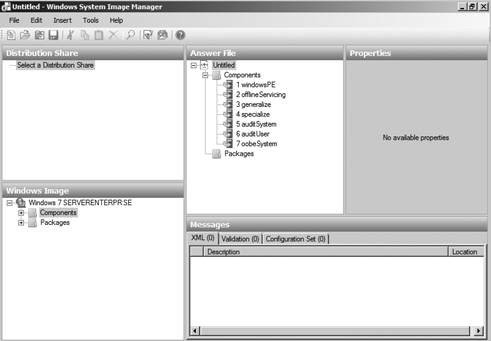
Choose File => Create An Answer File, and your screen will look similar to Figure 18.
You
will then need to add and configure the many settings that fit your
needs. For more information on configuring the settings, see the help
file that comes with WAIK tool set (waik.chm).
When you are done modifying settings in the answer file, you need to save the file. Select File =>
Save Answer File. During the save process, the SIM tool will start a
validation process. The validation tool will ensure your answer file is
correctly formatted and the settings are configured. Before you save,
you can also validate the file by selecting Tools => Validate Answer File.
Save the answer file with the name Autounattend.xml.
4.3. Install Windows Server 2008 R2 Unattended
After you have an answer file,
then it is time to install Windows. The previous process is good for
single-server deployments. However, the WAIK tools also provide
resources for many deployment methods. The WAIK tool set provides many
tools to quickly deploy multiple servers via a variety of sources. You
will learn the DVD method to deploy Windows Server 2008 R2 unattended.
Copy your answer file (Autounattend.xml) to a disc or USB flash drive (UFD).
Insert your UFD and your Windows Server 2008 R2 DVD into the server you want to install.
The Windows Server 2008 R2 setup program automatically checks the removable media for a file called Autounattend.xml.
After the installation is complete, make sure your settings were properly installed.
Lastly, you need to reseal the system by running this command:
c:\windows\system32\sysprep\sysprep.exe /oobe /generalize /shutdown
Resealing the system will
remove hardware-specific and unique system information. This is required
if you plan to redeploy the image and properly ready the system for
users.
