Configuring
Active Directory Sites and Services
As previously stated, in
order for Exchange Server 2010 to successfully deliver mail, it relies
heavily on Active Directory Sites and Services to determine what site
particular servers belong to.
After the AD domain
controller has been installed, it is necessary to configure Sites and
Services to support the future Exchange Server deployment. In our
example, we are going to configure two sites for a future installation
of Exchange servers in two locations. We will cover how to rename the
default first site, and how to create the second site from scratch.
Changing Site
Properties
To change the AD Default-First-Site-Name,
follow these steps:
1. | On the domain controller, select Start\Administrative
Tools\Active Directory Sites and Services.
|
2. | Click the plus sign (+) to expand the Sites tree.
|
3. | Right-click Default-First-Site-Name in the left pane of
the console, and then click Rename.
|
4. | Enter a name, and then press Enter, which changes the
default site name to your custom site name. In our sample lab, we will
choose FredericksburgVA.
|
Creating a New
Active Directory Site
To create a new site in AD, follow these steps:
1. | On the domain controller, open AD Sites and Services.
|
2. | Click the plus sign (+) to expand the Sites tree.
|
3. | Right-click Sites in the left pane of the console, and
then click New and Site.
|
4. | Enter the new site name in the New Object-Site dialog
box. In this example, SunnyvaleCA was used for the new site name.
|
5. | Click to highlight DEFAULTIPSITELINK, and then click
OK.
|
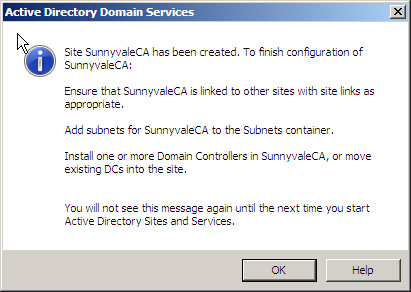
6. | Review the
Active Directory Domain Services message box (shown in Figure 4)
and ensure the configuration was successful, and then click OK.
|
In AD, sites are
associated with their respective subnets to allow for the intelligent
assignment of users to their respective domain controllers.
To create a new
subnet and associate it with a site, follow these steps:
1. | Open AD Sites and Services.
|
2. | Click the plus sign (+) to expand the Sites tree.
|
3. | Right-click Subnets and choose New and Subnet.
|
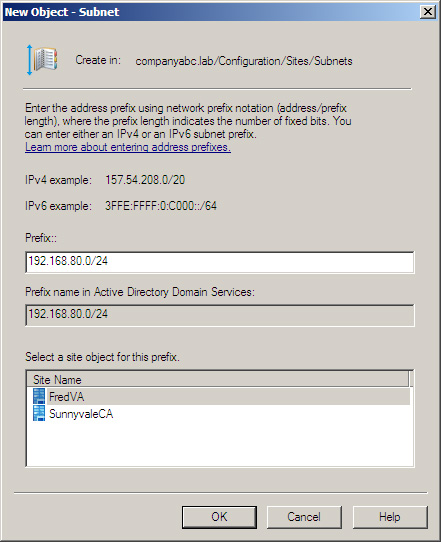
4. | Enter the address prefix
using network prefix notation. This requires the address and the prefix
length, where the prefix length shows the number of fixed bits in the
subnet. The example shown in Figure 5 uses the
192.168.80.0/24 subnet, providing us with a Class C (255.255.255.0)
subnet. Next, select a site to associate with the subnet and click OK.
|
Perform the same steps
to create a second subnet and associate it with the second site.
Configuring a
Global Catalog Server
By default, the first
domain controller in a domain is automatically configured as a global
catalog server. Any additional domain controllers need to be configured
manually.
To configure or
verify that a domain controller is a global catalog server, follow these
steps:
1. | Open AD Sites and Services.
|
2. | Click the plus sign (+) to expand the Sites tree.
|
3. | Expand the desired site name, the Servers folder, and
then the server object.
|
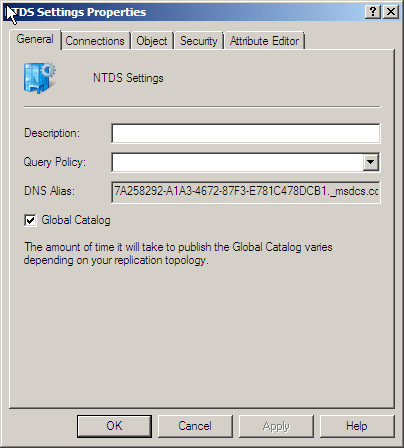
4. | Right-click the NTDS Settings object, and then
click Properties.
|
5. | On the
General Tab, ensure the Global Catalog check box is marked if you want
the server to be a global catalog server (as illustrated in Figure 6).
When ready, click OK.
|
