Many small to mid-sized companies usually struggle to
take advantage of the right Business Intelligence due to lack of
resources, proper tools, and systems that are often too expensive and
complicated to deploy and maintain. With powerful inherent BI
capabilities, robust cross-product integration, and advanced technology
improvements Dynamics NAV 2009 provides a single-point and comprehensive
business management solution with broad Business Intelligence options,
which are easy to deploy, flexible to personalize and customize, and
easy to maintain.
Inherent BI capabilities in NAV
Inherent BI capabilities in NAV
include standard reports that take advantage of strong SQL reporting
services, flexible views of data that allow various options for
filtering, flexible search, flexible data view options for different
people, and easy-to-use ad hoc reporting tools and charts. Record links
tie together structured and unstructured information, and transactional
insight can help people find documents related to specific
transactions—for example, a scanned copy of a customer PO can
be attached as a link to the sales order. Built-in features such as
drilldowns, lookups, and flow fields among others allow real-time data
in pages and provide options to navigate into details of transactions,
customer and supplier records, histories, and more. The use of
dimensions allows us to define and assign characteristics to the
information in our daily work such as product groups, market segments,
geographic regions, and time period. We can define hierarchies that
reflect reporting, analysis, and accounting needs.
Business insight through the Role Center
The Role Center serves as a
pivotal area for our role and provides an important insight to our
business through various parts personalized according to our function in
the company.
Activities section
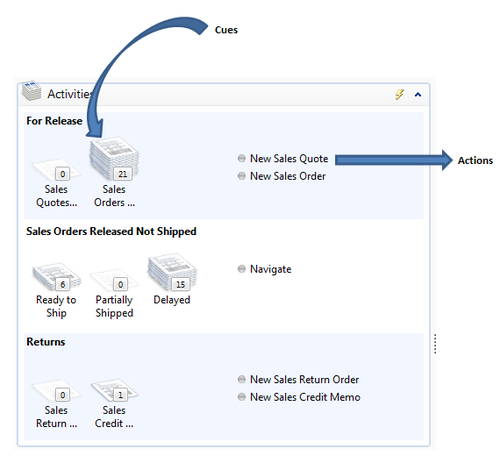
The Activities section consists
of Cues and Action items specific to the user's profile. The Cues
provide a pictorial representation of an activity or task such as the
number of sales orders, and the Actions provide links to triggers for
particular actions such as creating orders or quotes.
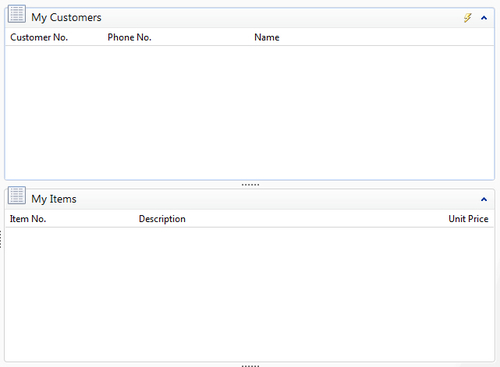
My Customers/Items/Vendors
The My Customers section provides quick links to our top customer pages and high-level details such as Customer No., Phone No., and so on. This applies to the My Vendors and My Items sections as well.
My Notifications
The My Notifications
section provides a space for instant notifications between peers and
colleagues. We can also attach links to actual items and other entities
in our communication.
With the ability to add
external objects in the NAV RoleTailored client, the users can create
visual objects, KPIs, graphs, and other Business Intelligence objects
and add them in different sections of pages.
Graphical charts and ad hoc analysis
NAV 2009 introduced a
feature to create ad hoc charts in list pages. The user can create a
two-or three-dimensional chart in any page, which displays the data
relevant for the user in a graphical representation.
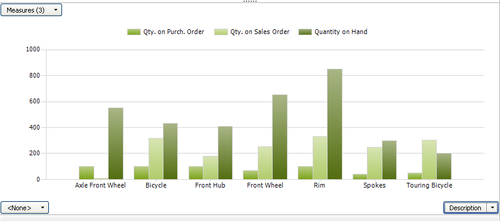
Let's see an example of creating a chart to analyze the status of inventory in terms of demand and supply:
1.
From the Role Center, open the Items page. The page lists all the items
in the system. To make the data relevant, let's apply some filters on
this list. We can use the expand option to see the full list of filters.

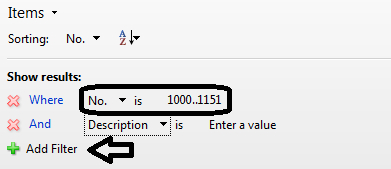
2. Select the No. range using the No. filter. We can use the Add Filter function if we need to add multiple filters to view the data.

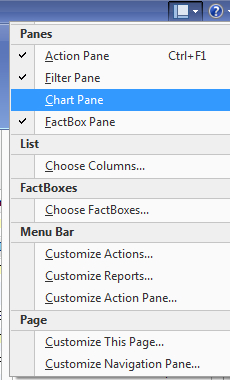
3. From the Customize page option on the top-right corner, select the Chart Pane option.
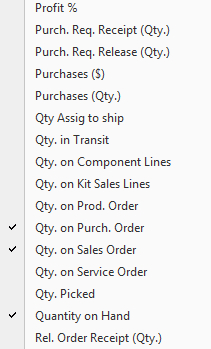
4. This should bring up a blank chart at the bottom. The first step is to select Measures
from the top-left corner of the chart. You can select as many measures
as you want at the same time. For this example, we will select three
measures: Qty. on Sales Orders, Qty. on Purchase Orders, and Qty. on Hand.
5. Select the Description dimension from the bottom-right corner of the chart. Once selected, the analysis should be like the following screenshot:
Creating charts for the Role Center home page
Another type of charts are
the ones that are available in the Role Center for users to get quick
analysis. The charts are predefined in the system and can be visible
using the customize option in the Role Center.
In this section, we will see how to create custom charts and make them available on the home page:
1.
To create a chart, open a text editor such as Notepad to write the XML
code for the chart. In this example, we will design a chart for the
number of customers per posting group.
2. Add the following XML code:
<?xml version="1.0" encoding="utf-8" ?>
<ChartDefinition xmlns:xsi=http://www.w3.org/2001/XMLSchema-instance xmlns:xsd="http://www.w3.org/2001/XMLSchema">
<Title>
<Text ID="ENU">Customers per CustomerPosting Group</Text>
<Text ID="ENU">Customers per CustomerPosting Group</Text>
</Title>
<Table ID="18">
<Filters>
<Filter>
<Field Name="No."/>
<Value/>
</Filter>
</Filters>
</Table>
<XAxis ShowTitle="false">
<Title/>
<Field Name="Customer Posting Group"/>
<Caption/>
</XAxis>
<YAxis>
<Title/>
<Measures>
<Measure Operator="Count">
<Caption>
<Text ID="ENU">Count</Text>
<Text ID="ENU">Count</Text>
</Caption>
</Measure>
</Measures>
</YAxis>
</ChartDefinition>
3. Save the chart as a<Name>.xml file—for example Test.XML.
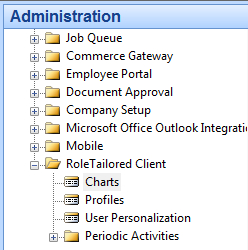
4. Once the chart is saved as an XML file, it has to be added to NAV. Open the Classic client and point to Charts under Administration | Application Setup | RoleTailored Client.
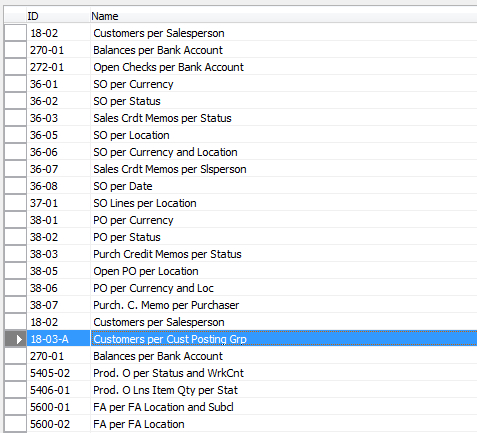
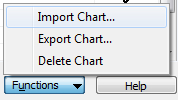
5. On the right-hand side, we can see the menu of charts available in the system:
6. Select Functions| Import Chart….
7.
Point to the chart we just created in the earlier step. Once the chart
is imported, start the RoleTailored client and customize page to add the
newly added chart. The chart we just added should look like the
following:
