With Microsoft Office Picture Manager, you can
manage, edit, and share your pictures. You can view all the pictures on
your computer and specify which file type you want to open with Picture
Manager. If you need to edit a picture, you can use Picture Manager to
change brightness, contrast, and color, and to remove red eye. You can
also crop, rotate and flip, resize, and compress a picture.
Open Picture Manager and Locate Pictures
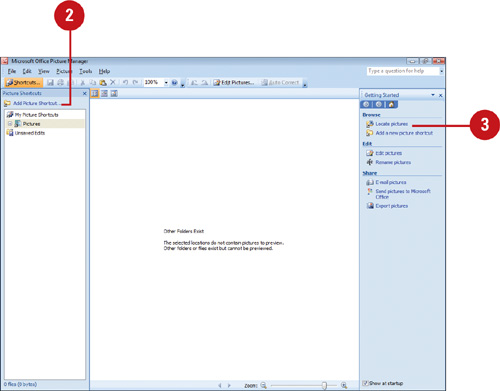
 Click the Start button, point to All Programs, click Microsoft Office, click Microsoft Office Tools, and then click Microsoft Office Picture Manager. Click the Start button, point to All Programs, click Microsoft Office, click Microsoft Office Tools, and then click Microsoft Office Picture Manager.
The first time you start the program, it asks you to select the file
types you want to open with Picture Manager. Select the check boxes with
the formats you want, and then click OK.
 If necessary, click Add Picture Shortcut. If necessary, click Add Picture Shortcut.
 Click Locate Pictures. Click Locate Pictures.
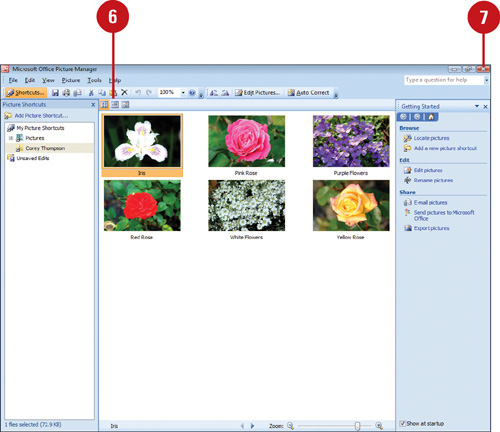
  Click the Look in list arrow, and then click a drive location. Click the Look in list arrow, and then click a drive location.
 Click OK. Click OK.
 Use the View buttons to view your pictures. Use the View buttons to view your pictures.
 When you’re done, click the Close button. When you’re done, click the Close button.

You can export a folder of files with a new format or size.
In Picture Manager, click the File menu, click Export, specify the
folder with the pictures you want to change, select an export file
format or select a size, and then click OK.
Edit Pictures
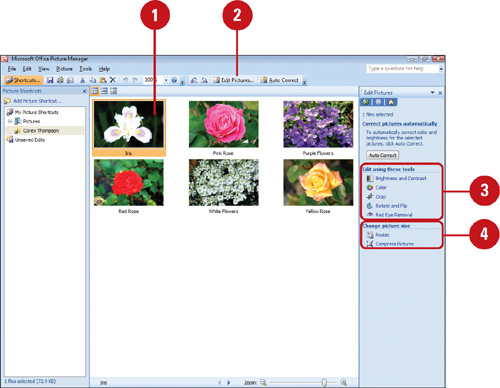
 In Picture Manager, select the picture you want to edit. In Picture Manager, select the picture you want to edit.
 Click the Edit Pictures button on the Standard toolbar. Click the Edit Pictures button on the Standard toolbar.
 Use the editing tools on the Edit Pictures task pane to modify the picture. Use the editing tools on the Edit Pictures task pane to modify the picture.
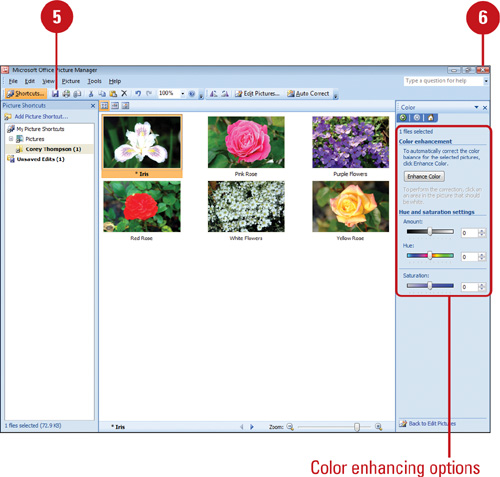
Brightness and Contrast Color Crop Rotate and Flip Red Eye Removal
 Use the sizing tools on the Edit Pictures task pane to change the picture size. Use the sizing tools on the Edit Pictures task pane to change the picture size.
  Click the Save button on the Standard toolbar. Click the Save button on the Standard toolbar.
 When you’re done, click the Close button. When you’re done, click the Close button.

You can discard changes to a picture.
If you don’t like the changes you make to a picture, click the Edit
menu, and then click Discard Changes to restore the picture.
|