Microsoft Clip Organizer is a program that comes with
all Office Programs that allows you to add and organize clips and other
media for use in Office documents using the Clip Art task pane. The
clips that come with Office are already organized, but if you’ve added
clips without organizing them, it’s probably hard to find what you need
in a hurry. To help you quickly locate a clip, you can place it in one
or more categories. You can also assign one or more keywords to a clip
and modify the description of a clip. When you add media files, Clip
Organizer automatically creates new sub-collections under My
Collections. These files are named after the corresponding folders on
your hard disk. To help you find clips later on, Clip Organizer also
creates search keywords based on the file’s extension and folder name.
If you no longer need a picture in the Clip Organizer, you can remove
it, which also saves space on your computer.
Add and Categorize Clips
 Click the Start button, point to All Programs, click Microsoft Office, click Microsoft Office 2010 Tools, and then click Microsoft Clip Organizer. Click the Start button, point to All Programs, click Microsoft Office, click Microsoft Office 2010 Tools, and then click Microsoft Clip Organizer.
 In Clip Organizer, click the File menu, point to Add Clips to Organizer, and then click On My Own. In Clip Organizer, click the File menu, point to Add Clips to Organizer, and then click On My Own.
 Locate the folder that contains the clip you want to add, and then select the clip. Locate the folder that contains the clip you want to add, and then select the clip.
 Click the Add To button. Click the Add To button.
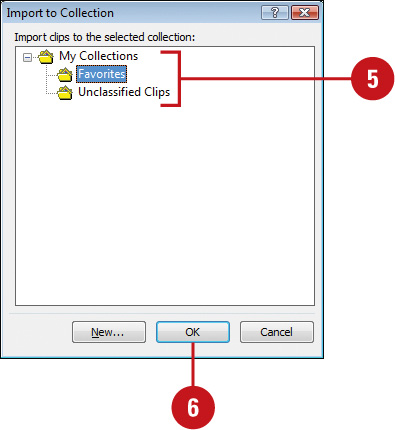
 Click the collection to which you want to add the clip, or click New to create a new folder. Click the collection to which you want to add the clip, or click New to create a new folder.
 Click OK. Click OK.
 Click Add. Click Add.
 To delete a clip from all Clip Organizer categories, point to the clip, click the list arrow, and then click Delete from Clip Organizer. To delete a clip from all Clip Organizer categories, point to the clip, click the list arrow, and then click Delete from Clip Organizer.
Manage Clips
- Click the Start button, point to All Programs, click Microsoft Office, click Microsoft Office 2010 Tools, and then click Microsoft Clip Organizer.
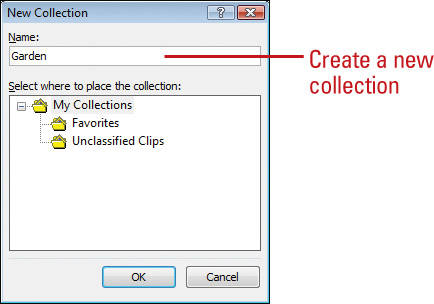
- To create a new collection folder, click the File menu, click New Collection, type a name, select a location, and then click OK.
-
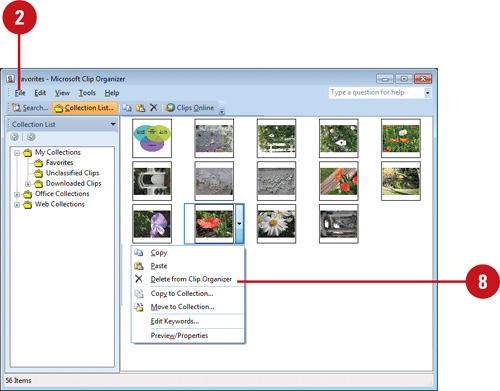
In the Clip Organizer, find and point to the clip you want to
categorize or change the properties of, click the list arrow, and then
click one of the following:
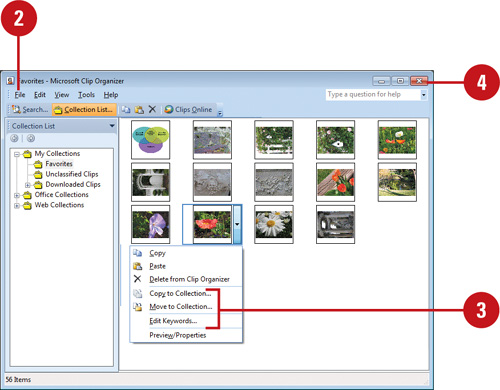
- Click Copy to Collection to place a copy of the clip in another category.
- Click Move to Collection to move the clip to another category.
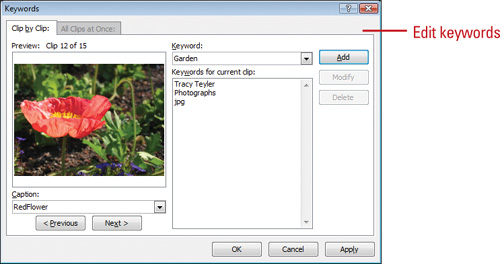
- Click Edit Keywords to edit the caption of the clip and to edit keywords used to find the clip.
- Click the Close button to close the Clip Organizer dialog box.
 -
You can change clip properties in the Clip Art task pane.
In the Clip Art task pane, point to a clip, click the list arrow next
to the clip, and then click Copy To Collection, Move To Collection, Edit
Keywords, and Delete From Clip Organizer.
|
