SQL Server Management Studio (SSMS) allows you to
create clustered and nonclustered indexes from a GUI interface. Often
times, we utilize SSMS to review the include columns of an index or to
modify an index quickly. The purpose of this section is to ensure that
you can create and modify clustered and and nonclustered indexes from
within SSMS.
1. Creating an Example Table
First connect to an
instance of SQL Server 2008 using SSMS and navigate to the database of
your choice. To make sure you have a common starting point, create a
table with five columns. Review the GUI creation of the table, shown in Figure 1.
For simplicity, the name of the table is table1 with column1, column2,
and so on. Make one of the columns (say, column1) an integer, and
specify it as the identity column. The remaining data types of the other
columns are not important, but for demo purposes, make sure the columns
are not BLOB data types.

Once you have added the
columns, save the table, name it, and exit the column creation screen.
Next, navigate to the table you just created by expanding the Tables
folder. Once you arrive at the table, click on the plus sign next to the
table name and select the Indexes folder. That section should be empty.
2. Creating a Clustered Index via the GUI
To create a new index, right-click on the Indexes folder and select New Index. Figure 2 shows the General section of the index creation screen.
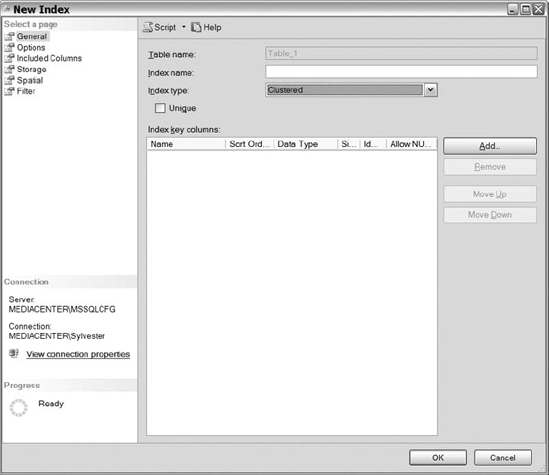
In the General section, name
your index by populating the Index Name text box. Then, click on the
Index Type drop-down list and select the type of index. You can choose
from Clustered, Nonclustered, Primary XML, and Spatial. For the current
example, select the Clustered index option, and then click on the Add
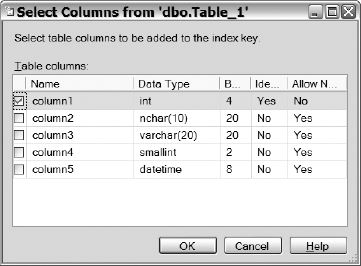
button. You'll be taken to a Select Columns dialog, resembling Figure 3.
The dialog displays all the columns within the table. Select the
identity column that you created for your clustered index and click OK.
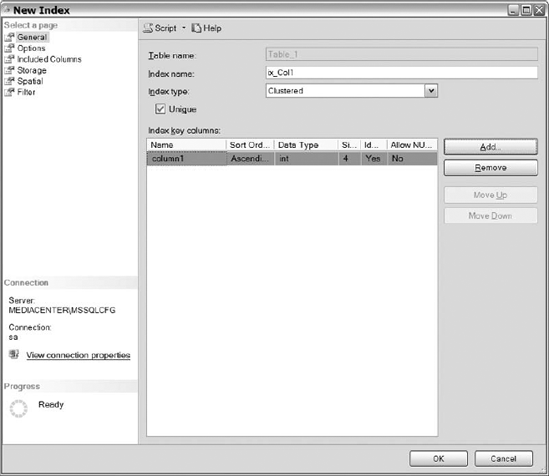
After you have selected
the columns that you want added to the index, there should be
information about the column(s) displayed for you under the Index Key
Columns area, shown in Figure 4.
Review that area and determine if additional columns are needed and
that you have selected the correct columns. If you want the key columns
to be unique, check the box for that option.
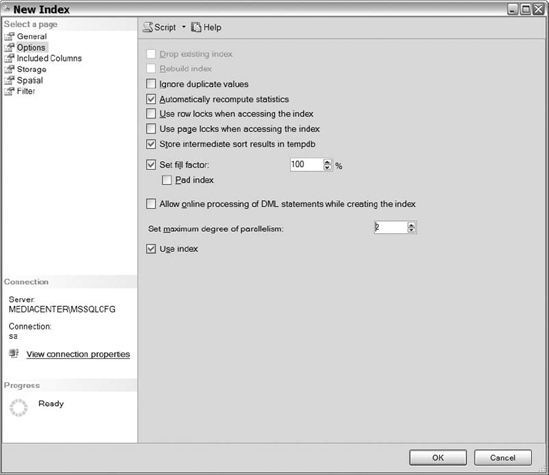
Once you reviewed the information in the General section, select Options. The Options section (see Figure 5)
lists the relational index options that we discussed earlier. Select
the relational options that you want enabled on your indexes. Remember,
you must enable the Set Fill Factor option in order to select the Pad
Index box. Leave the fill factor at 100% for this example because the
clustered index key has been created as an identity column. An identity
column always increases in value, meaning that new entries will always
be added to the end of the index, never into the middle.
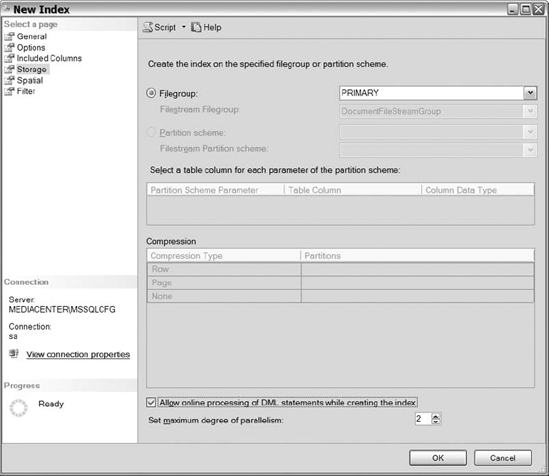
The next set of configurable options available for the clustered index is in the Storage section, shown in Figure 6.
The Storage section allows you to determine what filegroup an index
will be stored on. You can also enable online index operations by
checking the box Allow Online Processing of DML Statements While
Creating the Index. (Remember that online index processing is an
Enterprise Edition feature.)
There are three
remaining sections: Included Columns, Spatial, and Filter, but they
don't apply to clustered indexes. Ignore those, and click on OK to
create your new index. You should see the created index under the
Indexes folder on the left side of your SSMS screen. You may have to
refresh the folder before the index shows up.
3. Creating a Nonclustered Index via the GUI
Now that you have created a
clustered index, let's go through the process of creating a
nonclustered index. Right-click on the Indexes folder and select New
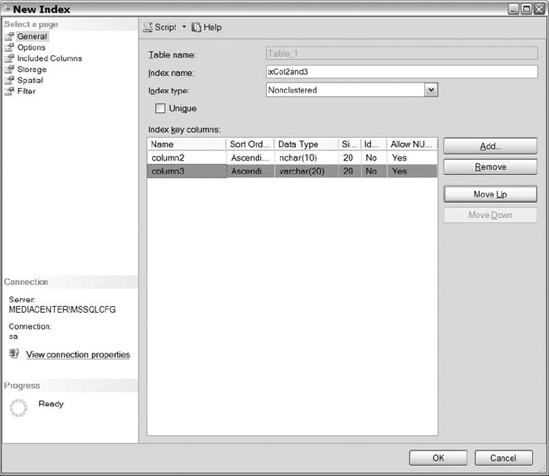
Index. In the General section, shown in Figure 7,
populate the name of your index and select Nonclustered as the index
type from the drop-down list. Click on the Add button, and select the
columns that you want for the index key. For this demonstration, select
two columns: column2 and column3. Click on the OK button, and you will
see the two columns that you added listed in the Index Key Columns area.
You will also notice that the Move Up and Move Down buttons are now
active. They allow you to place the index keys in the order of your
choosing for improved efficiency when covering your queries. Pay close
attention to the order of your index keys—the usefulness of an index
depends on it.
The Options section lets
you specify relational index options for nonclustered indexes. Because
we talked about this section already, we are going to move on to the
Included Columns section. Keep in mind, included columns are those that
are stored on the leaf level pages of a nonclustered index to aid in
covering your queries.
Figure 8 displays the
Included Columns page. Click on the Add button to specify columns that
you want included. Adding nonkey columns to the Included Columns section
works the same as adding key columns to the index. Click Add, choose
the columns you want, click OK, and the nonkey columns area is populated
with the columns you selected. Remember that the clustered index key is
stored on all leaf level pages, so there is no need to include the
clustered index column.

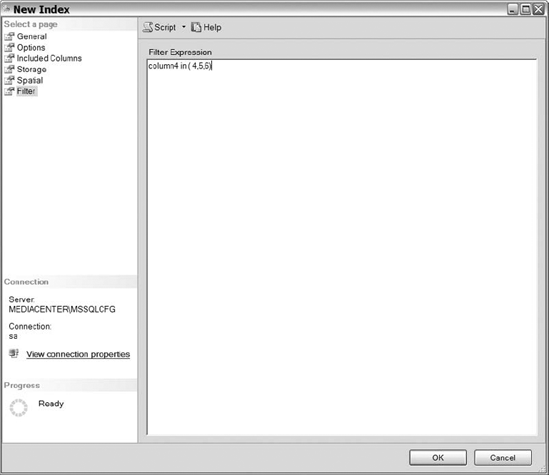
The last section of the New Index dialog is the Filtered section, shown in Figure 9. The Filtered section enables you to designate the FILTER
clause to apply to a nonclustered index. The area consists of a big
white box for you to add your filter, which is essentially a WHERE
clause that you would write in any SQL query. However, do not write the
word "where." Simply write one or more conditions, such as the one
shown in Figure 9. Separate those conditions using keywords like AND and OR.
