4. Using Windows System Image Manager to Create Answer Files
Answer files are
automated installation scripts used to answer the questions that appear
during a normal Windows 7 installation. You can use answer files with
Windows 7 unattended installations, disk image installations, or WDS
installations. Setting up answer files allows you to easily deploy
Windows 7 to computers that may not be configured in the same manner,
with little or no user intervention. Because answer files are associated
with image files, you can validate the settings within an answer file
against the image file.
You can create answer files by
using the Windows System Image Manager (SIM) utility. There are several
advantages to using Windows SIM to create answer files:
You can easily create and edit answer files through a graphical interface, which reduces syntax errors.
It simplifies the addition of user-specific or computer-specific configuration information.
You can validate existing answer files against newly created images.
You can include additional application and device drivers in the answer file.
In the following sections,
you will learn about options that can be configured through Windows SIM,
how to create answer files with Windows SIM, how to format an answer
file, and how to manually edit answer files.
4.1. Configuring Components Through Windows System Image Manager (SIM)
You can use Windows SIM to
configure a wide variety of installation options. The following list
defines what components can be configured through Windows SIM and gives a
short description of each component:
auditSystem
Adds additional device drivers, specifies firewall settings, and
applies a name to the system when the image is booted into audit mode.
Audit mode is initiated by using the sysprep /audit command.
auditUser
Executes RunSynchronous or RunAsynchronous commands when the image is
booted into audit mode. Audit mode is initiated by using the sysprep
/audit command.
generalize
Removes system-specific information from an image so that the image can
be used as a reference image. The settings specified in the generalize
component will only be applied if the sysprep /generalize command is used.
offlineServicing Specifies the language packs and packages to apply to an image prior to the image being extracted to the hard disk.
oobeSystem
Specifies the settings to apply to the computer the first time the
computer is booted into the Windows Welcome screen, which is also known
as the Out-Of-Box Experience (OOBE). To boot to the Welcome screen, the sysprep /oobe command should be used.
specialize
Configures the specific settings for the target computer, such as
network settings and domain information. This configuration pass is used
in conjunction with the generalize configuration pass.
Windows PE
Sets the Windows PE-specific configuration settings, as well as several
Windows Setup settings, such as partitioning and for matting the hard
disk, selecting an image, and applying a product key.
4.2. Creating Answer Files with Windows System Image Manager
To create an answer file with
the Windows System Image Manager, the first thing you must do is
install the Windows Automated Installation Kit (WAIK), In Exercise 4, you will download and install the WAIK, which is a free download from Microsoft's website.
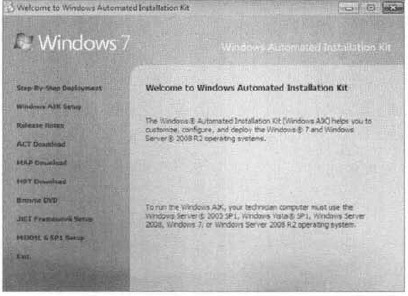
Download the WAIK. iso file from Microsoft's website. You must transfer the .iso file to a DVD. Insert the DVD into your Windows 7 machine. When Autoplay starts, click Run StartCD.exe. If Autorun does not start, open Windows Explorer and click StartCD.exe under the DVD drive. At the User Account Control screen, click the Yes button. The Welcome To Windows Automated Installation Kit screen appears. Click the Windows AIK Setup link.
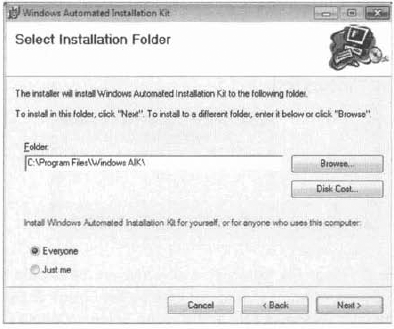
The Welcome screen to the wizard appears. Click Next. At the License Terms screen, click the I Agree radio button and click Next. At
the Select Installation Folder screen, choose where you want to install
the WAIK files. You can also choose who has the rights to use the WAIK.
In this example, the Everyone radio button is selected. Click Next.
At the Confirmation screen, verify your settings and click Next. At the Installation Complete screen, verify that there are no errors and click Close. Close the WAIK installation screen.
|
After you have installed the
WAIK, you can run the Windows SIM utility to create a new answer file or
edit existing answer files. Exercise 5 describes how to create a new answer file using Windows SIM.
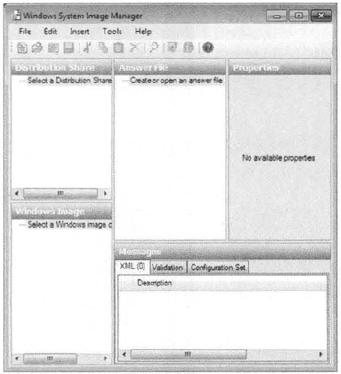
Select Start => All Programs => Microsoft Windows AIK, and click Windows System Image Manager. Windows
System Image Manager displays an empty screen with five panes: a pane
for selecting distribution shares, a pane for selecting Windows image
files, the answer file pane, a properties pane, and 3 pane for
displaying validation messages.
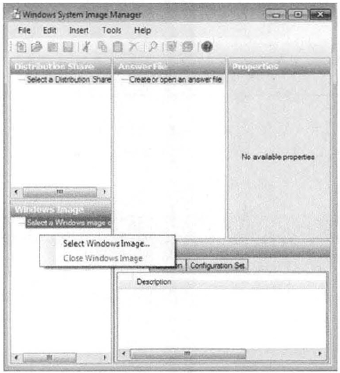
Select the Windows 7 image file for which a new answer file should be created by clicking the File =>
Select Windows Image or catalog file option or by right-clicking the
Windows Image pane in Windows SIM and clicking Select Windows Image, and
then choosing the image you created in Exercise 2.
Select File =>
New Answer File or right-click the Answer File pane and select New
Answer File from the context menu to generate the structure of the new
answer file. Right-click
each component as desired to modify the configuration pass options that
are specific to the new environment. You can drill down within a
component to provide specific customizations, or you can modify
parent-level components. When you have finished customizing the answer file for the desired environment, choose File => Save Answer File to save the answer file.
|
You can use an answer file to
provide automated answers for a DVD-based installation. Simply create a
new answer file named Unattend.xml and copy it to the root of the DVD.
Insert the Windows 7 DVD and set the BIOS to hoot from the DVD drive. As
the installation begins, Windows Setup will implicitly search for
answer files in a number of locations, including the root of removable
media drives.
