Logo
programming4us
programming4us
programming4us
programming4us
Home
programming4us
XP
programming4us
Windows Vista
programming4us
Windows 7
programming4us
Windows Azure
programming4us
Windows Server
programming4us
Windows Phone
 
programming4us
Windows 7

Microsoft PowerPoint 2010 : Building a Presentation Outline - Adding Text in the Outline Tab

- Free product key for windows 10
- Free Product Key for Microsoft office 365
- Malwarebytes Premium 3.7.1 Serial Keys (LifeTime) 2019
11/5/2012 5:48:46 PM
One of the benefits of the Outline tab is that it provides a fast way for you to enter text without having to deal with placeholders or graphics. After you enter the title, adding text to the outline consists of pressing Enter to create a new entry in the outline and then entering the text, which appears at the same outline level as the line before. You can then demote text to become a subheading (subtitle or bullet point) or promote a bullet point to become the next slide title.

1. Add a Slide Title

  1. With the Outline tab selected in Normal view, click in the outline.

  2. Enter some text, which is automatically formatted as a slide title, and press Enter. The slide title appears in both the outline and the Slide pane, and the cursor is in place to create the next slide title.
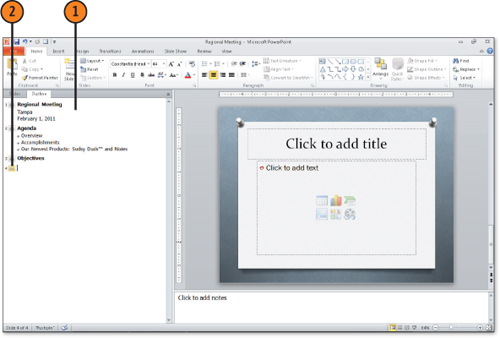

Note:

The first slide is always created using the Title Slide layout. There is typically only one title slide in a presentation, although you could duplicate it and place the duplicate at the end of your presentation. A title slide consists of a title and subtitle. After the first slide, other slides you insert use the layout of the slide that’s selected when you insert them by default.


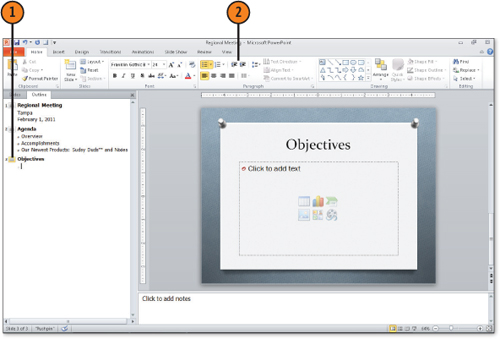
2. Promote and Demote Headings

  1. Enter text in the Outline tab, or click in an existing line of text to select it.

  2. Click the Home tab, and choose Decrease List Level or Increase List Level from the Paragraph group. Decrease demotes the heading; Increase promotes it to a higher level in the outline.


Note:

You can create many levels of indented bullets in an outline, but a couple of levels is usually the most you should ever have. As a rule, if you have that much detail to provide about a point, it really should be on a separate slide. Also, in the typical presentation environment, attendees can’t possibly see more than two levels of headings on the screen.


Note:

After you demote a heading to the bullet point level, when you press Enter to create the next heading, that heading is also at the bullet point level. When you’re ready to start the next slide, you can type a heading and then promote it to slide title level. You can also use a shortcut to do this: press Shift+Tab to promote a heading or Tab to demote it.


Note:


In PowerPoint 2010, when you select text, a Mini toolbar containing the most commonly used text formatting tools appears. You can use the Promote and Demote buttons on the Mini toolbar to structure your outline.

Other -----------------
- Microsoft PowerPoint 2010 : Understanding the Relationship of the Outline to Slides, Working with the Outline
- The Process of Troubleshooting Network Problems (part 5)
- The Process of Troubleshooting Network Problems (part 4) - How to Troubleshoot Joining or Logging on to a Domain
- The Process of Troubleshooting Network Problems (part 3) - How to Troubleshoot Name Resolution Problems, How to Troubleshoot Performance Problems and Intermittent Connectivity Issues
- The Process of Troubleshooting Network Problems (part 2) - How to Troubleshoot Application Connectivity Problems
- The Process of Troubleshooting Network Problems (part 1) - How to Troubleshoot Network Connectivity Problems
- Microsoft Excel 2010 : Analyzing Data by Using Descriptive Statistics
- Microsoft Excel 2010 : Finding Optimal Solutions by Using Solver
- Microsoft Excel 2010 : Varying Your Data to Get a Desired Result by Using Goal Seek
- Microsoft Word 2010 : Working with Outlines - Working with Master Documents
 
 
Top 10
- Microsoft Visio 2013 : Adding Structure to Your Diagrams - Finding containers and lists in Visio (part 2) - Wireframes,Legends
- Microsoft Visio 2013 : Adding Structure to Your Diagrams - Finding containers and lists in Visio (part 1) - Swimlanes
- Microsoft Visio 2013 : Adding Structure to Your Diagrams - Formatting and sizing lists
- Microsoft Visio 2013 : Adding Structure to Your Diagrams - Adding shapes to lists
- Microsoft Visio 2013 : Adding Structure to Your Diagrams - Sizing containers
- Microsoft Access 2010 : Control Properties and Why to Use Them (part 3) - The Other Properties of a Control
- Microsoft Access 2010 : Control Properties and Why to Use Them (part 2) - The Data Properties of a Control
- Microsoft Access 2010 : Control Properties and Why to Use Them (part 1) - The Format Properties of a Control
- Microsoft Access 2010 : Form Properties and Why Should You Use Them - Working with the Properties Window
- Microsoft Visio 2013 : Using the Organization Chart Wizard with new data
 
programming4us
Windows Vista
programming4us
Windows 7
programming4us
Windows Azure
programming4us
Windows Server