Windows Presentation Foundation offers native
controls for working with media contents and for manipulating documents.
This last topic is also important because documents are one of the most
common requirements in modern applications, and WPF provides a way for
creating and managing documents that can be dynamically arranged to
offer a better user experience.
Viewing Images
You use the System.Windows.Controls.Image
control to show images. The Visual Studio 2010 designer provides some
improvements to help you manage more images than in the past editions.
To see how the control works, create a new WPF project and name it as DocumentsAndMedia. When ready, drag an Image control from the toolbox onto the new Window; then set its dimensions as you like. To view an image, you need to set the Source property that basically points to an Uri. Open the Properties window by pressing F4
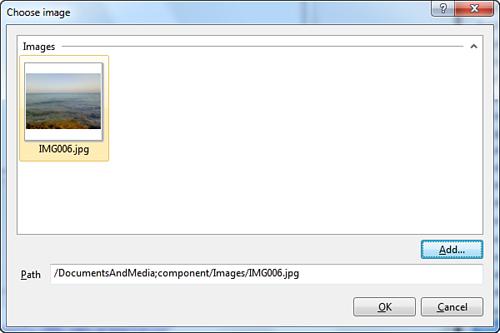
and then click the button for the Source property. At this point you
can select one or more images to add as resources to your project, as
shown in Figure 1. When you add your images at this point, simply select the one you want to be shown inside the Image control. When you click OK,
Visual Studio generates a subfolder in the project main folder, naming
the new folder as Images and setting the build action for added images
as Resource.

Visual
Studio also automatically sets the Source property for you, taking
advantage of the packed Uri, as demonstrated by the following line of
XAML code:
<Image Source="/DocumentsAndMedia;component/Images/IMG006.jpg"
       Stretch="Fill" Name="Image1" />
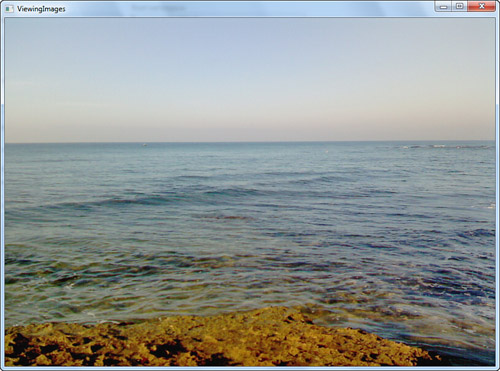
The Stretch property enables establishing how pictures will be tiled inside the Image control. Fill, which is the default value, dynamically adapts the picture to fill the entire Image control, but when you resize the control you may lose the original aspect ratio. If you instead use Uniform you can keep the aspect ratio and dynamically adapt the picture; while setting UniformToFill the picture will work like Uniform except that it will clip the source image so that the layout will be based on the ImageStretch property with None, the source image will be shown in its original size. Figure 2 shows how the image looks with Stretch set as Fill. control size. If you instead assign the

You can also assign the Source
property at runtime from Visual Basic code so that you can provide
users the ability of selecting different pictures. Differently from the
XAML code, in VB you need to create first an instance of the BitmapImage class and assign some of its properties as follows:
Private Sub LoadPicture(ByVal fileName As String)

    Dim img As New BitmapImage
    With img
        .BeginInit()
        .BaseUri = New Uri("MyPicture.jpg")
        .EndInit()
    End With

    Image1.Source = img
End Sub
Basically you invoke BeginInit to start editing; then you set BaseUri pointing to the desired file and finally invoke EndInit to finish editing. When you perform these steps, you can assign the new instance to the Image.Source property.
Playing Media
Windows Presentation Foundation enables easily reproducing media files, such as audio and videos, through the System.Windows.Controls.MediaElement
control. This basically enables reproducing, among others, all media
contents supported by the Windows Media Player application, thus .Wmv,
.Wma, .Avi, and .Mp3 files. This section shows you how to build a simple
media player using MediaElement and Visual Basic 2010. Now add a new Window
to an existing project setting this as the main window. The goal of the
next example is to implement a media player and buttons for controlling
media reproduction. Code in Listing 1 declares the user interface.
Listing 1. Defining the User Interface for a Simple Media Player
<Window x:Class="PlayingMedia"
    xmlns="http://schemas.microsoft.com/winfx/2006/xaml/presentation"
    xmlns:x="http://schemas.microsoft.com/winfx/2006/xaml"
    Title="PlayingMedia" Height="300" Width="600">
    <Grid>
        <Grid.RowDefinitions>
            <RowDefinition />
            <RowDefinition Height="50" />
        </Grid.RowDefinitions>
        <MediaElement Name="Media1" Grid.Row="0" LoadedBehavior="Manual"
                      Volume="{Binding ElementName=VolumeSlider, Path=Value}"
                      MediaFailed="Media1_MediaFailed"
                      MediaEnded="Media1_MediaEnded"/>

        <StackPanel Orientation="Horizontal" Grid.Row="1">
            <Button Name="PlayButton" Width="70" Height="40"
                    Margin="5" Click="PlayButton_Click"
                    Content="Play"/>

            <Button Name="PauseButton" Width="70" Height="40"
                    Margin="5" Click="PauseButton_Click"
                    Content="Pause"/>

            <Button Name="StopButton" Width="70" Height="40"
                    Margin="5" Click="StopButton_Click"
                    Content="Stop"/>

            <Button Name="BrowseButton" Width="40" Height="40"
                    Margin="5" Content="..."
                    Click="BrowseButton_Click"/>

            <Slider Name="VolumeSlider" Width="80" Margin="5"
                    Minimum="0" Maximum="1" Value="0.5"
                    TickFrequency="0.1"
                    AutoToolTipPlacement="TopLeft"
                    TickPlacement="BottomRight"
                    ToolTip="Adjust volume"/>
        </StackPanel>
    </Grid>
</Window>
|
The MediaElement control has basically no
look, so when you place it onto the user interface, it has a
transparent background and border, although you can replace this with
your custom background and border. The LoadedBehavior property enables establishing how the media file needs to be reproduced; for example, Play means that the associated video will be automatically played when the control is loaded, whereas Manual
means that playing will be started via Visual Basic code at the
specified moment. (IntelliSense can help you to choose the most
appropriate self-explanatory option.) You associate a media file to the MediaElement assigning the Source property, but this is not mandatory because you can accomplish this later in code. The Volume property enables adjusting reproduction volume, and its range is between 0 and 1. In this example the Volume value is bound to the VolumeSlider.Value property. The control also offers some events such as MediaFailed and MediaEnded
that respectively are raised when an error occurs when attempting to
open the media file and when the reproduction completes. The MediaElement control also provides some methods for controlling reproduction in code, such as Play, Pause, and Stop. Code in Listing 2 shows how to implement the features and how to allow media selection from disk.
Listing 2. Controlling the MediaElement in Code
Public Class PlayingMedia

    Dim sourceMedia As String = String.Empty

    Private Sub Media1_MediaEnded(ByVal sender As System.Object,
                                  ByVal e As System.Windows.
                                  RoutedEventArgs)
        'Playing completed
    End Sub

    Private Sub Media1_MediaFailed(ByVal sender As System.Object,
                                   ByVal e As System.Windows.
                                   ExceptionRoutedEventArgs)
        MessageBox.Show(e.ErrorException.Message)
    End Sub

    Private Sub PlayButton_Click(ByVal sender As System.Object,
                                 ByVal e As System.Windows.RoutedEventArgs)
        If String.IsNullOrEmpty(Me.sourceMedia) = False Then
            Me.Media1.Play()
        End If
    End Sub

    Private Sub PauseButton_Click(ByVal sender As System.Object,
                                  ByVal e As System.Windows.RoutedEventArgs)
        If String.IsNullOrEmpty(Me.sourceMedia) = False Then
            Me.Media1.Pause()
        End If
    End Sub

    Private Sub StopButton_Click(ByVal sender As System.Object,
                                 ByVal e As System.Windows.RoutedEventArgs)
        If String.IsNullOrEmpty(Me.sourceMedia) = False Then
            Me.Media1.Stop()
        End If
    End Sub

    Private Sub BrowseButton_Click(ByVal sender As System.Object,
                                   ByVal e As System.Windows.RoutedEventArgs)
        Dim dialog As New Microsoft.Win32.OpenFileDialog

        With dialog
            .Title = "Select a media file"
            .Filter = "Avi & Wmv|*.avi;*.wmv|Audio|*.wma;*.mp3|All files|*.*"
            If .ShowDialog = True Then
                Me.sourceMedia = .FileName
                Me.Media1.Source = New Uri(sourceMedia,
                                           UriKind.RelativeOrAbsolute)
            End If
        End With
    End Sub
End Class
|
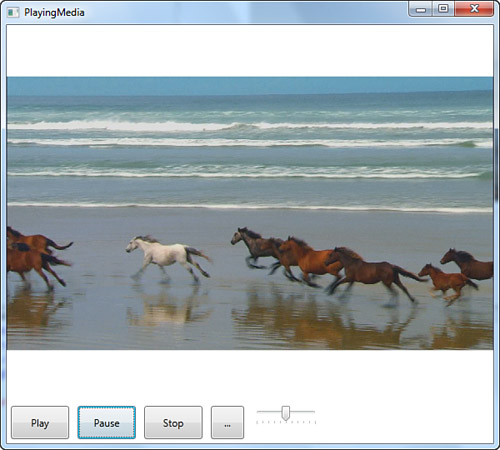
Notice how the MediaFailed event handler shows an error message in case an exception is thrown and how the media file is assigned under the form of an Uri to the MediaElement.Source property. This also means that you can assign an Uri such as a Web address to play a media content stored on a website. At this point you can run the application, click the Browse button to select your media content and click Play. Figure 3 shows the application playing a video.

The MediaElement control also offers a Position property (of type TimeSpan) that provides the ability to seek the desired position within the media content.