In previous versions of Windows, if you needed to
remotely collaborate with other users by sharing a program or working
together on a document, the tool of choice was Microsoft NetMeeting.
Vista’s replacement for NetMeeting is an entirely new program: Windows
Meeting Space. As in NetMeeting, you can use Windows Meeting Space to
show a local program or document to any number of remote users and you
can collaborate on a document with remote users. Windows Meeting Space
uses several new Vista technologies, including Peer-to-Peer Networking,
Distributed File System Replicator (DFSR), and People Near Me. The next
few sections show you how Windows Meeting Space works.
1. Signing In to People Near Me
To use Windows Meeting Space, you must first
sign in to People Near Me. You do this either by starting Windows
Meeting Space or directly via the Control Panel: select Start, Control Panel, Network and Internet, People Near Me.
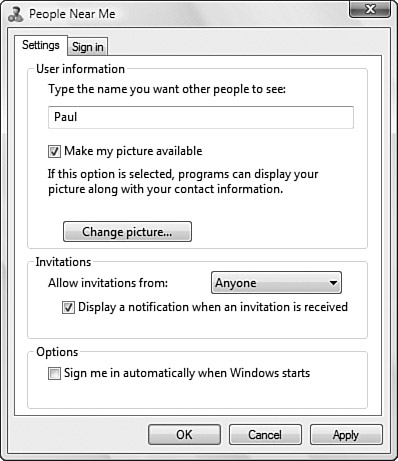
In the People Near Me dialog box that appears,
display the Sign In tab and activate the Sign In to People Near Me
option. Before you click OK, you might want to look at the Settings tab,
which enables you to change the name and picture that other people see,
and to control various other People Near Me options, as shown in Figure 1.
When
you first sign in, Vista displays the People Near Me privacy policy,
which states that the People Near Me feature discloses only your name,
your computer name, and your computer’s IP address. Click OK to
continue.
2. Starting Windows Meeting Space
When you’re signed in to People Near Me, you can
launch Windows Meeting Space by selecting Start, All Programs, Windows
Meeting Space. The first time you do this, the Windows Meeting Space
Setup dialog box appears. For Windows Meeting Space to work, the data
must be allowed to pass through the Windows Firewall—to do that, there
must be Windows Firewall exceptions for the Meeting Space Infrastructure
and the DFSR. If you click Yes, Continue Setting Up Windows Meeting
Space (and enter your UAC credentials), Vista creates the exceptions for
you automatically.
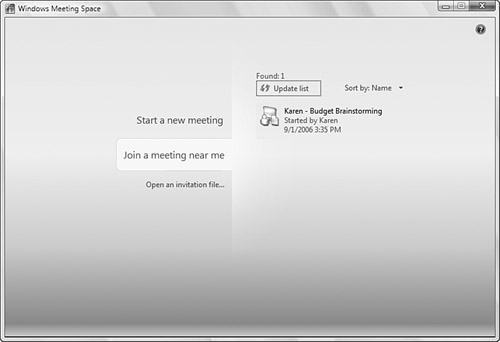
The Windows Meeting Space window appears, as shown in Figure 2.
From there, you either start a new collaboration meeting or join an
existing meeting, as described in the next couple of sections.
3. Joining a Meeting
If you know that another person has a meeting
running, but you didn’t receive an invitation, here are the steps to
follow to join that meeting:
1. | In
the Windows Meeting Space window, click Join a Meeting Near Me. Windows
Meeting Space displays a list of running meetings (see Figure 2).
|
2. | Click the meeting you want to join. Windows Meeting Space prompts you to enter the meeting password.
|
3. | Type the password and press Enter. Windows Meeting Space verifies your password and then joins the meeting.
|
4. Starting a Meeting
If you want to start your own collaboration meeting, follow these steps:
1. | Click Start a New Meeting.
|
2. | Enter the meeting name.
|
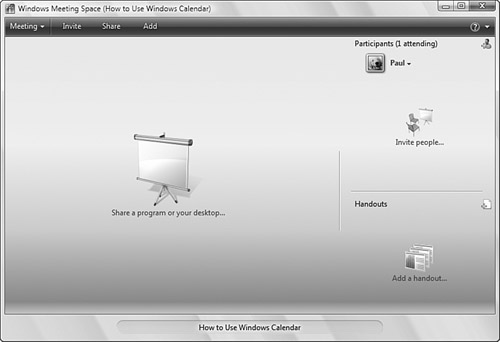
3. | Enter the meeting password.
|
4. | Press Enter. Meeting Space starts the new meeting, as shown in Figure 3.
 |
