The next thing I fix (after
adjusting the white balance) is the photo’s exposure. Now, some might
argue that this is the most essential adjustment of them all, but if
your photo looks way too blue, nobody will notice if the photo’s
underexposed by a third of a stop, so I fix the white balance first,
then I worry about exposure. In general, I think of exposure as three
things: highlights, shadows, and midtones. So in this tutorial, I’ll
address those three, which in Camera Raw are the exposure (highlights),
blacks (shadows), and brightness (midtones).
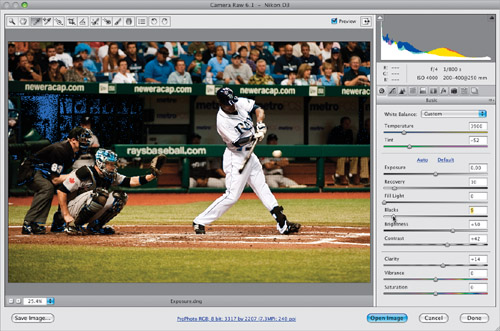
Step One. | The
Exposure slider affects the overall exposure of the photo (dragging to
the right makes your overall exposure lighter; dragging to the left
makes it darker). But don’t just start dragging the Exposure slider yet,
because there’s something we need to really watch out for, and that’s
clipping the highlights (where areas of the photo get so bright that
they lose all detail). Luckily, Camera Raw has builtin clipping
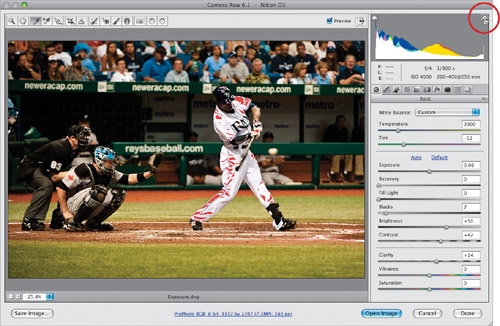
warnings, so you don’t lose highlight detail. First, look at this
photo’s histogram at the top right of the window. See the solid white
triangle in the top-right corner? That’s warning you that some parts of
this photo are already clipping.
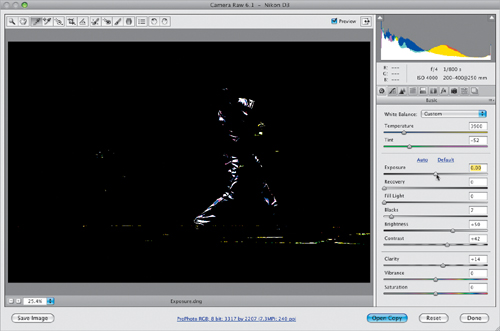
 | Step Two. | If
you want to see exactly which areas are clipping (so you can see if
they are even areas we need to worry about), just move your cursor over
that highlight warning triangle, click on it, and any areas that are
clipping will show up in red (as shown here). That
see-your-clipping-areas-in-red warning will now stay on while you’re
making your adjustments. Click on the little highlight triangle again
(or press the letter O on your keyboard) to toggle this feature off/on.
 | Step Three. | If
you don’t like the red clipping warning, or if you have a photo with a
lot of red in it, and the red warnings aren’t easily seen, there is
another warning you can use. Just press-and-hold the Option (PC: Alt)
key and then click-and-hold the Exposure slider. This turns your preview
area black, and any clipped areas will appear in their color, as seen
here (so if the Blue channel is clipping, you’ll see blue; if parts of
the Green channel are clipping, you’ll see areas of green; but of
course, the worst is to see areas in solid white, which means all the
colors are clipping). By the way, this warning will stay on as you drag
the Exposure slider, as long as you have the Option key held down. Also,
some things will always clip, like a photo with the sun visible in it,
or a specular highlight on the chrome bumper of a car, but that’s
okay—they don’t have any detail. We’re only concerned about recovering
areas that actually have important detail.
 | Step Four. | So,
now that we know how to find out when we have a clipping problem, how
do we make the problem go away? Well, since this problem happens when
things get too bright, you could always drag the Exposure slider to the
left until the clipping warnings go away. For example, here I lowered
the exposure (by dragging the Exposure slider to the left) until the
clipping warning finally went away, but that’s a really bad tradeoff. We
fixed one problem (clipped highlights), but now we have another problem
that may be worse (a really underexposed photo). Luckily, there’s
something simple we can do that lets us keep the overall exposure where
we need it, and avoid clipping the highlights at the same time.
 | Step Five. | Start
by dragging the Exposure slider until the exposure looks right to you
(here the exposure looked good to me, but some of the important
highlight areas were clipping, as shown in Step Three). Now, drag the
Recovery slider (located right below the Exposure slider) to the right,
and as you do, just the very brightest highlights are pulled back
(recovered) from clipping. Keep dragging until the white highlight
clipping warning turns solid black (like the one shown here), and you’re
done! By the way, you can use that same press-and-hold-the-Option (PC:
Alt)-key trick while you’re dragging the Recovery slider, and the screen
will turn black, revealing just the clipped areas. As you drag to the
right, you’ll actually see the clipped areas go away. Now you’ve got
your overall exposure where you want it, and you have detail in all your
highlights at the same time. How sweet is that?
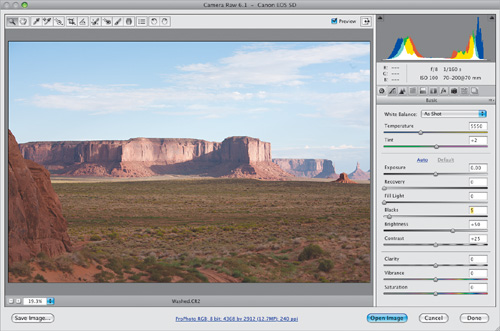
 | Step Six. | Next,
I adjust the shadow areas using the Blacks slider. Dragging to the
right increases the amount of black in the darkest shadow areas of your
photo. Dragging to the left opens up (lightens) the shadow areas. I
switched photos here to show you a better example of how the Blacks
slider works.
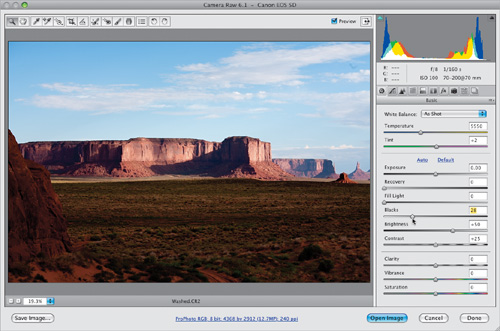
 | Step Seven. | Increasing
the blacks will usually saturate the colors in your photo, as well, so
if you have a really washed out photo (as shown in the previous step),
just drag the Blacks slider to the right until the color and depth come
back (as they have here). Compare this with the original shown in the
previous step, and you can see what a dramatic difference increasing the
blacks can make for a washed out photo. Okay, let’s switch back to the
baseball photo, and pick up there.
 | Step Eight. | While
my biggest concern is clipping the highlights, there’s also a shadow
clipping warning to let you know when areas have gotten so dark that
they lose all shadow detail. That warning is the triangle on the top
left of the histogram. If you move your cursor over it and click, any
areas that are solid black will appear in bright blue (as seen here). If
there’s shadow clipping, the only fix is to drag the Blacks slider to
the left to reduce the amount of blacks in the shadows, but I generally
don’t do that, because to me that usually makes a photo look flat and
too low-contrast. So, I avoid lowering the Blacks amount below the
default setting of 5 unless absolutely necessary (here the clipped areas
are just shadows, not important detail, so I ignore them). But hey,
that’s just me. You can also use the press-and-hold-the-Option (PC:
Alt)-key trick with the Blacks slider. As you might expect, this works
in the opposite way the highlight warning works; instead, the preview
area turns solid white, and any areas that are solid black have lost
detail and actually have turned to solid black.
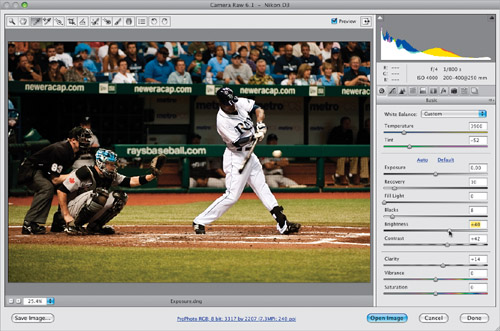
 | Step Nine. | The
next slider down is Brightness. Since you’ve already adjusted the
highlights (Exposure slider) and the shadows (Blacks slider), the
Brightness slider adjusts everything else (I relate this slider to the
mid tones slider in Photoshop’s Levels adjustment, so that might help in
understanding how this slider differs from the Exposure or Blacks
sliders). Of the three main adjustments (Exposure, Blacks, and
Brightness), this one I personally use the least—if I do use it, I
usually just drag it a very short amount to the right to open up some of
the midtone detail. But in this case, I dragged it a little to the left
to keep the photo from looking too bright. There are no warnings for
midtones, but if you push it far enough to the right, you could see some
highlight clipping.
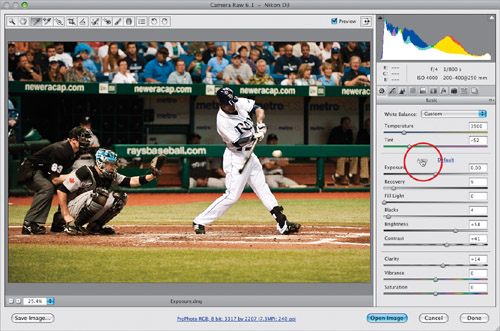
 | Step 10. | If
you don’t feel comfortable making these adjustments yourself, you can
always give Camera Raw a crack at it by clicking the Auto button (it’s
the underlined word Auto, shown circled here in red). When you click on
Auto, your photo will either look better, or not. If it’s not, just
press Command-Z (PC: Ctrl-Z) to Undo
the Auto adjustment, and then try the correction yourself using the
Exposure, Blacks, and Brightness sliders. Here, I clicked the Default
button (to the right of the Auto button) to reset Camera Raw to its
defaults, and then I clicked the Auto button. In this case, it looks
kinda bright to me, and that’s why it’s important to learn to be able to
make these corrections yourself.
 |
|
