Troubleshooting Hardware Compatibility Issues
Diagnosing hardware
compatibility issues related to installing Windows Vista can be done in
steps. A good first step is to verify whether a particular hardware
device is supported. You can do this by using the Windows Vista Upgrade
Advisor.
This program contains the information that was previously published as
the Windows Hardware Compatibility List (HCL). The information you find
can generally tell you whether a particular device is supported in
Windows Vista. In some cases, you will need to download and install
updated drivers manually after you install Windows Vista. In this
section, you’ll learn how to troubleshoot hardware compatibility issues.
Updating Device Drivers
One of the most common
troubleshooting steps for Windows Vista installation issues is updating
or replacing drivers. This is often necessary to address hardware that
might have stopped working after the installation of the operating
system. For example, you might be supporting a customer who has a
universal serial bus (USB) scanner that is no longer accessible after
upgrading to Windows Vista.
In the past, finding the
correct device drivers for a particular hardware component could be a
long and frustrating process. Customers often needed to visit their
computer manufacturer’s Web site, the hardware vendor’s Web site, or the
Microsoft Web site. Windows Vista includes several features designed to
simplify the process of locating, downloading, and installing device
drivers.
After installing
Windows Vista, users should access the Windows Update feature. Although
most users might think of Windows Update as a feature for downloading
and installing security updates, it is also able to find relevant device
drivers automatically that might have updates by scanning the system
for attached hardware devices (whether they are functioning properly or
not), and looking for newer versions of the required software and driver
components. When hardware-related updates are found, they can either be
downloaded directly (like other types of updates), or a link is
provided to obtain more information.
Obtaining Device Drivers
When you are
supporting customers who are experiencing hardware-related issues, using
the Internet is one of the most efficient methods of supplying device
drivers. What should you do, however, if the customer does not have
Internet access (or if the problem is with a network adapter or modem)?
One option is to use any manufacturer-supplied installation media (such
as a CD-ROM that contains drivers). Computer manufacturers and
third-party vendors generally include this media with new hardware. It
is important to note, however, that the drivers found on this media are
often not the latest available versions. Still, they might allow a
device to work well enough to allow for downloading updates.
Another method
of obtaining necessary drivers is using another computer that is able
to access the Internet. The general process is to download (but not
install) device drivers from manufacturers’ Web sites. You can then
place them on removable media such as a USB memory device or a CD-ROM or
DVD-ROM. You can then copy the files to the computer that is
experiencing the problem.
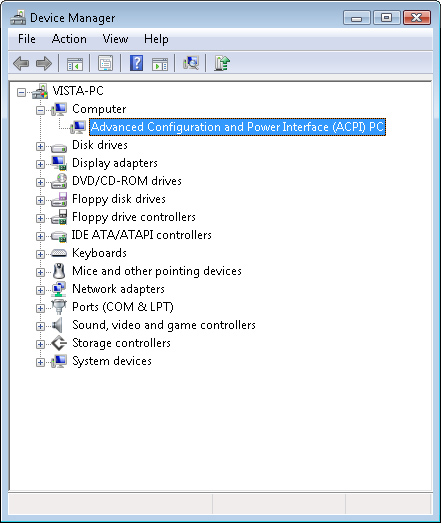
After you have
obtained the necessary device drivers, you can install them by using
Device Manager. To open Device Manager, click Start, choose Control
Panel, click System And Maintenance, and then select Device Manager. Figure 1 shows the default view, which displays a list of hardware devices organized by device type.
Troubleshooting Application Compatibility Issues
Perhaps the most common
problem after upgrading to a new operating system is that a previously
installed program no longer works, or it behaves differently. To resolve
this issue, a common troubleshooting approach is to verify
compatibility with Windows Vista by visiting the software
manufacturer’s Web site. In some cases, known workarounds might be
listed, or software-based updates might be required to run under the new
operating system.
Whenever possible, advise
customers to select software that is designed to work with Windows
Vista. Most programs written for Windows XP also work in Windows Vista,
but some older programs might run poorly or not at all. Potential
reasons for incompatibilities include the enhanced visual interface in
Windows Vista.
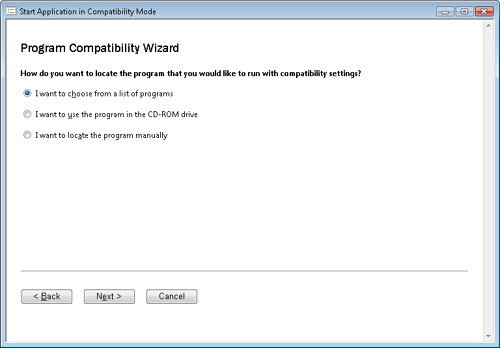
Using the Program Compatibility Wizard
The Program
Compatibility Wizard enables you to run older programs in an environment
that simulates earlier versions of Windows. To start the Program
Compatibility Wizard, in Control Panel, click Programs. Click Use An
Older Program With This Version Of Windows to start the wizard. Figure 2 shows the first step.
The wizard walks you through several steps, including the following:
Locating or selecting the program
The program itself will most likely be located within the Program Files
folder on the System drive. In some cases, however, it might be located
on removable media (such as a CD-ROM or DVD-ROM) or on a USB memory
device. If the program has already been installed, you can select an option to view a list of installed programs.
Selecting a compatibility mode
Microsoft designed compatibility mode settings to emulate various
settings from previous versions of the Windows platform. These options
can be helpful when troubleshooting an application that does not run on
Windows Vista because the version of the operating system is
unsupported. The default option, however, is to not apply a
compatibility mode. Included operating system versions are the
following:
Microsoft Windows 95
Microsoft Windows NT 4.0 (Service Pack 5)
Microsoft Windows 98/Windows Me
Microsoft Windows 2000
Microsoft Windows XP (Service Pack 2)
Selecting display settings
This step enables you to disable or modify the standard desktop
elements of Windows Vista. The specific options include the following:
256 Colors
640 × 480 Screen Resolution
Disable Visual Themes
Disable Desktop Composition
Disable Display Scaling On High DPI Settings
Security settings
To provide increased security, Windows Vista includes numerous features
that are designed to make programs run with a limited set of
permissions. In some cases, these issues might prevent a program from
running properly. In this step, you can choose to run a program always
using Administrator credentials.
After you have
selected the relevant options, the Program Compatibility Wizard gives
you the option of testing the settings by running the program. If the
settings do not resolve the problem, customers should contact their
software vendors for more details.
Using Software Compatibility Modes
The Program
Compatibility Wizard provides users with a guided method of locating
programs and providing appropriate compatibility settings. This is a
good method for users who are new to Windows Vista, but it can take
several minutes to walk through the steps. Fortunately, there’s a
quicker alternative to accessing the same settings that are available
through the wizard.
You can view
and modify compatibility settings for a program manually by accessing
the Compatibility tab of a program’s Properties dialog box. Figure 3 shows the options that are available. Table 1 provides additional details related to the settings and their purpose.
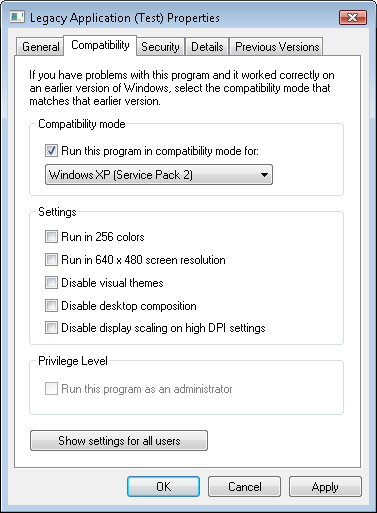
Table 1. Description of the Compatibility Tab Settings
| Setting | Description |
|---|
| Compatibility Mode | Runs
the program using settings from a previous version of Windows. Try this
setting if you know the program is designed for (or worked in) a
specific previous version of Windows. |
| Run In 256 colors | Uses a limited set of colors in the program. Some older programs are designed to use fewer colors. |
| Run In 640 × 480 Screen Resolution | Runs the program in a smaller window. Try this setting if the graphical user interface appears jagged or is rendered improperly. |
| Disable Visual Themes | Disables
themes on the program. Try this setting if you notice problems with the
menus or buttons on the title bar of the program. |
| Disable Desktop Composition | Turns
off transparency and other advanced display features. Choose this
setting if window movement appears erratic or you notice other display
problems. |
| Disable Display Scaling On High DPI Settings | Turns
off automatic resizing of programs if large-scale font size is in use.
Try this setting if large-scale fonts are interfering with the
appearance of the program. |
| Privilege Level | Runs
the program as Administrator. Some programs require Administrator
privileges to run properly. If you are not currently logged on as an
Administrator, this option is not available. |
| Show Settings For All Users | Enables you to choose settings that apply to all users on this computer. |
Reinstalling Windows Vista
Windows
Vista includes numerous tools and features for troubleshooting a wide
variety of potential installation issues. In some cases, however,
customers might choose to reinstall the operating system. This should
generally be considered a last resort because it can result in the loss
of all operating systems and installed applications.
Before
starting the reinstallation process, it is very important to create a
backup of important data files. Tools such as the Backup and Restore
Center and Windows Easy Transfer can help make the process easier. To
reinstall Windows Vista, start by booting the computer from the
installation media. Several different repair-related operations are also
available for managing the most common issues.
Getting Additional Troubleshooting Assistance
So far, you have learned
about several different ways to obtain updated information about
hardware and software compatibility for a device or program. Over time,
and as new products are created and updated, details related to
compatibility issues might change. Additionally, you might encounter
various error messages or other issues that can prevent the system from
working optimally.
Microsoft has
provided a central starting point that can assist customers and Consumer
Support Technicians with resolving the most common types of issues they
are likely to encounter. You can find the Windows Vista Solution Center
at http://support.microsoft.com/windowsvista. The site includes groups for various types of issues, such as these:
Each section includes steps that can help resolve the problem or that can provide more details about the issue.
