To access a printer connected to another PC on the
network from your Windows Vista–based machine, you’ll need to add it
manually. You can achieve this through Control Panel, Hardware and
Sound, and Printers.
To add a shared printer connected to another PC on your network, follow these steps:
1. | On the PC running Windows Vista, click Start, click Control Panel, and under Hardware and Sound, click Printer.
|
2. | In the toolbar, click Add Printer.
|
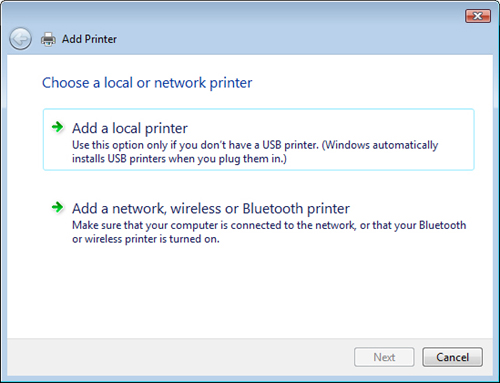
3. | From the Add Printer dialog box, click Add A Network, Wireless Or Bluetooth printer. See Figure 1. Click Next.

|
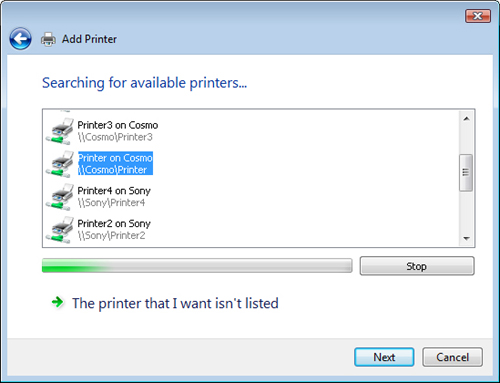
4. | Browse through the list to locate the printer to add. Figure 2 shows an example of a network with several computers and multiple printers. Select the printer, and click Next.

|
5. | If prompted to install a driver, click Install Driver, and click Continue to proceed.
|
6. | Select
or deselect Set As The Default Printer. (The default printer will
always be selected by default, and all “quick” print jobs will
automatically go to this printer.)
|
7. | Click Next.
|
8. | Click Finish.
|
The printer will now
appear in all drop-down lists for printer options, and you’ll access it
in the same way you access local printers connected directly to your own
PC.
Tip
To change which
printer is the default, open the Printer folder, right-click the folder
to configure as the default printer, and click Set As Default Printer.