You are now ready to install Windows 7. Boot from your Windows 7 installation DVD, and perform a new installation.
How to Do a Custom (Clean) Installation
Follow these steps to perform a clean installation:
Caution
A clean installation
consists of removing all data from your hard disk by repartitioning and
reformatting your hard disk and reinstalling the operating system and
programs to an empty (clean) hard disk. This means that any programs or
data you might have still stored on that hard disk will be removed and
you won’t have access to them any more, unless you’ve previously copied
those programs and data to a separate place, such as another virtual or
real hard disk, another place on your network, or to a temporary storage
device such as a USB thumb drive or other removable material. A clean
installation also offers you an opportunity to clean up space on your
hard disk, storing the programs you decide to reinstall in a more
efficient manner and perhaps compacting some of your data files.
However, the most common mistake people make prior to a clean
installation is not saving everything they want to keep. Be sure you
select all the files you even think you may want to keep. You can delete the ones you truly don’t need later.
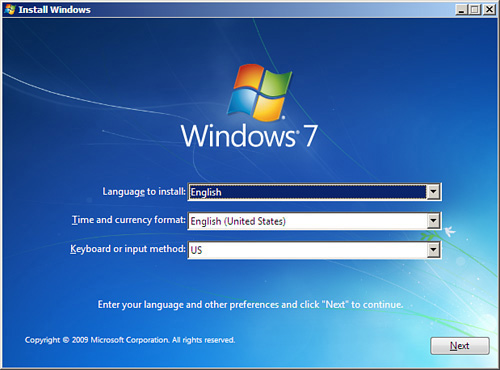
1. | Insert the Windows 7 installation disc into the computer’s DVD drive, turn on your computer, and then do one of the following:
If you want
to replace your computer’s existing operating system with Windows 7, and
you don’t need to adjust your disk partitions, go to step 2. Restart
your computer with the installation disc inserted in your DVD drive. If
you’re asked to press a key to boot from the DVD, press the appropriate
key. If the Install Windows window appears as shown in Figure 1, go to step 2.
Note
If the Install
Windows page doesn’t appear and you’re not asked to press a key to start
from DVD, you might have to specify that your computer use its DVD
drive as the startup device. You’ll need to restart your computer, enter
the BIOS Setup, specify your DVD drive as the startup device, and then
start Windows from the Windows 7 installation DVD as described
previously. See your computer’s documentation for entering the BIOS
setup (this varies from computer to computer). Or, watch closely while
your computer is booting. Before the Windows 7 splash screen appears,
several lines of text appear quickly on your screen. In the text, you
should see directions, such as Press F2 to Enter BIOS Setup. Press
whatever key is specified. Once the BIOS Setup appears, you will need to
scan around and look for boot drive options and set yours to look in
your DVD drive first for a bootable DVD. Be careful with the BIOS
settings and if you make changes that you are certain aren’t correct,
exit the BIOS without saving. If you are sure that you have changed the
boot order correctly, be sure to choose the exit and save option. It’s
nearly impossible to give specific directions for this procedure because
it varies from BIOS to BIOS. If you are uncertain what to do, we
suggest contacting your computer’s manufacturer.
| 2. | When the Install Windows page appears, click Install Now.
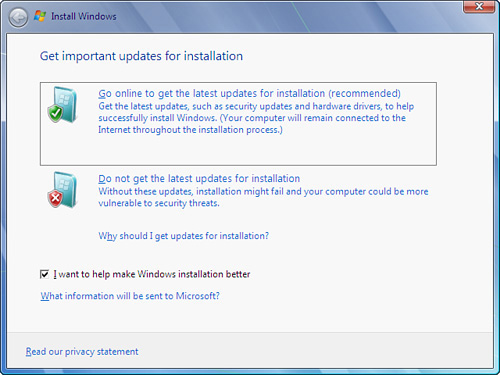
| 3. | When the Get Important Updates for Installation page appears, click Get the Latest Updates as shown in Figure 2. Among other things, the latest updates will help protect your computer from recently detected security problems.
| 4. | After
the updates are complete, resume the Windows 7 installation by clicking
the Continue button. Click I Accept the License Terms (you must accept
to continue the installation) and click Next.
| 5. | When the Which Type of Installation Do You Want? page appears, click Custom.
| 6. | When the Where Do You Want to Install Windows? page appears, choose one of the following options:
If you
don’t want to specify a specific partition where you want to install
Windows, or create partitions on your hard disk, click Next. If
you already have an existing partition where you want to install
Windows 7 to create a multiple boot configuration, select that partition
and click Next to begin the installation. (Be sure to install Windows 7
on a different partition from where your current version of Windows XP is installed.) If
you want to create, extend, delete, or format a partition, click Drive
Options (Advanced), select the option you want, and follow the
instructions. Click Next to begin the installation. (If the Drive
Options (Advanced) option is disabled, you will have to start your
computer using the installation disc.) If you have only a single partition defined for the disk, you will need to delete it and then create a blank disk partition.
Note
You might see a
window that says the partition you selected contains files from a
previous Windows installation. If you want to proceed, these files will
be moved to a folder called Windows.old and will be accessible but not used to run Windows 7.
| 7. | Click OK.
| 8. | Your computer will begin installing the Windows 7 files and may stop and start several times (see Figure 3). You can see that the system is busy when an ellipse (...) appears after the phrase describing its current action.
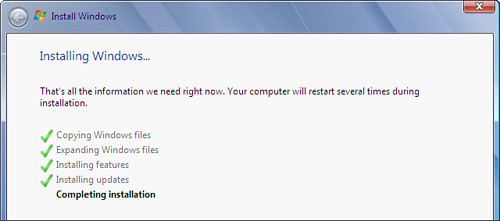
Note
The installation can take
a long time (25 minutes is not unreasonable for certain
configurations); it depends on the speed of your CPU, the speed of your
DVD reader, and several other factors.
| 9. | When
installation has completed, you’ll see the new Windows 7 desktop. The
first thing you will note is that the desktop interface has changed
quite a bit from Windows XP.
|
|
