4. Installing and Sharing Printers on Windows 7
Installing a local printer on
Windows 7 is very simple with Plug and Play. Most printers today use USB
connections, and after the printer is connected with the USB cable, the
printer is automatically added. Windows 7 will attempt to install the
correct driver from the driver store, or if the driver is not in the
driver store, it will attempt to download the driver using Windows
Update. You can also install the driver using the installation media
that came with the printer.
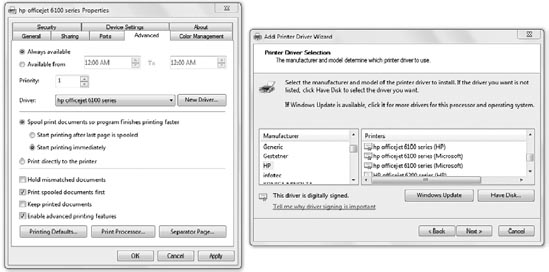
Drivers can be updated manually from the Advanced tab of the Printer Properties if necessary. Figure 8
shows the wizard that appears after clicking New Driver. If the driver
is in the driver store, it will appear as a Printer Driver Selection. If
not, you can try to use Windows Update to download an updated driver.
Finally, you can download a driver from the manufacturer, select Have
Disk, and browse to the location where it was downloaded.
If the printer uses a network,
wireless, Bluetooth, serial, or parallel port, you'll have to install it
manually using either the installation media that came with the printer
or the Devices and Printers applet. Selecting Add Printer from the
toolbar of Devices and Printers will launch a wizard that can be used to
add non-USB printers. When you click Add Printer, you'll see the
following two choices:
Add A Local Printer
This is used for non-USB printers that are connected directly to the Windows 7 system or can be reached with a TCP/IP address.
Add A Network, Wireless, Or Bluetooth Printer
This choice is used to
connect to wireless printers or network printers that are shared by
other systems and can also be used for printers that have their own IP
address.
The Add Printer Wizard will
prompt you to share the printer. After the printer has been added, you
change the selection using the Sharing tab of the Printer Properties
page, as shown in Figure 9.
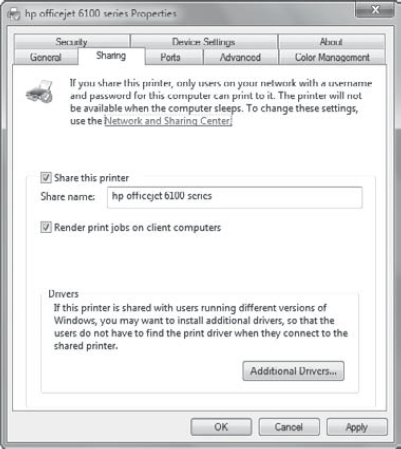
You can also add additional
drivers from this page to support users running different architectures,
such as 32-bit or 64-bit systems.
Print drivers have been
simplified in recent years. As long as the end-user computers are
running Windows 2000 or greater, you only need to add Type 3 – User Mode
drivers. Type 3 – User Mode drivers come in three versions:
Itanium Type 3 – User Mode (for Itanium-based systems)
x64 Type 3 – User Mode (for x64 or 64-bit systems)
x86 Type 3 – User Mode (for x86 or 32-bit systems)
Type 2 drivers are for systems older than Windows 2000.
5. Connecting to a Shared Printer
A common task with
printers in an enterprise will be to connect to a shared printer that is
hosted by another computer such as a print server. You'll need to know
the name of the print server, and it's also helpful to know the name of
the shared printer.
Launch Control Panel, and click View Devices And Printers in the Hardware And Sound category.
Click Add A Printer to start the Add Printer Wizard.
Click
Add A Network, Wireless, Or Bluetooth Printer. The wizard will use
Network Discovery to locate any printers on the same network. If you
have a printer shared on your system, it will locate and list it using
the UNC path. Network Discovery cannot locate printers on different
subnets.
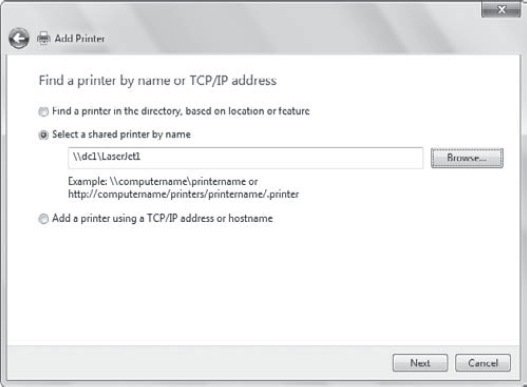
Select
The Printer That I Want Isn't Listed. You can now browse for a printer
using Windows Explorer, enter the UNC path of the printer if it's shared
by another computer, or add the printer using the TCP/IP address if it
isn't being shared by another computer. Select A Shared Printer By Name
is selected by default, allowing you to enter a UNC path.
Enter
the name of the server in the UNC format (\\servername\) and, when you
type the last slash, the shared printers for the server will appear. You
can either select one of the shared printers or enter the full UNC path
of the shared printer. Your display will look similar to the graphic
shown here. Click Next.
If the printer
doesn't exist or the server can't be contacted, the wizard will generate
an error. However, if the connection succeeds, the correct drivers will
automatically be downloaded and the printer will be added.
After the driver is downloaded and the printer is installed, click Next.
The
last page will indicate you've successfully added the printer. You can
print a test page and set the new printer as a default printer from
here. Click Finish.
