Spyware (and its close
cousin adware) isn't specifically designed to cause your computer harm.
But even without the direct intent to do harm, spyware can have serious
consequences. Too much spyware can bog your system down, causing
everything to run slower than it should. Spyware can make unwanted
changes to your Internet settings, causing your Web browser to act in
unexpected ways. Spyware can lead to many annoying pop-up ads. In the
worst cases, it can send personally identifiable information about you
to identity thieves.
Most spyware comes from
software that you can download for free, such as screen savers, custom
toolbars, and file-sharing programs. However, it can also be installed
automatically from scripts and programs embedded in Web pages.
There are many programs on the
market that are designed to prevent and eliminate spyware (and adware).
But you don't have to spend any money or download any third-party
programs to protect your system from these threats. You can use Windows
Defender, which comes with Windows 7 for free. Despite its focus on
spyware, Defender actually protects your computer from any potentially
unwanted programs. That includes many types of adware, Trojan horses,
and rootkits.
1. Opening Windows Defender
Windows Defender doesn't need
to be open to protect your computer. But you can do other things with
Defender that do require opening the program. As with most programs, you
have many ways to open Defender. Use whichever is most convenient for
you at the moment:
Open the Control Panel and click the All Control Panel Items link in the left pane; then, open Windows Defender.
Press  , type def in the Search box, and click Windows Defender.
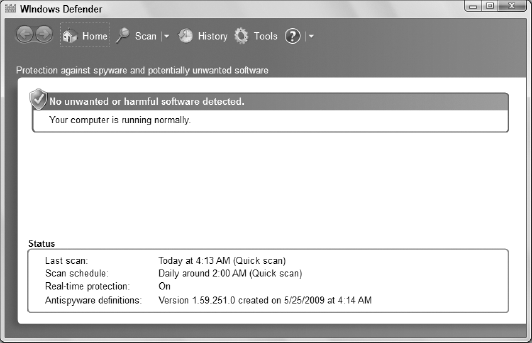
When Windows Defender opens, it looks something like Figure 1.
2. Removing spyware from your computer
Windows Defender offers many
tools for fighting spyware. One of them is the ability to scan your
system for any spyware that you might have already acquired. You can do a
Full Scan, which takes a while but gives you the peace of mind of
knowing that your system is free of malicious spyware. Or you can do a
Quick Scan. As its name implies, the Quick Scan takes less time because
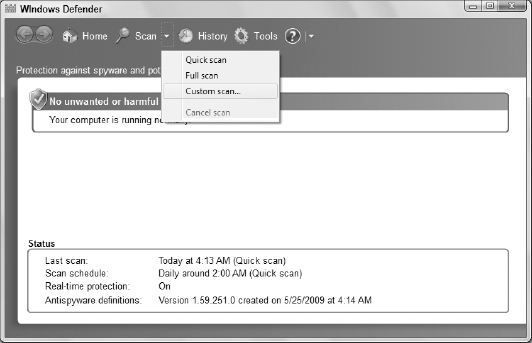
it focuses on areas where spyware is most likely hiding. You can also
opt for a Custom Scan, which lets you choose which drives you want to
scan. To perform a scan, click the arrow next to the Scan button, as
shown in Figure 2, and then select the desired scan option.
NOTE
If you're unable to scan for spyware from a standard account, an administrator may need to enable scanning for you.
A full scan takes several
minutes, so you need to be patient. When the scan is complete, you
should see a clean bill of health. If not, suspicious items will be quarantined (disabled). You should be taken to the quarantined list automatically, though you can get there any time by choosing Tools => Quarantined Items.
Each item in the quarantined list has an alert level associated with it. Here's what each alert level means:
Severe: This item is known to compromise the security of your computer. It should be removed immediately.
High:
This item may be too new to be well known. But all indications point to
malicious intent, so the item should be removed immediately.
Medium:
This item appears to collect personal information or change Internet
settings. Review the item details. If you do not recognize or trust the
publisher, block or remove the item.
Low: This is a potentially unwanted item that should be removed if you did not intentionally install it yourself.
Not Yet Classified:
This item is unrecognized but is potentially something you don't want
on your computer.
To remove an item, click
its name and click Remove. You can usually click Remove All, because
valid, useful programs are rarely detected as spyware or other
potentially unwanted items. If in doubt, you can leave the item
quarantined for a while. Use your computer normally to see whether some
useful program no longer works. After you've determined that everything
is okay, you can go back into Quarantined Items and remove anything you
left behind.
Should you ever encounter a
false positive (where an innocent program is quarantined), don't remove
it. Instead, click its name and then click Restore.
2.1. Doing a quick scan
A full scan takes some time
because it scans every file on your hard disk. You can save some time by
doing a quick scan. A quick scan checks only new files and the kinds of
files commonly used by spyware. After you've done a single full scan,
quick scans are sufficient.
2.2. Doing a custom scan
A custom scan lets you scan a
specific drive or folder. For example, if someone sends you a CD or DVD,
you might want to check that disk before copying or opening any files
from it.
For downloads, you might
consider creating a subfolder within your Documents folder, perhaps
named Unscanned or something similar. Whenever you download a file or
save an e-mail attachment that you don't trust 100 percent, save it to
that Unscanned folder. Then scan just the folder to make sure all is
well. If the files check out okay, you can then move them to any folder
you like. Or, in the case of a downloaded program, click the icon to
start the program installation.
To do a custom scan, click
Scan in Windows Defender and choose Custom Scan. Then click the Select
button and click to select the drive you want to scan. Or, expand any
drive icon and select the specific folder you want to scan. Then click
OK to start the scan.
2.3. Automatic scanning
You can also set up Defender
to automatically scan your system daily, weekly, or however often you
wish. You must be logged in to an account with administrative privileges
to set up automatic scanning. From the Administrator account, start
Windows Defender normally. Then click Tools and Options. Automatic
scanning options appear as shown in Figure 3.
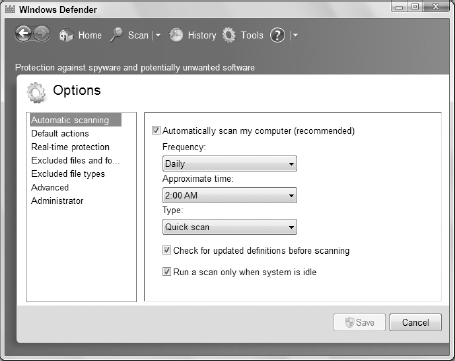
To enable automatic
scanning, make sure the Automatically Scan My Computer (Recommended)
check box is selected (checked). Then you can set a schedule for
scanning. For example, if you use a desktop computer that you leave on
24 hours a day, choose Daily and a time during which you're unlikely to
be using the computer. If the computer isn't turned on when the
scheduled time arrives, the scan will take place the next time you start
the computer. Choose the type of scan you want to perform on the
schedule.
If your computer is on and online
24 hours a day, you can also choose Check for Updated Definitions
before Scanning. Doing so ensures that Defender is up-to-date with all
known spyware when it scans.
Under the Default Actions
heading, you can choose how you want an automatic scan to treat Severe,
High, Medium, and Low alert items, as follows:
Recommended Action Based on Definitions: Choose this option to take the action that's recommended in the item's definition.
Remove: Choose this option if you want the item removed automatically when found.
Quarantine:
Choose this option to have Windows Defender place the item in
quarantine and prevent it from running until you review it and choose to
either restore it or delete it.
Allow:
Have Defender add the software to the allowed list and allow it to run
on the computer. This option is available only for the Medium and Low
alert items.
If in doubt about what to
choose, your best bet is to choose the Recommend Action Based on
Definitions option. Each malware item that Defender identifies has a definition
that specifies its intent, severity, and recommended actions. The
definitions are created by human experts who have previously found and
analyzed the item. Unless you're an expert yourself, your best bet is to
allow those expert definitions to choose a course of action.
2.4. Preventing Spyware
You've probably heard the
saying "An ounce of prevention is worth a pound of cure." That's
certainly true of spyware. Getting rid of spyware that has already
infected your computer is a good thing. But preventing it from getting
there in the first place is even better. That's where real-time protection comes into play. The term "real time" means "as it's happening."
The Windows Defender real-time
protection analyzes files as they approach your computer from the
Internet. Any spyware or suspicious-looking files are blocked to keep
your computer from being infected.
Real-time protection is turned on
by default. You can control whether it's on or off, and optionally
tweak what it monitors by clicking Tools in Defender and choosing
Options. Click Real-Time Protection to see the real-time options shown
in Figure 4.
Following is a description of the options available for real-time protection:
Use Real-Time Protection (Recommended): Turn on real-time protection.
Scan Downloaded Files and Attachments: Monitor ActiveX controls and software installation programs that are downloaded, installed, or run from your Web browser.
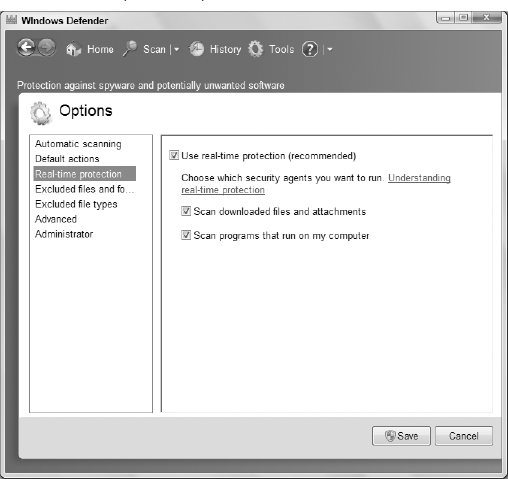
Scan Programs That Run on My Computer: Monitor other programs installed on your computer to search for suspicious activity.
2.5. Excluding Files and Folders
In some situations, you might
want to exclude certain files or folders from being scanned by Windows
Defender. For example, if there are folders or files that you know are
safe but could take a long time for Windows Defender to scan or could
cause problems when scanned, you can exclude them. You can also exclude
files based on their file type.
To set folder or file
exclusions, click the Excluded Files and Folders link in the Windows
Defender Options page. Click Add, select a folder or file, and click OK.
Repeat the process for any other folders or files you want excluded.
To exclude files by type,
click the Excluded File Types link. Click in the text box, type the file
extension of the files you want to exclude from scanning, and click
Add. Then, click Save to save your changes.
2.6. Advanced and Administrator Configuration Options
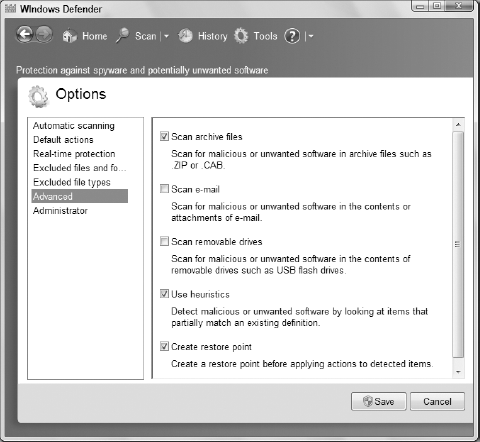
If you click Advanced in the Defender Options window, you see the Advanced options shown in Figure 5. These options include:
Scan Archive Files: Scan inside archive files such as zip and CAB files for malware.
Scan E-Mail: Scan the contents and attachments of e-mail for malware.
Scan Removable Drives: Scan USB and other removable media for malware.
Use Heuristics:
When scanning, detect malware by matching partial malware signatures.
This option can enable Defender to identify threats that have been
modified (derivative threats) since the signature was released.
Create Restore Point:
Create a Windows Restore Point prior to applying actions to detected
items to enable you to roll back Windows to its previous state.
Clicking Administrator in
the Options page lets you configure two additional options for Windows
Defender. The Use This Program option, when selected, enables Defender.
Deselecting this option turns off Defender. Unless Defender is causing a
problem with your computer or a specific program, you should leave this
option selected to enable Defender to protect your system. The second
option, Display Items from All Users of This Computer, enables you to
see the History, Allowed items, and Quarantined items for all users.
These items are normally hidden.
3. Disallowing Allowed Programs
There may be times when
you allow a program that you know and trust to run without any warnings
from Windows Defender. These get added to the allowed programs list when
Windows Defender alerts you about an item and you click Always Allow.
Later, you might change your mind about that. If you do, you can click
Tools in Defender to open its Options page. Then click Allowed Items.
From there you can click any item and choose Remove from List to have
Windows Defender start monitoring the program again.
4. Joining the SpyNet Community
The SpyNet community is a huge
group of Windows Defender users who keep a watchful eye on potential
spyware. Joining the community allows you to see how others are treating
suspicious software that hasn't yet been classified by experts. Seeing
how others deal with a suspicious file can help you make decisions about
suspicious files on your computer. When Defender finds a suspicious
file, the community's rating appears as a graph indicating the number of
members who have allowed the item.
To join the Microsoft
SpyNet community, open Windows Defender, click Tools, and choose
Microsoft SpyNet. Then choose the Basic Membership, Advanced Membership,
or No Membership option as described on the page that opens.
5. Windows Defender Web Site
The
Windows Defender Web site is a great resource for staying up-to-date
with spyware threats and tools. The Community link on that page offers
further resources for live interaction with others grappling with
spyware decisions and experts to help you make those decisions. You can
get to the Web site by clicking the Windows Defender Web site link on
Defender's Tools page.
