Another way to keep related
shapes together is to group them. Containers and lists are brand new in
Visio 2010, but groups have been around since Visio’s inception.
In Visio any two or more shapes
can be grouped together. As your Visio experience grows, you will see
that groups come in two flavors:
1. | Assemblies
of premade or finished shapes grouped together. Think of a set of
office furniture shapes grouped together to represent a standard cubicle
configuration.
|
2. | Elemental
graphical bits grouped together to form a single shape. Think of any
network PC shape. There is a thick outline, a screen, a bezel, a
keyboard, and some shading. These are all separate shapes, grouped
together to form a single symbol.
|
Groups are useful and have
their place, but they also cause some problems. When shapes are grouped
together, they get buried inside a group shell, which hides data, makes
formatting awkward, and can be confusing to users.
In
fact, the shortcomings of groups provided impetus for the invention of
containers and lists. Nevertheless, you should understand how groups
work in Visio, and how to recognize them, as well as how and why to use
them.
Creating a Grouped Shape
1. | Create a new drawing from any template.
|
2. | Drop three shapes on a page.
|
3. | Select all three shapes.
|
4. | In the Arrange group on the Home tab, click the Group drop-down and select Group.
|
5. | Move the group. Note that all the subshapes move with the group. That’s the point of grouping!
|
6. | With
the group still selected, choose a new fill color either from the Home
tab or by right-clicking. Note that all the subshapes are colored. This
is a potential drawback of groups.
|
7. | Type some text while the group is selected. Notice that the text goes to the group, not to any of the subshapes.
|
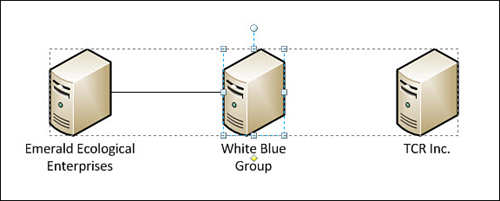
8. | Move one of the subshapes. To do this, you need to subselect
a shape. First, click the group, pause for a second, and then click on
one of the subshapes. You should see lighter-blue selection handles
around the subshape and a dashed line around the entire group, as shown
in Figure 1. You can now move the subshape within the group.
|
9. | Reselect
the group. To do this, first deselect everything by clicking on a blank
area of the page or pressing the Esc key. Then click once on the group
to reselect it.
|
10. | Ungroup
the shape. In the Arrange group on the Home tab, click the Group
drop-down and then select Ungroup. You now have four shapes. Of course,
you get your original three shapes back, but you also have one more
“clear” shape that holds the text that you typed on the group.
|
|
There
are some nifty shortcuts for grouping and ungrouping that will come in
handy if you end up dealing with groups a lot. Shift+Ctrl+G groups a
selection, and Shift+Ctrl+U ungroups a group or all groups in a
selection of shapes.
If you like menus, right-clicking reveals the Group item. This item has two subitems: Group and Ungroup.
|
When to Use Groups
You should use groups in the following scenarios:
For creating a single
shape. If you are creating a shape that will be used as a single
graphic, and users don’t need to have access to its innards, grouping is
appropriate. If your shape needs to have multiple text blocks, or
details with different fill and line colors, you have to group separate
pieces together.
For
temporary movement or arrangement. Perhaps you need to align a set of
shapes with another set, while maintaining spacing within the set. You
can quickly group your shapes together, move them around, align them,
and ungroup them.
For
planned ungrouping. An example could be an office plan where you have
several standard arrangements of furniture. These arrangements could be
stored as grouped units on a “library” page. Users could copy an
arrangement to the floorplan page for placement in an office and then ungroup to get the individual equipment and furniture items.
You
could even store such assemblies in stencils as masters and ungroup
them after dropping them into a drawing. But Visio presents a warning
when you ungroup masters, which can be unpleasant for users.
When Not to Use Groups
You might not want to use groups in the following scenarios:
For creating
categorical relationships. For example, you want to show which servers
are in North America and which are in Asia on a network diagram. This is
a good application for containers, not groups.
If
your shapes have Shape Data fields that need to be readily edited by
users of your diagram. Grouping buries data fields and forces users to
subselect to get at the data.
If
your shapes have other custom features such as right-click actions or
control handles that users will need to manipulate. Grouping buries
these features as well.
If you expect that users of your diagram won’t understand groups and subselecting subshapes.
If you are creating shapes
for others to use, they might not know about subselecting within groups
and might find it awkward. If you don’t mind subselecting and are the
only user of your shapes, then these caveats take on less importance.
Editing Inside a Group
If you want to change the look of a grouped shape, especially one that came from a stencil, you should add graphics inside
the group. Many beginners try to ungroup a shape, add graphics, and
then regroup the shape. This approach works for groups of shapes that
have been temporarily grouped together, but not for custom shapes that
may have special behaviors.
For example, the Server
shape from the Network and Peripherals stencil is a grouped shape that
has 22 Shape Data fields. It also has a special control handle that
enables you to reposition its text block easily.
If you ungroup the Server
shape, you destroy the text/control handle behavior and obliterate the
shape data fields. Regrouping doesn’t bring them back.
Editing Inside of a Group
1. | Start a new drawing from the Basic Network Diagram template.
|
2. | Drop a Server shape on the page.
|
3. | With
the Server selected, right-click it and choose Group, Open Server.
Because every shape on the page has a different name, you might see
something like Open Server.5 or Open Server.19.
|
4. | A
new window opens showing just the innards of the Server shape. You are
inside the group, in a group editing window. Notice that the caption
atop the Visio window has the text “<GROUP>” to remind you that
you are inside a grouped shape.
|
5. | From the Home tab, select the Rectangle or Ellipse tool and draw a shape or two on top of the server.
|
6. | Close
the group editing window by clicking the X (or “Close window” button)
in the top-right corner of the window. Make sure you don’t accidentally
close the Visio application window!
|
7. | You should now see your modified server from the “outside,” with your additions safely inside the group.
|
If you like the idea of adding
icons to server shapes, be sure to check out my “Visio Network Server
Shape Icon Customization Tool” at http://www.visguy.com/2009/09/11/visio-server-shape-icon-customization-tool/. It uses a VBA macro to automatically perform steps 1-7 at the click of a button!
|
Shape designers
have a way of locking groups against subselection. Many of the master
shapes in Visio’s stencils are groups but, you can’t subselect the
member shapes. This is great, because they feel like single shapes and
you don’t accidentally subselect parts within the group.
Designers normally don’t
want you to ungroup the masters they create. Nevertheless, you’re free
to try! Be advised, however, that you’ll see a warning if you try to
ungroup an instance of a master shape. Because designers incorporate
various protection and behavior into their shapes, unexpected things can
happen when you ungroup masters (such as subshapes jumping down to the
lower-left corner of your page!). So proceed with caution, or better
yet, try it out first in a test drawing that you don’t intend to save.
|
