Outlook offers great features
for managing your schedule. That it can display and even overlay
multiple calendars is very handy for viewing schedules for multiple
people or projects. If you use SharePoint to maintain shared calendars
for time off, projects, team deliverables, and so on, you can open those
calendars right in Outlook and work with them as if they were your own
calendars in Outlook. Updates that you make in Outlook are synchronized
to SharePoint, and vice versa. The first step is to connect the
SharePoint calendar to Outlook.
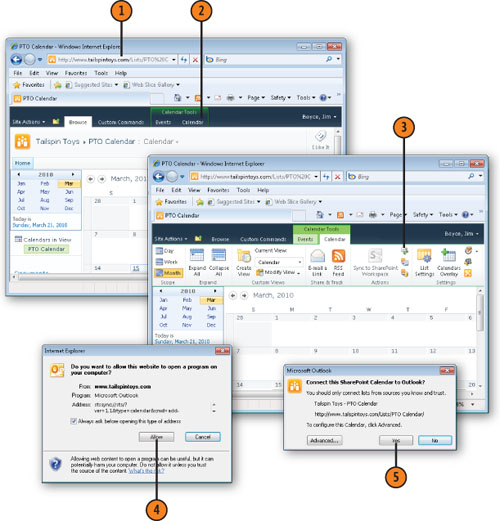
1. Connect a SharePoint 2010 Calendar to Outlook
Open the SharePoint site and navigate to the calendar that you want to connect to Outlook.
Click Connect To Outlook.
Click Yes.
Note:
You must have Outlook 2007 or later to be able to create or edit SharePoint calendar items from Outlook.
Note:
To view details of an item in a SharePoint calendar, just click the item in SharePoint to open a form that shows those details.
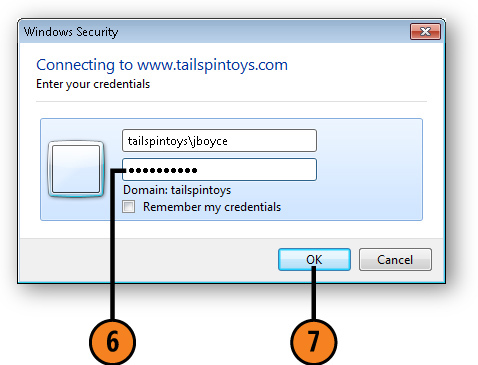
Enter your credentials for the SharePoint site, if you’re prompted.
Click OK.
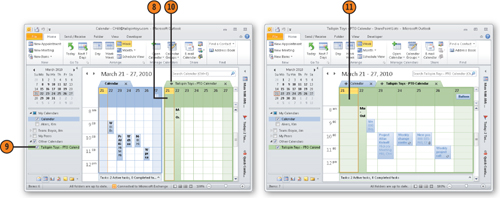
The SharePoint calendar appears in Outlook.
The calendar appears in the Navigation Pane.
Click to overlay with your own calendar.
Outlook shows the overlaid calendars so that you can see combined calendar information.
Note:
Use Alerts to have SharePoint notify you when a calendar changes.
Note:
Use RSS feeds to receive updates about calendar changes in your mailbox.
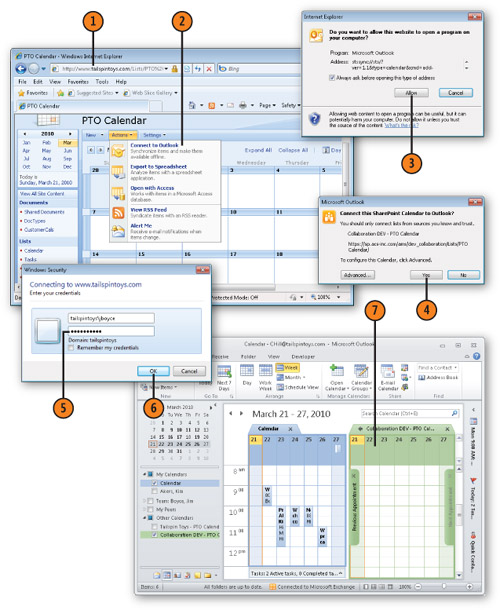
2. Connect a SharePoint 2007 Calendar to Outlook
Browse to the SharePoint calendar you want to connect to Outlook.
Click Actions and choose Connect To Outlook.
Enter your credentials for the SharePoint site, if you’re prompted.
The calendar appears in Outlook.
Note:
You can also use
Outlook 2010 to interact with SharePoint 2007 and SharePoint 2010
calendars, as well as other types of lists in SharePoint.
Note:
You’re not limited to
making calendar changes from Outlook. You can open the SharePoint site,
browse to the calendar, and if you have the right permissions, modify
the calendar from your Web browser.
3. Create SharePoint Calendar Items in Outlook
After
you have connected a SharePoint calendar to Outlook, you can work with
that calendar in the same way you work with a local calendar in Outlook.
You can create new items if you have the appropriate permissions in the
SharePoint calendar, and you can edit existing items if you have the
appropriate permissions for those items.
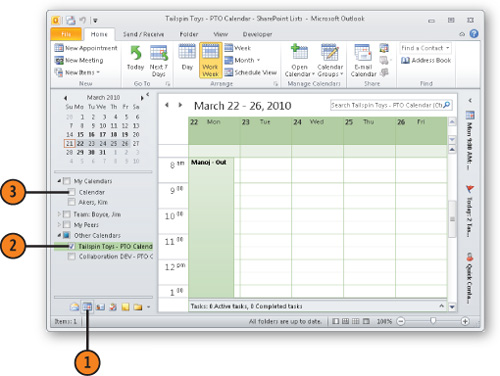
Click the Calendar icon in Outlook to open the Calendar folder.
Choose the SharePoint calendar you want to view.
If you want, clear the check box for your default calendar to remove it from the view.
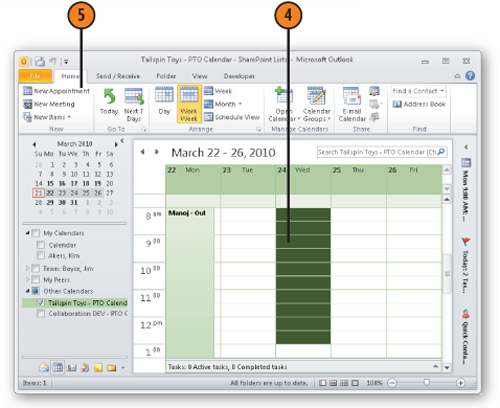
Select a time range in the calendar.
Click New Appointment.
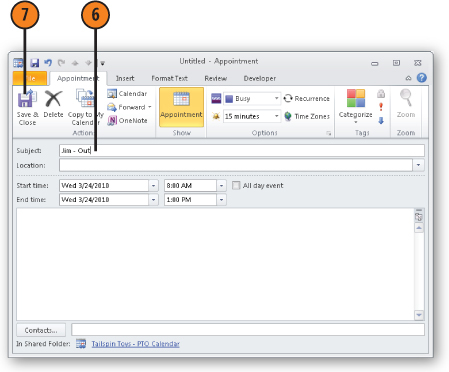
Enter a subject for the calendar item, and then add other details if you need to.
Click the Save & Close button.
The new item appears in Outlook.
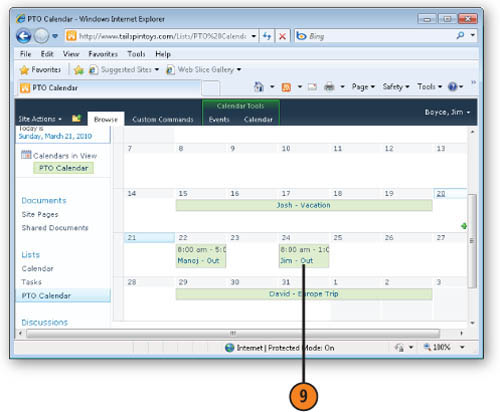
The new item also appears in SharePoint.
Note:
You can create meetings in a SharePoint calendar, but you won’t receive a tally of responses from requested participants.
