Windows 7 provides three options for controlling how your children (or even you) can use the computer. These are as follows:
Time Limits: Specify the hours during each day that the child can use the computer.
Games: Specify whether the child can play games on the computer, and set the rating and content types that are allowed.
Allow and Block Specific Programs: Select which programs the child can run.
1. Getting to the Parental Controls Page
Fortunately, you don't need
to be a computer guru to set up parental controls. After you've set up
appropriate user accounts, the rest is easy. Here are the steps:
Log in to a user account that has administrative privileges.
Do whichever of the following is most convenient for you at the moment:
Tap  , type par in the search box, and click Parental Controls.
Click the Start button, choose Control Panel, and click Set Up Parental Controls for Any User.
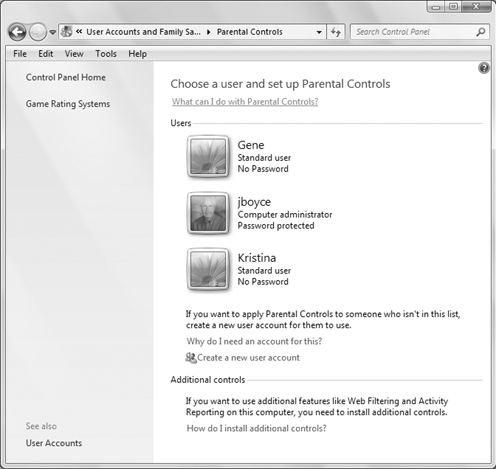
You come to a page that shows the name and picture for each user account you've created, as in the example in Figure 1. Click the user account for which you want to set up parental controls.
Now you're in the parental controls page shown in Figure 2. Any options you choose are applied to the account shown in the page. For example, in Figure 2, I'm setting up parental controls for a user named Gene.
To activate parental controls
for the account, choose On, Enforce Current Settings under the Parental
Controls heading. After you turn on parental controls, you can choose
which controls to apply for the selected user.
2. Setting Time Limits
To specify times when the child
is allowed to use the computer, click Time Limits. You see a grid of
days and times. Initially, all squares are white, meaning there are no
restrictions. You can click any time slot for which the child isn't
allowed to use the computer to turn it blue. Or, drag the mouse pointer
through a longer stretch of time to block more time.
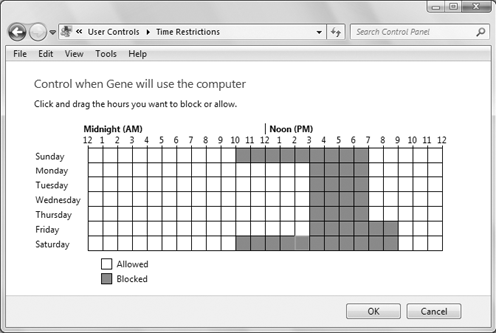
Optionally, you can place the
mouse pointer in the upper-left corner of the grid and drag down to the
lower-right corner to block all times. Then drag the mouse pointer
through the times that the child is allowed to use the computer. For
example, in Figure 3,
the child is allowed to use the computer from 10:00 am to 7:00 pm on
Sunday, 3:00 to 7:00 on Monday, Tuesday, Wednesday, and Thursday, 3:00
to 9:00 on Friday, and 10:00 a.m. to 9:00 p.m. on Saturday.
Click OK after setting
allowable times. You can change those settings at any time by clicking
Time Limits again when appropriate. For example, if the child needs a
"time out" from the computer, you can block out all the times so that
the child can't use the computer at all!
|
Sometimes you might want to
allow your children to use the computer but not use the Internet. For
example, they might need to do homework but you don't want them on the
Web. You can prevent their access to the Internet by blocking Internet
Explorer, but I block Internet traffic at the home firewall instead.
With a single click in the firewall interface, I can allow or deny
traffic to the kids' computer.
|
|
3. Controlling Game Play
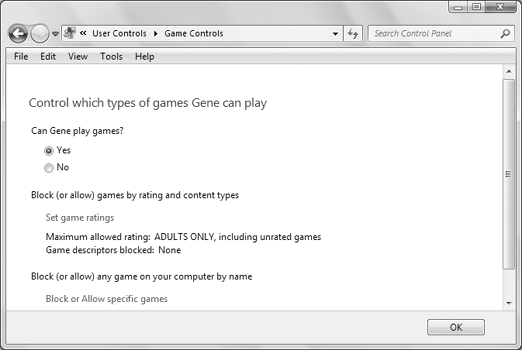
To control the child's game play, click Games. Doing so opens the page shown in Figure 4. If you don't want the child to use the computer for game play at all, choose No. Otherwise, choose Yes.
If you choose Yes, you can
block games based on content. Click Set Game Ratings. Your first options
will be based on ESRB ratings. ESRB stands for Entertainment Software
Rating Board, an independent third party that rates games for age
appropriateness and specific content. The ratings are similar to movie
ratings (G, PG, R, and so forth), but specific to computer games.

|
To use a rating system other
than ESRB, click the Back button until you get to the first parental
controls page that shows user accounts. Then click Select a Games Rating
System in the left column.
|
|
To prevent the child from
playing games that have no ESRB rating, choose Block games with no
rating. Then read each rating and click whichever rating is the most
appropriate for your child. The child will be able to play games up to,
and including, the rating you choose.
Then you can scroll down the
page and block more games based on content type. To block games based on
content, select the type of content you want to block. When you get to
the bottom of the list and have blocked all the content that you feel is
inappropriate, click OK.
Finally, you can click Block
or Allow Specific Games to allow or block games installed on your
computer. For each listed game, you can choose User Rating Setting to
block based on the ESRB rating. Or you can choose Always Allow to let
the child play the game. Or choose Always Block to prevent the child
from playing that game. Click OK after making your selections. Then
click OK again to return to the main parental controls page for your
child.
4. Blocking and allowing programs
Clicking Allow and Block
Specific Programs takes you to a page that lists all the programs
installed on your computer. There you can opt to allow the child to use
all programs. Or choose <child>
Can Only Use the Programs I Allow. If you choose the second option, you
need to select the check box next to each program that the child is
allowed to use. Click OK after making your selections.
When you've finished
setting up parental controls for the child, the account name and picture
summarize your settings. You can click OK to return to the list of user
accounts. From there, you can click another account to which you want
to assign parental controls. Or close the window if you're finished
setting up parental controls.
