3. Deploying ZTI Task Sequences to Target Computers
After creating the task sequence and the packages and images containing the
software the target computers need, you must complete a number of additional steps to
deploy the task sequence to the target computers. Eventually, you will be able to
simply boot the target computers and walk away as SCCM and MDT complete the entire
workstation installation with no further interaction. The following sections describe
what you must do to get to that point.
3.1. Creating Distribution Points
SCCM 2007 is a highly scalable application that you can use to manage hundreds
or thousands of computers all over an enterprise network. To deploy software to
computers at different sites, SCCM uses distribution points. A distribution point
is a computer that is designated as a storehouse for packages and images. To
perform a truly large ZTI deployment, you might have to use multiple distribution
points, and Configuration Manager enables you to select those points and control
the replication of the distribution packages and images to them.
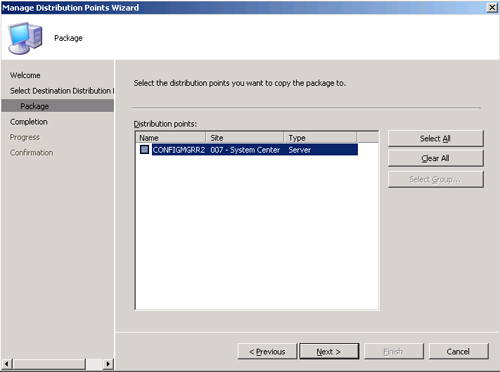
To select the distribution point you want to use for your ZTI deployment, you
must run the Manage Distribution Points Wizard by browsing to the Site
Database/Computer Management/Software Distribution/Packages folder, right-clicking
the Settings package you created with the task sequence and, from the context
menu, selecting Manage Distribution Points.
On the Package page of the wizard, as shown in Figure 12, you select one or more
distribution points. If you select more than one, the wizard replicates the
package to all of the points, in preparation for the deployment.
Note:
UPDATING DISTRIBUTION POINTS
If you
modify the CustomSettings.ini file at any point after you select the
distribution points you want to use, you must update the distribution points to
replicate your changes before you actually deploy your target computers.
When the wizard is completed, you must then browse to the Site
Database/Computer Management/Operating System Deployment/Operating System Images
folder and do the same thing to select distribution points for the operating
system image you created with the task sequence.
3.2. Customizing Task Sequences
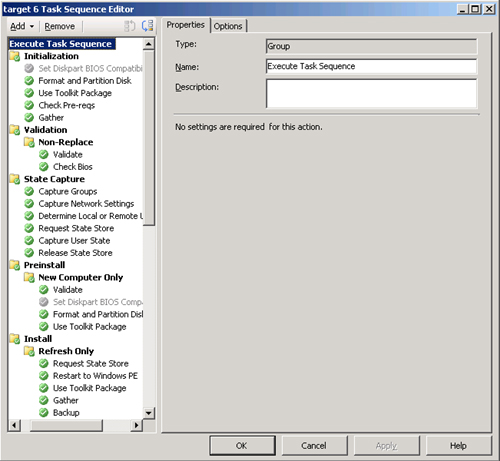
As in an LTI deployment, you can modify the task sequences you create in
Configuration Manager to customize them, although the interface is slightly
different. To edit a task sequence, browse to the Site Database/Computer
Management/Operating System Deployment/Task Sequences folder in Configuration
Manager, right-click the task sequence you created and, from the context menu,
select Edit. The Task Sequence Editor appears, as shown in Figure 13.
An SCCM task sequence, in its default configuration, usually needs no
modification to perform an entire workstation deployment. However, using this
interface, you can modify all aspects of the workstation installation, if
necessary. For example, the default task sequence disables the target computer’s
Administrator account and assigns it a random password. To modify that behavior
and specify a password of your own, you can browse to the PostInstall/Apply
Windows Settings page and select the Enable The Account And Specify The Local
Administrator Password option, as shown in Figure 14.

3.3. Adding the Target Computer to the Site Database
SCCM 2007 is designed to manage computers by
communicating with a client installed on each one. The ZTI task sequence includes
the installation of the client so that administrators can manage the workstation
after the deployment is complete. However, this client/server communication cannot
take place if there is no client. Therefore, when you deploy target computers
using the New Computer scenario, you must add the computer to the SCCM site
database so that it can communicate with the build server.
If you are using one of the other deployment scenarios, such as Refresh
Computer, Replace Computer, or Upgrade Computer, and your workstations already
have an operating system and the client installed and running, SCCM can
automatically discover them and initiate the deployment, so there is no need to
manually add them to the database.
To add New Computer targets to the data, browse to the Site Database/Computer
Management/Operating System Deployment/Computer Association folder, right-click it
and, from the context menu, select Import Computer Information. The Import
Computer Information Wizard appears and offers two options for importing computer
information, as follows:
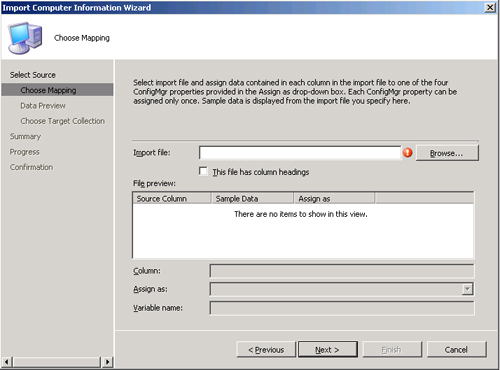
Import computers using a
file
To add a large number of target computers to the database, you can
create a comma-delimited text file with each line containing a computer
name and either an SMBIOS GUID value or the MAC address of the network
adapter in the computer. You then use the wizard’s Choose Mapping page,
as shown in Figure 15,
to specify the database field into which the wizard should add the values
in each column of your file.
Import single computer
To add a single target workstation to the
database, you use the wizard’s Single Computer page, as shown in Figure 16, to enter the
computer name and either an SMBIOS GUID value or the MAC address of the
network adapter in the computer.

3.4. Creating Collections
In SCCM, a collection is an organizational tool that enables administrators to
perform tasks on a specific set of computers, users, or groups. To perform a ZTI
deployment, you must add the target computers that you want to deploy to a
collection. The computers in the collection then receive an advertisement from
SCCM that informs them of the installation to be completed.
To create a collection, browse to the Site Database/Computer
Management/Collections folder in Configuration Manager. The console includes a
number of preconfigured collections, but you can add as many new ones as you need.
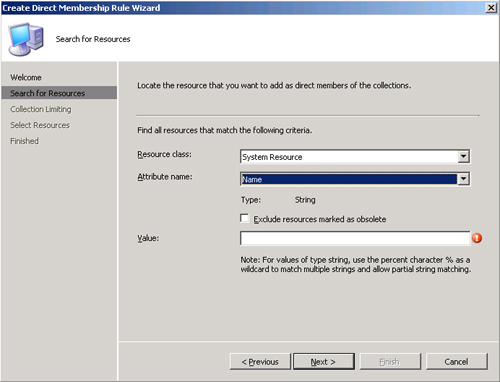
Right-click the Collections folder and, from the context menu, select New
Collection. This launches the New Collection Wizard, which in turn launches the
Create Direct Membership Rule Wizard, which you can use to select computers in the
database by searching for specific attribute values, such as names and MAC
addresses, as shown in Figure 17.
Collections are one way to regulate the progress
of your deployment project. By creating multiple collections, you can limit the
number of workstations you deploy at any one time, to prevent your networks from
being flooded with traffic. For example, if you determine that your subnets can
handle up to five simultaneous workstation deployments, you can create a number of
collections, each of which contains five target computers from every subnet. You
can then configure SCCM to advertise each collection at a different time so that
the collection deployments never overlap.
3.5. Creating Advertisements
Advertisements are the mechanisms by which SCCM makes software packages
available to collections of computers, users, or groups. In a ZTI deployment, you
use advertisements to make your task sequences available to the target computers
in your collections.
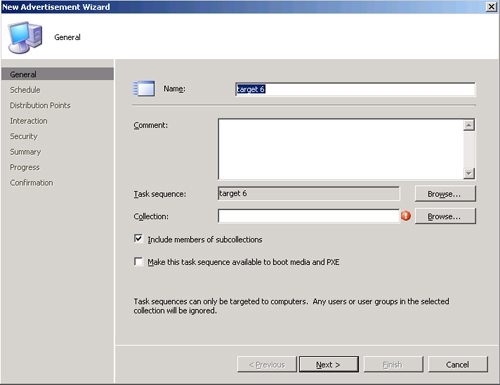
To create an advertisement, open Configuration Manager and browse to the Site
Database/Computer Management/Operating System Deployment/Task Sequences folder.
Right-click the task sequence you want to advertise and, from the context menu,
select Advertise. The New Advertisement Wizard appears, displaying the General
page, as shown in Figure 18. On
this page, you specify the name of the collection to which you want to advertise
the task sequence.
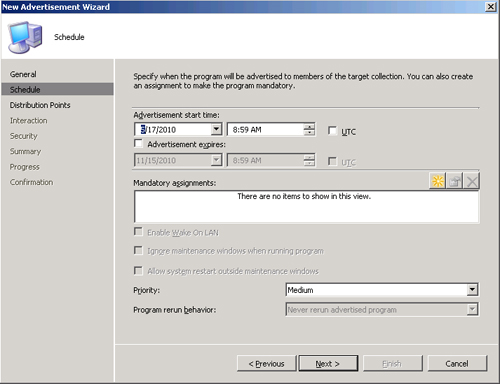
The
default values on the rest of the wizard pages will suffice in many cases, but you
can also use the Schedule page, as shown in Figure 19, to regulate when your
task sequences are advertised, thus providing another way to restrict the amount
of traffic generated by the deployment process.
3.6. Creating Boot Media
With the SCCM server prepared, all that remains is
to boot the target computers. After they are started, the target computers connect
to the server, and the installation of the packages and images you prepared
earlier proceeds automatically.
As with an LTI deployment, you can start the target computers using removable
boot media, such as DVDs, CDs, or USB flash drives, or you can use Windows
Deployment Services for workstations that are PXE-enabled.
To create task sequence bootable media, use the following procedure:
Open Configuration Manager and browse to the Site Database/Computer
Management/Operating System Deployment/Task Sequences folder.
Right-click a task sequence and, from the context menu, select Create
Task Sequence Media. The Task Sequence Media Wizard appears, displaying the
Select Media Type page, as shown in Figure 20.
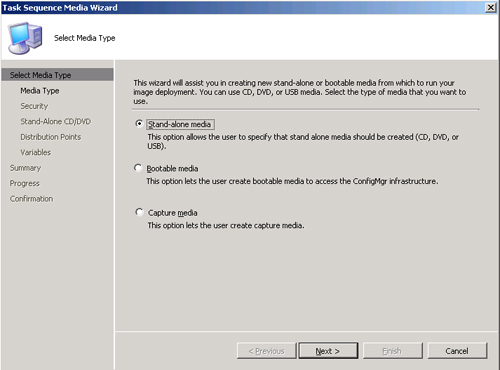
Select the Bootable Media option and click Next. The Media Type page
appears, as shown in Figure 21.
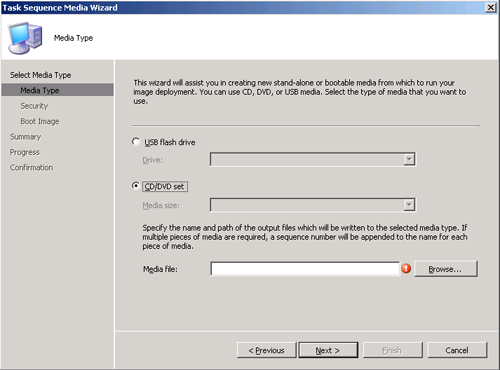
Select one of the following options:
SB flash drive
Insert the flash drive and select the drive letter. The wizard
burns the task sequence medium directly to the drive.
D/DVD set
Specify the name of the media file the wizard will create and
the path to the folder in which you want to create it. The wizard
creates an ISO file that you can burn to a CD or DVD.
Click Next. The Security page appears, as shown in Figure 22.

In the Password and Confirm Password text boxes, type a password to
protect the task sequence medium and click Next. The Boot Image page
appears, as shown in Figure 23.
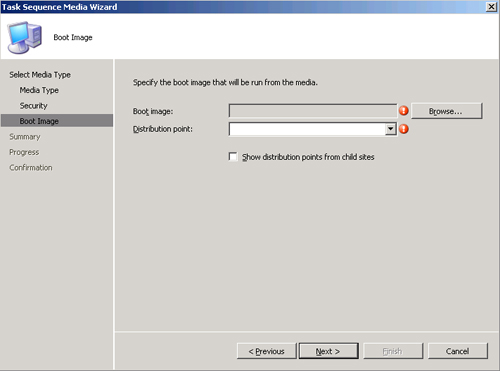
Click Browse. The Select A Boot Image dialog box appears.
Select the boot image you created with the Create Microsoft Deployment
Task Sequence Wizard and click OK.
In the distribution point drop-down list, select the distribution point
from which the target computer will access the boot image and click Next.
The Summary page appears.
Click Next. The wizard creates the boot medium and displays the Wizard
Completed page.
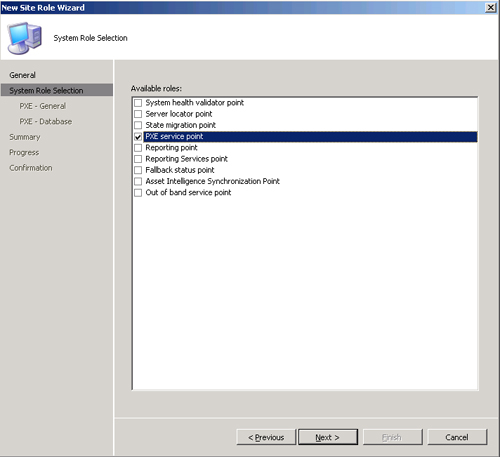
To boot the target workstations using WDS, you must configure SCCM to function
as a PXE service point so that the server can respond to boot requests generated
by the target computers. By right-clicking the Site Database/Site
Management//Site Settings/Site Systems/ folder and
selecting New Roles, you launch the New Site Role Wizard, with which you can add
the PXE service point role, as shown in Figure 24.