Sending a Presentation for Review Using E-Mail
After
you finish making changes to a presentation, you can quickly send it to
another person for review using e-mail. PowerPoint allows you to send
presentations out for review as an attachment, either a presentation,
PDF, or XPS document, using e-mail from within the program so that you
do not have to open your e-mail program. An e-mail program, such as
Microsoft Outlook, needs to be installed on your computer before you
begin. When you send your presentation out for review, reviewers can add
comments and then send it back to you.
Send a Presentation for Review Using E-Mail
 Click the File tab, click Save & Send, and then click Send Using E-mail.
 Click the Send as Attachment, Send a Link, Send as PDF, or Send as XPS.
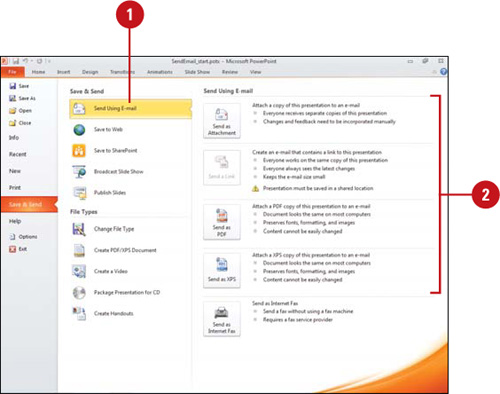
 If the Compatibility Checker appears, click Continue or Cancel to stop the operation.
Important
To complete the following steps, you need to have an e-mail program installed on your computer and an e-mail account set-up.
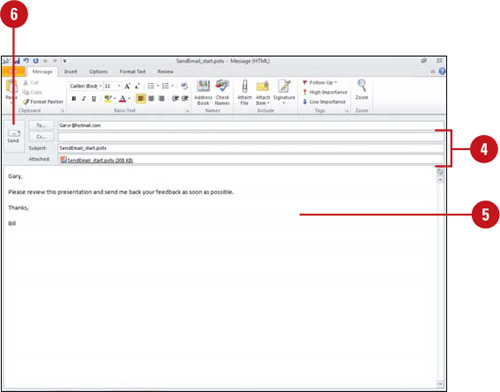
 Enter your recipients and subject (appears with document name by default).
- To add recipients from your address book or contacts list, click To, click the recipient names, click To, Cc, or Bcc until you’re done, and then click OK.
 Enter a message for your reviewer with instructions.
 Click the Send button.
Sending a Presentation by Internet Fax
If
you are a member of an online fax service, such as eFax, InterFAX,
MyFax, or Send2Fax, you can use PowerPoint to send and receive faxes
over the Internet directly from within your Microsoft Office program. If
you’re not a member, a Web site can help you sign up. You also need to
have Microsoft Outlook and Word installed to use the fax service and
Outlook must be open to send your fax. If Outlook is not open and you
send the fax, it will be stored in your Outbox and not sent until you
open Outlook again.
Send a Presentation by Internet Fax
- Click the File tab, click Save & Send, and then click Send Using E-mail.
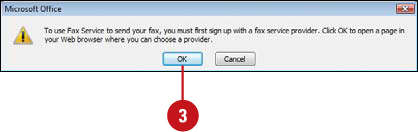
- Click the Send as Internet Fax button.
- If you’re not signed up with an Internet Fax service, click OK to open a Web page and sign up for one. When you’re done, return to PowerPoint, and then repeat Step 1.
- If the Compatibility Checker appears, click Continue or Cancel to stop the operation.
An e-mail opens in Microsoft Outlook with your document attached as a .tif (image) file.
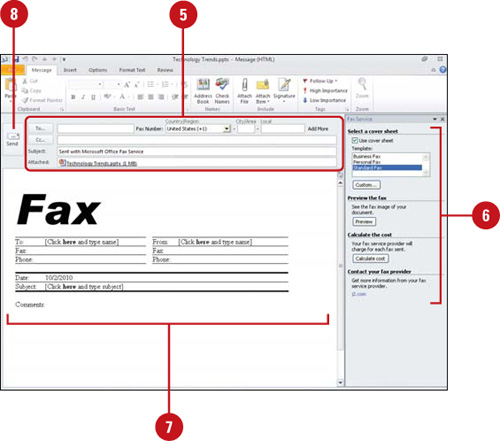
- Enter a Fax Recipient, Fax Number and Subject (appears with presentation name by default).
- You can enter a fax number from your address book. Country codes must begin with a plus sign (+).
- To send your fax to multiple recipients, click Add More, and then enter fax information.
- In the Fax Service pane, choose the options you want.
 Complete the cover sheet in the body of the e-mail message.
 Click the Send button.