Running a Macro
Running
a macro is similar to choosing a command in Word. When you record or
edit the macro, you have the choice of making it available through a
menu command, a keyboard combination, or even a toolbar button. As with
other options in Word, your choice depends on your personal
preferences—and you can choose to make more than one option available.
Where you store a macro when you save it determines its availability
later. Macros stored in the Personal Macro document are always
available, and macros stored in any other documents are only available
when the document is open.
Run a Macro
 Click the Developer or View tab.
 Click the Macros button.
- If you use the View tab, click View Macros on the menu.
Timesaver
Click the Macros button on the Status bar.
 Click the macro you want to run.
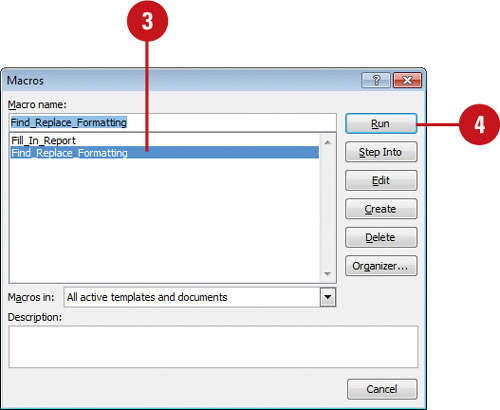
 Click Run.
Delete a Macro
- Click the Developer or View tab.
- Click the Macros button.
- If you use the View tab, click View Macros on the menu.
- Click the macro you want to delete.
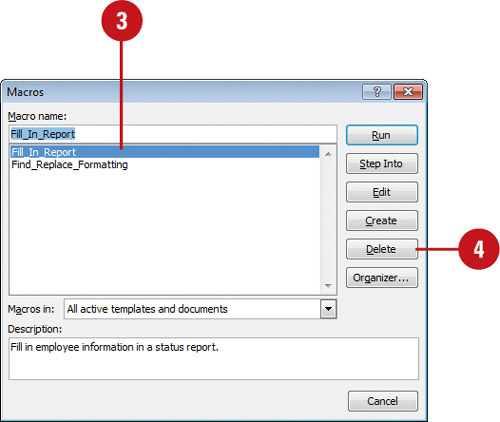
- Click Delete, and then click Delete again to confirm the deletion.
You can stop a macro. Press Ctrl+Break to stop a macro before it completes its actions.
Controlling a Macro
If
a macro doesn’t work exactly the way you want it to, you can fix the
problem using Microsoft Visual Basic for Applications (VBA). VBA allows
you to debug,
or repair, an existing macro so that you change only the actions that
aren’t working correctly. All macros for a particular document are
stored in a macro module, a collection of Visual Basic programming codes
that you can copy to other document files. You can view and edit your
Visual Basic modules using the Visual Basic editor. By learning Visual
Basic you can greatly increase the scope and power of your programs.
Debug a Macro Using Step Mode
- Click the Developer or View tab.
- Click the Macros button.
- If you use the View tab, click View Macros on the menu.
- Click the macro you want to debug.
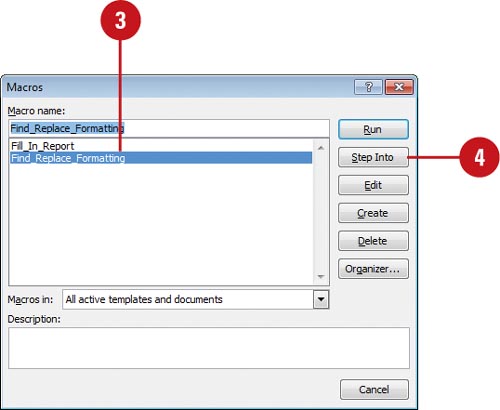
- Click Step Into.
The Microsoft Visual Basic window opens.
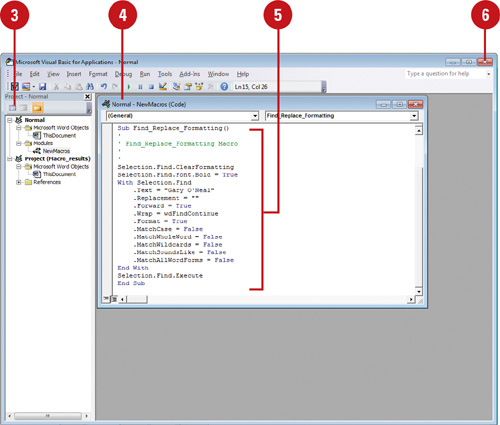
 Click the Debug menu, and then click Step Into (or press F8) to proceed through each action.
 When you’re done, click the Save button, click the File menu, and then click Close and Return to Microsoft Word.

 Click OK to stop the debugger.
You can display the Debug toolbar. In the Visual Basic editor, click the View menu, point to Toolbars, and then click Debug.
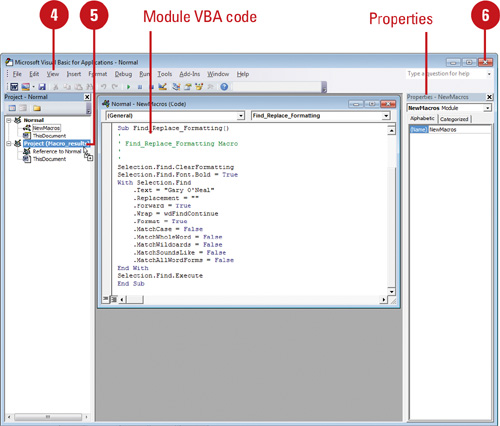
Edit a Macro
- Click the Developer or View tab.
- Click the Macros button.
- If you use the View tab, click View Macros on the menu.
- To open a macro, click the macro you want to change, and then click the View Code button.
- Click the Module window containing the Visual Basic code for your macro.
- Type new Visual Basic commands, or edit the commands already present.
- Click the Save button, and then click the program Close button.
Copy a Macro Module to Another Document
- Open the document files you want to copy the macro from and to.
- Click the Developer tab.
- Click the Visual Basic button.
- Click the View menu, and then click Project Explorer.
- Drag the module you want to copy from the source document to the destination document.
- Click the Save button, and then click the program Close button.
