In SharePoint 2010, the Secure Store Service (SSS)
replaced the single sign-on (SSO) service that you may have used in
SharePoint 2007. The SSS is a claims-aware authorization service that
uses a secure database to store user credentials such as user names and
passwords. These credentials are mapped to the secure database by using
application IDs, which are then used as an authorization handshake with external data sources.
The application ID is
important when trying to connect to SQL Azure because SQL Azure does not
live within the same domain as your SharePoint server. Thus, you
require a way to pass a separate set of credentials along to SQL Azure
when connecting using BCS. You manage the SQL Azure credentials by first creating an application ID and then passing those credentials along to SQL Azure at the time of connection.
The user is prompted upon first connecting to SQL Azure, which then
allows you to interact with the SQL Azure database.
Let’s go ahead and walk through how you create an application ID.
1. Create an Application ID
Open SharePoint Central Administration, and under Application Management, click Manage Service Applications. Under
Secure Store Service, click the Secure Store Service link (this is the
Secure Store Service Application proxy link). (If there is no Secure
Store Service instance created, you need to create a new Secure Store
Service instance. To do this, click New on the SharePoint ribbon and
select Secure Store Service. Provide a name for the service, accept the
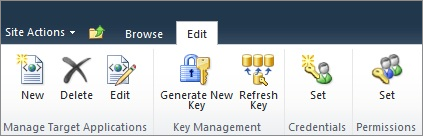
default options, and then click OK.) After you’ve clicked the Secure Store Service link, click New, as illustrated in the following image.
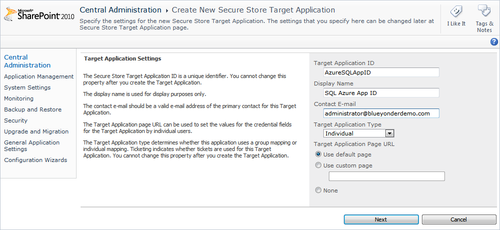
On the Target Application Settings page, provide a Target Application ID (for example, AzureSQLAppID), Display Name (SQL Azure App ID), and Contact E-mail (can be any email address), leave the other default options, and click Next.
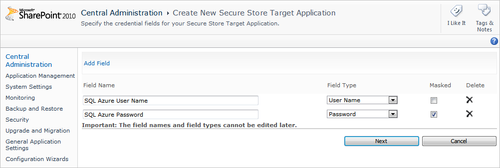
On
the Add Field page of the wizard, add a descriptive name for the User
Name and Password fields. Select User Name and Password in the Field
Type lists. Select the Masked check box to mask the Password field.
In
the final step of the wizard, enter a valid Windows Active Directory
alias to be the Target Application Administrator—this is required so
that a valid user is associated with the application ID. Click OK when
done to complete the creation of the application ID.

When you’ve completed the new application ID wizard, your new ID will appear in the application ID list.
With the application ID
created, you’ll now want to create the external content type—which
references the application ID to connect to SQL Azure.
2. Create an External Content Type
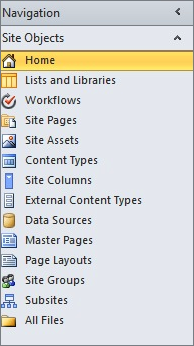
Navigate to your SharePoint site. Click Site Actions, and then select Edit With SharePoint Designer. When SharePoint Designer opens, click External Content Types in the left navigation pane.
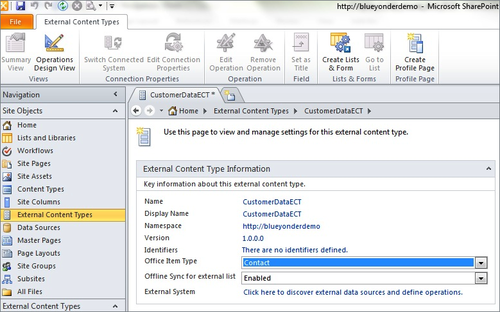
On the SharePoint Designer ribbon, click External Content Type. Provide a Name and Display Name (for example, CustomerDataECT),
set the Office Item Type to Contact, leave the default namespace,
ensure that Offline Sync For External List is enabled, and then select
the Click Here To Discover External Data Sources And Define Operations link.
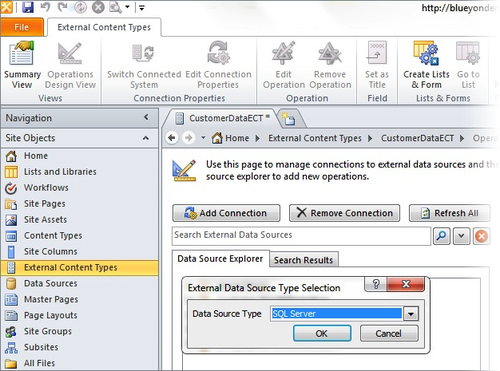
Click the Add Connection button to add the connection to your SQL Azure database.
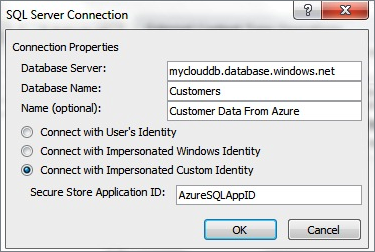
When prompted, enter the name of the SQL Azure server (for example, mydb.database.windows.net) and the database name (for example, Customers), and provide a display name for the external content type (for example, Customer Data from Azure). Before
clicking OK, click Connect With Impersonated Identity, and enter the
name of the application ID you created earlier (for example, AzureSQLAppID).
Now click OK to connect to SQL Azure and move on to the next process of creating the external content type. When
you are prompted for your SQL Azure credentials, enter the user name
and password that was created when you first created the SQL Azure
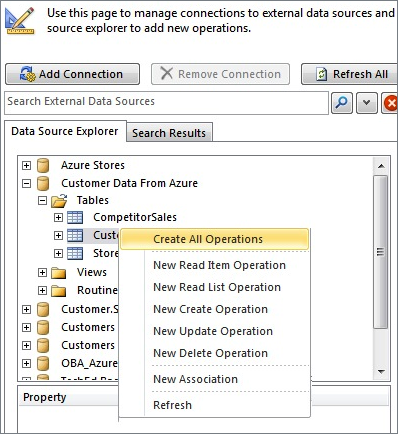
database. After authenticating with SQL Azure, SharePoint Designer will load the connection
into your existing list of external content type connections, and the
connection will display in the Data Source Explorer. Navigate down to
the table level, right-click the CustomerData table you created earlier, and select Create All Operations.
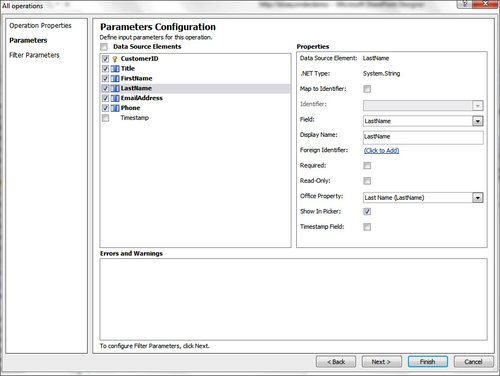
In the Operations wizard, you need to designate a primary key, so make sure the CustomerID
is mapped to the Map To Identifier by first checking the CustomerID
check box and then selecting the Map To Identifier check box. You also
need to make sure the LastName field is mapped to the Last Name Office property, so click the LastName
field and then select the Last Name option from the Office Property
list. You can optionally map the other fields from the table to various
properties in the Office Property list. Clear the Timestamp check box on
the left because you will not expose this in the list. When complete,
click Finish.
Click
the Save button on the main SharePoint Designer ribbon after you
complete the wizard. This saves the new external content type to the BDC
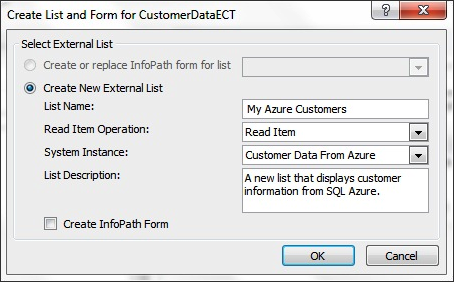
Metadata Store in SharePoint. With
the external content type saved to SharePoint, you’ll now want to
create a new list. To do this, click the Create Lists & Form button
on the SharePoint Designer ribbon. Provide a List Name and List Description and accept the other default options, as shown in the following image.
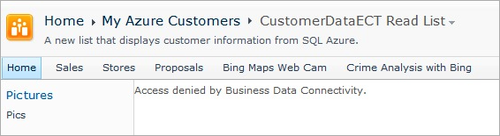
You can
now navigate to your SharePoint site to load your new list. However, you
may discover the following message when you try to load the new list.
This is because you have not yet configured the newly created external
content type with any permissions.
Now that you’ve created the ECT that connects SharePoint to SQL
Azure, you must set the permissions for the ECT in SharePoint Central
Administration. The permissions give you discrete control over which of
your SharePoint users can access the external list. This is a secondary
level of security by which you can separate the connection
to your SQL Azure database (using the application ID) from the
read/write permissions you assign to specific people in your
organization against the ECT. So, for example, if you wanted to give
five SharePoint users read-only access and two other users read/write
access, you can do that using the Business Data Connectivity Service in SharePoint Central Administration.
In the next exercise,
you’ll walk through the process of setting up permissions for the ECT by
using the Business Data Connectivity Service in SharePoint.
|
