So you have your first custom effect file but nothing
to show for it on the screen. Let’s get started by drawing a quad with
the new effect file.
Define the following two member variables to hold the Effect and the array of vertices make up the two triangles in the quad.
Effect customEffect;
VertexPositionColor[] userPrimitives;
The Effect type is used with
custom effects and is the base type of the five built-in effects. There
are a number of built-in vertex types. The VertexPositionColor contains both the vertex position and the color for the vertex. All built-in vertex types implement the IVertexType interface that requires the vertex type to specify the VertexDeclaration. As we discussed before, the VertexDeclaration is used to tell the graphics hardware how the fields of the vertex should be used, such as position and color.
Next, in the games LoadContent method, load the Effect and define each of the vertices.
// Load custom effect and set parameters
customEffect = Content.Load<Effect>("CustomEffect");
customEffect.Parameters["World"].SetValue(Matrix.Identity);
customEffect.Parameters["View"].SetValue(Matrix.CreateLookAt(new Vector3(0, 0, 3), new
Vector3(0, 0, 0), new Vector3(0, 1, 0)));
customEffect.Parameters["Projection"].SetValue(Matrix.CreatePerspectiveFieldOfView (MathHel
per.PiOver4, GraphicsDevice.Viewport.AspectRatio, 0.1f, 100.0f));

// Create the verticies for our triangle
userPrimitives = new VertexPositionColor[4];
userPrimitives[0] = new VertexPositionColor();
userPrimitives[0].Position = new Vector3(-1, 1, 0);
userPrimitives[0].Color = Color.Red;
userPrimitives[1] = new VertexPositionColor();
userPrimitives[1].Position = new Vector3(1, 1, 0);
userPrimitives[1].Color = Color.Green;
userPrimitives[2] = new VertexPositionColor();
userPrimitives[2].Position = new Vector3(-1, -1, 0);
userPrimitives[2].Color = Color.Blue;
userPrimitives[3] = new VertexPositionColor();
userPrimitives[3].Position = new Vector3(1, -1, 0);
userPrimitives[3].Color = Color.Yellow;
Notice that the Effect is loaded through the content pipeline. After loading the effect, set three properties for the World, View, and Project matrices. Although the built-in effects expose these as properties in the API surface, your Effect can’t because there is no guarantee that the Effect will use those global variables. Instead, use the Parameters collection and specify the parameter by string name.
Finally, in the games Draw method, tell the graphics card that you are using this specific effect and to draw the two triangles.
// Start using the BasicEffect
customEffect.CurrentTechnique.Passes[0].Apply();
// Draw the primitives
GraphicsDevice.DrawUserPrimitives<VertexPositionColor>(PrimitiveType.TriangleStrip,
                                                       userPrimitives, 0, 2);
Before using an Effect, call Apply on the specific EffectPass you plan to use. In this case, you know there is only one EffectTechnique, so use the CurrentTechniqueEffectPass, so use index 0. and there is only one
Now you are ready to draw. Press F5 and see the glory that is your first effect. Figure 1 shows an example of what you should see.
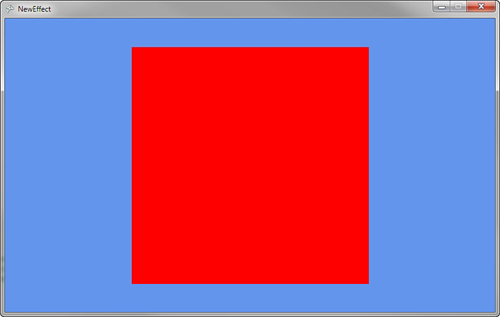
Well that’s not too exciting,
but it draws a pure red quad to the screen. Notice that the colors that
were defined for each vertex are not used because the template pixel
shader just outputs the single red color and does not use the vertex
color. Don’t worry about it—it gets better looking from here.
