MSI Export/Import/Install
You have seen in the
previous section how to import and install a BizTalk application
manually. Soon you will realize, if you have not already, that deploying
an application manually is a long and error-prone process. In order to
simplify the process of exporting, importing, and installing a BizTalk
application, Microsoft provides with BizTalk 2006 a way to do all the
preceding using MSI packages.
Exporting a BizTalk
application consists of taking all BizTalk artifacts for a particular
application and packaging them into an MSI file. Exercise 2
walks you through the process. You do not have to export all the
different BizTalk artifacts into a single MSI. You can also decide to
split your BizTalk artifacts into multiple MSI packages. This is
convenient or BizTalk applications that contain too many artifacts.
|
This exercise shows how to export an MSI application. To perform this exercise, please ensure that you completed Exercise 1 successfully. Then follow these steps:
Open the BizTalk Administration Console: Select Start =>All Programs => Microsoft BizTalk Server 2006 => BizTalk Server and then click the Administration icon. In the BizTalk Server 2006 Administration Console, expand BizTalk Server 2006 => BizTalk Group => Applications => PROBIZTALK Deploy Sample Application.
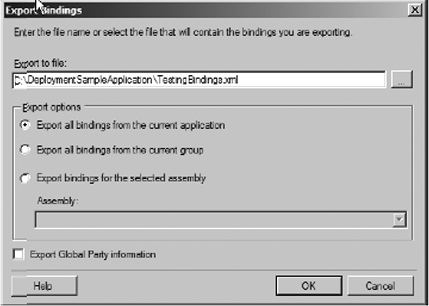
Add the testing binding file to the PROBIZTALK Deploy Sample Application: Right-click PROBIZTALK Deploy Sample Application, point to Export, and then click Bindings. In the Export Bindings window shown in Figure 5, type C:\DeploymentSampleApplication\ TestingBindings.xml in the Export to file field and select Export all bindings from the current application.
Open C:\PROBIZTALK\DeploymentSampleApplication\TestingBindings.xml with Notepad. Replace all occurrences of the text "\Documents\" with "\TestDocuments\". Save the file and close Notepad. In the BizTalk Server 2006 Administration Console, expand BizTalk Server 2006 => BizTalk Group => Applications => PROBIZTALK Deploy Sample Application. Right-click the PROBIZTALK Deploy Sample Application, point to Add, and then click Resources. In
the Add Resources window, click the Add button and select the
C:\PROBIZTALK\ DeploymentSampleApplication\TestingBindings.xml file. In the Add Resources window, type Testing
in the Target Environment text box. This text box allows you to specify
which environment a binding file is applied to upon installation of the
BizTalk MSI application. In the Add Resources window, click the OK button.
Add a pre-processing script to the PROBIZTALK Deploy Sample Application: In Notepad, create a new file and insert content of the command file presented in Listing 2. Save the file as C:\PROBIZTALK\DeploymentSampleApplication\TestingDirs.cmd. In the BizTalk Server 2006 Administration Console, expand BizTalk Server 2006 => BizTalk Group => Applications => PROBIZTALK Deploy Sample Application. Right-click the PROBIZTALK Deploy Sample Application, point to Add, and then click Pre-processing scripts. In the Add Resources window shown on Figure 6, click the Add button, and select the C:\PROBIZTALK\DeploymentSampleApplication\TestingDirs.cmd file. In the Add Resources window, click the OK button.

Export the PROBIZTALK Deploy Sample Application to an MSI file: In the BizTalk Server 2006 Administration Console, expand BizTalk Server 2006 => BizTalk Group => Applications => PROBIZTALK Deploy Sample Application. Right-click the PROBIZTALK Deploy Sample Application, point to Export, and then click MSI. When the Welcome window appears as shown on Figure 7, click the Next button.

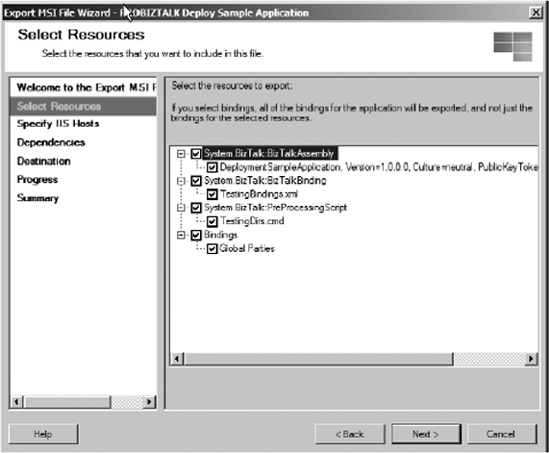
In the Select Resources window shown on Figure 8, ensure that all BizTalk artifacts are checked, and then click the Next button. Since the application does not have any virtual directories, click the Next button in the Specify IIS Hosts window as shown on Figure 9.

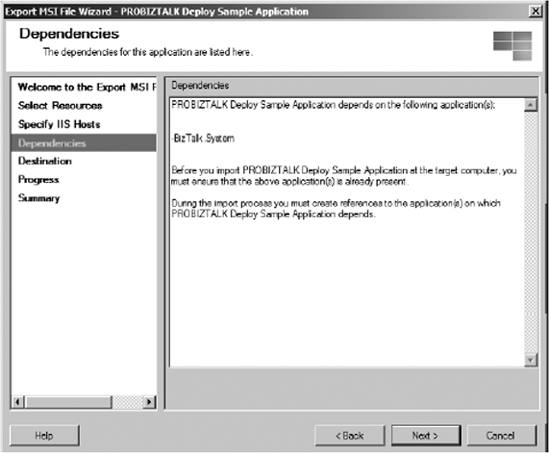
The Dependencies window shown in Figure 10
enumerates all the dependencies for the application. As you can see in
this particular case, this application depends only on the
BizTalk.System application. Click the Next button.
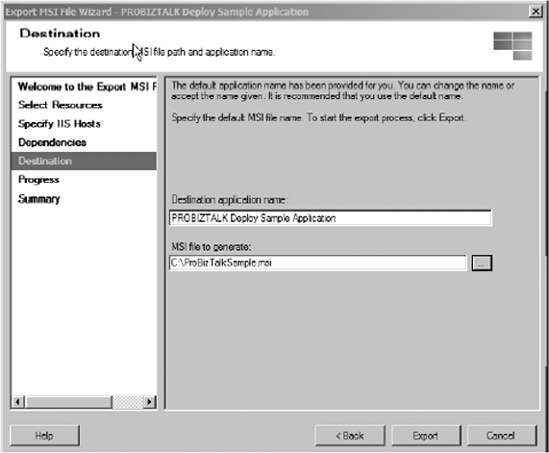
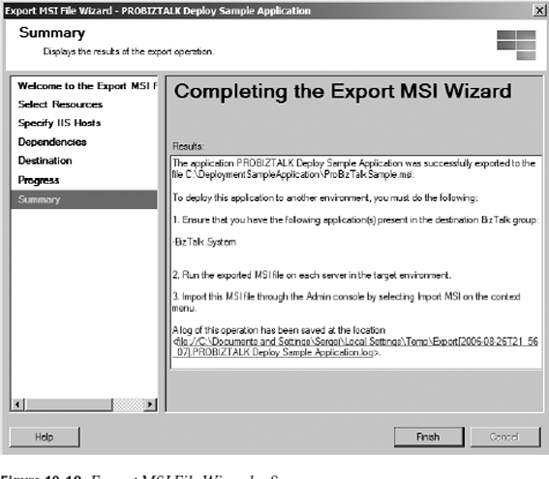
Type C:\ProBizTalkSample.msi and then click the Export button in the Destination window as shown in Figure 11. In the Summary window shown in the Fig 12, click the Finish button.
|
Once you have
exported your BizTalk application to an MSI package, you can import or
install it onto a new BizTalk Server Group. When importing or installing
an MSI BizTalk application, you can specify the following parameters:
Application name:
The name of the application used to import or install the MSI package.
If the application name is not provided, the default BizTalk application
name will be used. Environment:
The target environment where the MSI package is being imported or
installed. This parameter allows all binding files for the specified
environment to be applied to the BizTalk server. If the environment
parameter is not specified, all the binding files that do not specify a
target environment will be applied. Overwrite: This flag specifies whether or not to overwrite the existing artifacts.
Table 1 displays what operations are executed when a BizTalk application is imported or installed.
Table 1. Operations Executed When Importing or Installing a BizTalk Application| Operation | Occurs While Importing | Occurs While Installing |
|---|
| Add references in the BizTalk Management Database. | X | | | Copy BizTalk artifacts to the BizTalk server. | X | X | | Apply binding files for the specified target environment. | X | X | | Execute pre- or post-processing scripts. | X | X | | | The scripts will only perform actions that will run when the BTAD_InstallMode is equal Import.. | The scripts will only perform actions that will run when the BTAD_InstallMode is equal Install. | | Store
file-based artifact (assem- X blies, virtual directories, files,
scripts, certificates, BAM artifacts, and BAS artifacts) data in the
BizTalk Management Database.. | X | | | Store policies in the Rule Engine database. | X | | | Store BAM artifacts in the BAM Primary Import database. Deploy BAM definitions | X | | | Add BAS artifacts to the BAS site. | X | | | Add BizTalk assemblies to the Global Assembly Cache. | Only if BizTalk assemblies were added to the BizTalk application with the "Add to global assembly cache on MSI import" option. | Only if BizTalk assemblies were added to the BizTalk application with the "Add to global assembly cache on MSI install" option. |
The BizTalk
Administration Console and BTSTask command-line application are the two
applications that allow a user to export, import, and install a BizTalk
MSI file. Please note that the BTSDeploy tool from BizTalk Server 2004
is also available to perform these tasks, but it has been deprecated and
scripts should be migrated to the BTSTask tool. Exercise 10-3 walks you through the process of importing a BizTalk application using the BTSTask tool.
|
To perform this exercise, please ensure that you completed Exercise 2 successfully. Then follow these steps:
Remove the PROBIZTALK Deploy Sample Application: In the BizTalk Server 2006 Administration Console, expand BizTalk Server 2006 => BizTalk Group => Applications => PROBIZTALK Deploy Sample Application. Right-click the PROBIZTALK Deploy Sample Application and then select Stop. In the Stop 'PROBIZTALK Deploy Sample Application' window shown in Figure 13, select the Full Stop - Terminate instances radio button and then click Stop.

In the BizTalk Server 2006 Administration Console, right-click the PROBIZTALK Deploy Sample Application and then select Delete. In the confirmation message box, click the OK button. Then, close the BizTalk Server 2006 Administration Console.
Import the PROBIZTALK Deploy Sample Application: Open the Visual Studio 2005 Command Prompt. In the Visual Studio 2005 Command Prompt, execute the following command: BTSTask ImportApp /Package:C:\ProBizTalkSample.msi /Environment:Testing
/ApplicationName:"PROBIZTALK Deploy Sample Application" /Overwrite.
If the script was executed successfully, the content of the command prompt will resemble Figure 14.
|

Typical Deployment Cycle
In the previous
sections, you learned how to deploy a BizTalk solution manually and
using the MSI export and import method. In this section, you will learn
how to move a BizTalk application from the development environment all
the way to production using the steps outlined in the preceding two
sections. There are five main steps to move an application from one
environment to another:
Deploy from Visual Studio 2005 the assemblies in a BizTalk solution:
In this step, the BizTalk developers deploy a BizTalk solution on their
development environment. Once the developers have tested their BizTalk
application adequately, they proceed to the next step. Add BizTalk artifacts to the deployed BizTalk application:
In this step, the BizTalk developers or the integrators add artifacts
to the BizTalk application in order to deploy their solution to another
environment or BizTalk Server Group. Typically, this step involves
creating new binding files specific to the next target environment,
adding processing scripts to automate as much as possible the
installation of the BizTalk MSI application to the next target
environment, and adding any other BizTalk artifact (like certificates
and readme files) necessary on the target environment. Export the BizTalk application to an MSI file:
In this step, the developers or the integrators proceed to export the
modified BizTalk application to an MSI file using the BizTalk
Administration Console or the BTSTask command-line tool. They will have
to decide whether or not they want to create one or more MSI packages
and what BizTalk artifact they wish to include in them. Import and install the MSI file:
Once the MSI package or packages are ready, it is time to import and
install them on the target environment. The MSI file will register all
BizTalk artifacts in the target environment's BizTalk Management
Database. It will also copy and register in the GAC or in the Windows'
registry all .NET assemblies and COM libraries on the BizTalk servers
where the packages are installed. Please keep in mind that you must
install the MSI file on each BizTalk server in a BizTalk Server Group. Start the application and verify that it is functioning correctly:
At this point, the BizTalk developer or integrator starts and tests the
newly installed BizTalk application. Once that person is satisfied with
the results, he can repeat steps 2 through 5 to deploy the BizTalk
application to other staging environments until he eventually releases
the BizTalk application to production.
|
