The CRM Event Management accelerator provides
functionality for event management within CRM. Out of the box, CRM
offers rich campaign management, and this accelerator takes your
marketing campaigns to the next level.
One of the main
features of this accelerator is extending CRM campaign functionality to a
web portal, although a web portal is not required, and the
functionality this accelerator provides can be used solely within CRM.
This accelerator, shown in Figure 1, provides the following functionality:
Event planning,
such as booking a venue, managing presenters, managing catering, and
managing presentations and content preparation
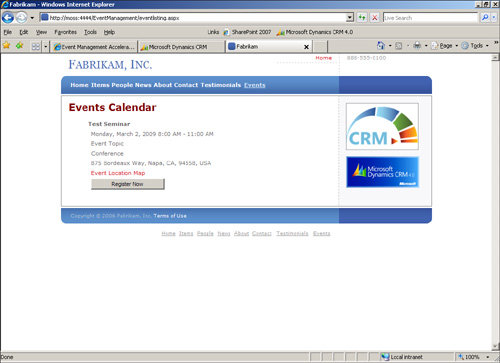
Event attendee management features, including inviting the target audience via phone, fax, letter, and email, and the Web Allow CRM users to manage registrations via phone, letter, fax, email, and web Track all customers who attend the event Event Review - Microsoft Dynamics CRM reports that measure the effectiveness and return on investment (ROI) of the event
Prerequisites and Modifications
The following prerequisites exist for the Event Management accelerator:
A website running the .NET Framework. The
standard implementation is designed to work with AD authentication;
however, because source code is provided, an IFD implementation is
possible. This accelerator has not been road-tested within 64-bit environments. SSL is highly recommended because this accelerator allows users to access potentially sensitive customer data. If
you’ve implemented IFD or service provider licensing agreement (SPLA)
deployments, you must modify the authentication code within the portal. This
portal is single-tenant, and so it will point to only one organization
within a CRM deployment. If you’re running multitenancy, you need to
deploy a web portal for each organization.
Note
The Microsoft Dynamics CRM External Connector license is required if the portal is exposed on the Internet.
This accelerator modifies the following CRM entities:
Adds new campaign attributes Adds new campaign response attributes Adds many new CRM entities for events Adds new CRM views Adds new CRM plug-in Modify campaign forms Adds new JavaScript functions Adds ASP.NET user controls
For a detailed
breakdown of modifications, review the Microsoft Dynamics CRM Event
Management Accelerator Installation Guide.doc that’s included in the
\Documentation folder included with the download files. All files can be
downloaded from the Codeplex website at http://crmaccelerators.codeplex.com.
Once the eService accelerator is downloaded and unzipped, you’ll find the following in the Source folder:
Documentation for installation and extensibility All required customization files Sample HTML, CSS, and images for a sample website portal Visual Studio source code for all examples
Event Management Installation
There are four main components to the installation:
CRM entity customizations ASP.NET user controls Custom CRM workflow assembly Interface for configuring the eService user controls
The following subsections outline the steps for a standard installation.
Create an Event Management Accelerator User
1. | You
will need to assign a user for which the Event Management accelerator
will use for authentication. You can either configure your own user, or
you can create a user specifically for use with the accelerator. Within
Active Directory, create a user whose logon name is crmwebuser
or similar. This can be done by right-clicking an administrator user
and selecting Copy (to inherit all the administrator permissions).
| 2. | If
your user does not exist within CRM, add it. Within CRM, create the
crmwebuser and assign the appropriate email address if necessary.
| 3. | Assign the appropriate role to this user (for example, System Administrator).
|
Prepare the Installation
1. | Run
the installation executable that you downloaded from Codeplex. At the
time of this writing, this is EventManagement_V1.0_RTW.exe.
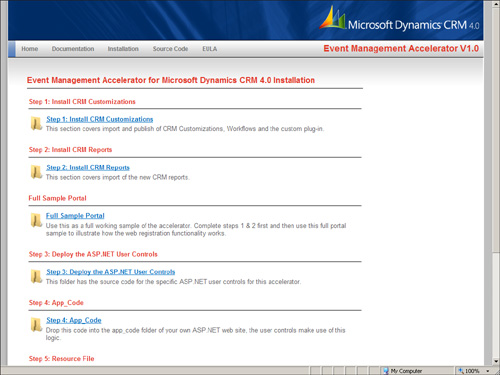
| 2. | Once you’ve extracted the files, you can use the wizard to configure most of the necessary components (see Figure 2).
|
Wizard Step 1: Install CRM Customizations
1. | Within
the Event Management accelerator Installation Wizard, click Step 1:
Install CRM Customizations. The \Installation\Step 1 - CRM
Customizations\ folder is displayed. Copy the
EventManagement-Customizations.xml file to your desktop.
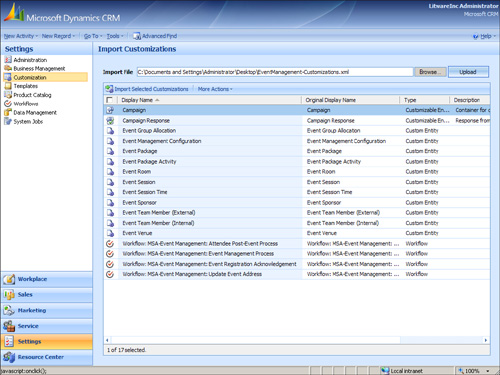
| 2. | Open CRM and navigate to Settings, Customization, Import Customizations.
| 3. | Click
Browse and open EventManagement-Customizations.xml on your desktop.
Then click Upload, and the Event Management customizations will display
(see Figure 3).
Note
When
installing the Event Management accelerator, you will lose any changes
you have made to the entities previously described (limited to form
changes and not schema changes). Be sure to back up your customizations
before performing an implementation.
| 4. | Select
all displayed customizations, and then click Import Selected
Customizations. All customizations should import successfully.
| 5. | Navigate
to Settings, Customization, Customize Entities. Ensure that the new
event customizations are present within the list of CRM entities, and
then click More Actions, Publish All Customizations.
| 6. | Run msa_eventmanagement.Install.exe.
Note
The msa_eventmanagement.Intall.exe will not overwrite existing forms, onLoad events, or onSave events. Instead, all new customizations will be merged with these existing customizations. In addition, before running this EXE, you’ll receive specific instructions about configuring this command-line utility.
| 7. | Within the \Installation\Step 1 - CRM Customizations\ folder, open the register.xml file (see Figure 4).
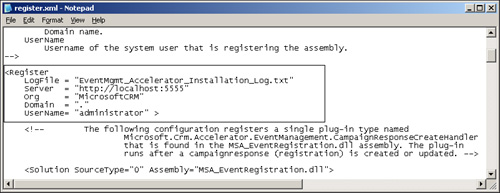
Set Server to the
CRM web service URL, which is the URL you use to access the front page
of CRM; for example, http://localhost:5555. Set
Org to the name of the organization. Remember not to use spaces in the
name. (For example, MicrosoftCRM is used if the org name is Microsoft
CRM.) Set Domain accordingly. Within the standard virtual PC image for CRM, use a period (.). Set
UserName to your logged-in username or a CRM user with a high level of
privileges, such as a user with a System Administrator role. Save your changes.
| 8. | Before
running the msa_eventmanagement.Install.exe, make sure you’re logged in
to Windows as a user that exists within CRM, and you have appropriate
permissions to make the customizations, such as System Administrator.
| 9. | Navigate to the \Installation\Step 1 - CRM Customizations\ folder and run the msa_eventmanagement.Install.exe.
| 10. | You’ll
be prompted to enter your password. Type it and then press Enter. After
authenticating, the program will create a CRM connection, delete
duplicate solutions if detected, and then register the
MSA_EventRegistration.
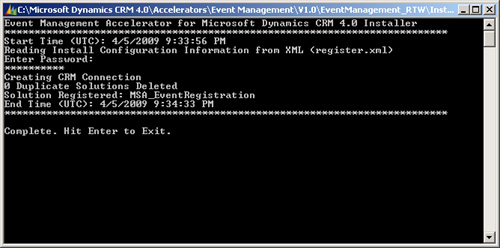
| 11. | When the program has completed successfully, you are prompted to press Enter to continue (see Figure 5).
| 12. | If
you encounter any problems during the installation, additional
information may be available within the
msa_eventmanagement.Install.Log.txt file located within the same
directory as the EXE. |
|