We have two options available to implement a search capability for our Tropical Green site:
The MCMS Connector
includes the following three controls that assist you in implementing
search functionality for an MCMS site by leveraging SharePoint search
scopes:
SearchInputControl: Used to create the search form input for a search to be submitted.
SearchResultControl: Takes search criteria entered in the SearchInputControl, executes the search against the SPS search Web Service, and displays the results in list form.
SearchMetaTagGenerator: Creates HTML META tags based on the PropertyType setting. META tags generated can include standard page properties as well as custom properties.
You can use these
three controls on the same page or separate pages. This is very
convenient as you may wish to include a small search keyword input box
on all pages in your site that submits the search to a separate results
page, but you might want to provide the search input on the search
results page as well.
Once we have created a
working search page using the MCMS Connector controls, we’ll create a
custom solution that won’t include anything provided in the MCMS
Connector. Our solution will include an advanced search, specific to our
site, and a customized search result listing.
Both options have
distinct advantages and disadvantages. Which one you’ll implement on
your MCMS site will depend entirely upon your requirements,
customization needs, and available development time. The following table
outlines a few of the more prominent advantages and disadvantages of
using the MCMS Connector controls as well as rolling your own solution:
Implementing search leveraging MCMS Connector controls:
| Advantages | Disadvantages |
|---|
| Fast install and integration into pages & templates | No customization of search input controls |
| Will work out of the box with minimal configuration | No customization of search result list |
Implementing search with a custom solution:
| Advantages | Disadvantages |
|---|
| Complete control over layout of search input form | Requires extra development time and testing |
| Complete control over search result list | |
| Create special advanced search based on specific site requirements | |
Searching with the MCMS SharePoint Connector
The first thing we’ll do
for this is to create a new search page in our Tropical Green project.
This page will not be a new MCMS template, but a regular ASP.NET page.
You could make this a template, but there’s no real advantage in doing
so because there will only be a single search page on our site with no
extra content.
1. | In Visual Studio .NET, right-click on the Tropical Green project and select Add Web Form.
|
2. | Name the new ASPX page Search.aspx and click Open.
|
3. | If the page doesn’t load in Design mode, click Design in the lower left corner.
|
4. | Change the page layout to FlowLayout.
|
5. | Drag the /Styles/styles.css, /UserControls/TopMenu.ascx, and /UserControls/RightMenu.ascx files from Solution Explorer onto the designer.
|
6. | Switch to HTML mode and modify the body tag as follows: <body topmargin="0" leftmargin="0" rightmargin="0">
|
7. | Add the following code between the <form> and </form> tags, replacing the two user controls that were just added:
<form id="Form1" method="post" runat="server">
<table width="100%" border="0" cellspacing="0" cellpadding="0">
<tr>
<td width="100%" colspan="2" valign="top" bgcolor="#ffcc00">
<img src="/tropicalgreen/images/Logo.gif">
</td>
<td vAlign="top" rowSpan="10"> </td>
</tr>
<tr bgColor="#66cc33">
<td colSpan="2"><uc1:TopMenu id="TopMenu1"
runat="server"></uc1:TopMenu></td>
</tr>
<tr>
<td vAlign="top" style="PADDING-RIGHT:30px; PADDING-LEFT:30px;
PADDING-BOTTOM:30px;">
<p> </p>
<table cellspacing="0" cellpadding="10" border="1"
bordercolor="#669900">
<tr vAlign="top">
<td>Tropical Green Search:</td>
</tr>
<tr>
<td vAlign="top">
</td>
</tr>
</table>
</td>
<td class="RightMenuBar" width="20%" valign="top" height="100%"
align="center" rowspan="2" bgcolor="#669900">
<uc1:RightMenu id="RightMenu1" runat="server"></uc1:RightMenu>
</td>
</tr>
</table>
</form>
|
Why did we drag the user controls onto the page and then replace the resulting HTML?
Dragging the user controls onto the page adds the <%@
Register
%> lines to the ASPX for us as
well as adding the user control ASP.NET tags to the HTML. We then only
need to modify the HTML to make it more presentable.
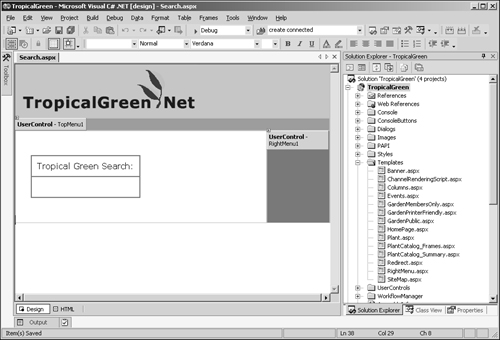
You should now have a page that looks like the following when viewed in Design mode:

Let’s save our new search
page, build the Tropical Green project, and navigate to it in a browser
to make sure everything is in order before we go about adding the search
input and results controls.
1. | Save all changes to the search.aspx page.
|
2. | Right-click the TropicalGreen project and select Build.
|
3. | If there are no errors in the build, open a browser and navigate to: http://www.tropicalgreen.net/TropicalGreen/Search.aspx.
|
4. | If there are any issues, retrace the steps we’ve taken to this point, address the errors, and retry the URL.
|
Now that we have a working
search page, we need to add some functionality to it. We’ll add the two
MCMS Connector server controls, make some configuration changes, build
the solution, and test our search page.
1. | Open the search.aspx page in Visual Studio .NET if it’s not already open, and switch to Design view.
|
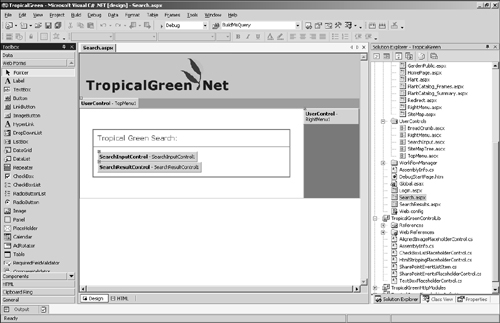
2. | Open the Visual Studio .NET Toolbox and drag the SearchInputControl and SearchResultsControl into the table cell below the Tropical Green Search cell. Refer to the following image for placement:
 |
3. | Select the SearchInputControl we added to search.aspx and set the following properties in the Visual Studio .NET property window:
| Property | Value |
|---|
| SearchMode | Simple | | SearchResultPage | /TropicalGreen/Search.aspx |
|
4. | Select the SearchResultControl we added to the search.aspx page and set the following properties using the Visual Studio .NET property window:
| Property | Value |
|---|
| PortalUrl | http://portal.tropicalgreen.net/ | | SearchResultPageSize | 10 |
|
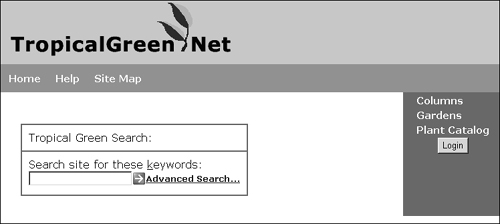
Let’s see if our search is working. Save all changes to search.aspx, build the Tropical Green project, and go to http://www.tropicalgreen.net/TropicalGreen/Search.aspx in a browser. You should see a page similar to the one below:

Enter a word you know will be found on the site, such as ficus.
You will see the same list of search results that were returned when
searching for the same string in the portal containing the content
index.

|
If you receive an error message stating “There
was a problem loading the input control. The error returned by the
system is: Could not find part of the path
c:\inetpub\wwwroot\tropicalgreen\cms\wssintegration\searchpropertycollection.xml”, double-check that you added the CMS virtual directory in your TropicalGreen web application.
|
At this point, we have got
search capabilities on our site thanks to the MCMS Connector controls
and SPS’s search features. But this solution is very limited, for
instance there is no way to change the look and feel of these controls
and there is also no way to configure which properties are displayed in
the result page, for instance to show a short description for the
returned documents.
To address this, we will now build our own search controls.