Practice: Using Windows Server Backup
In this practice session, you install Windows Server Backup on the Mailbox
server VAN-EX1 and carry out a manual full backup.
EXERCISE 1 Installing Windows Server
Backup
Typically, Windows Server Backup is not installed by default on a Mailbox
server. If Windows Server Backup has already been installed on your VAN-EX1
Mailbox server, you do not need to carry out this exercise. To install
Windows Server Backup, carry out the following procedure:
Log on to the Mailbox server VAN-EX1 using the Kim Akers
account.
Click Start and then click Server Manager.
Click Features and then click Add Features.
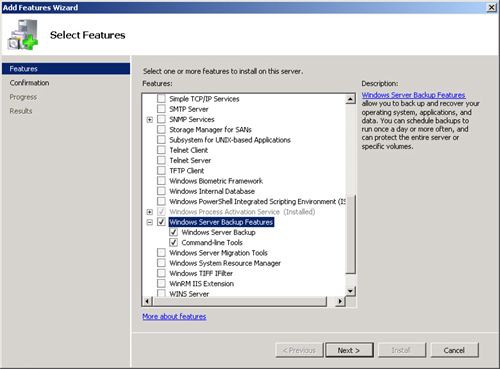
In the Add Features Wizard, expand Windows Server Backup Features
and select Windows Server Backup and Command Line Utilities, as
shown in Figure 2.
Click Next. On the Confirm Installation Selections page, click
Install.
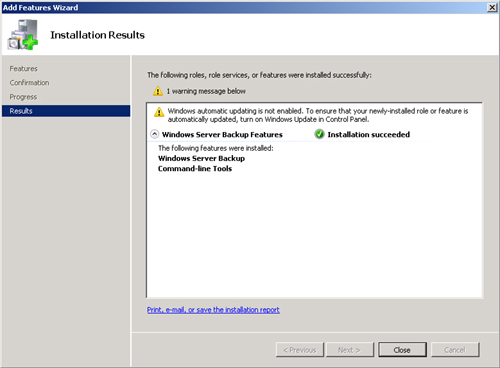
Installation proceeds. When it is complete, the Installation
Results page, shown in Figure 3,
appears. Note that Windows Automatic Updating cannot be enabled on
your isolated test network. You would enable this feature on a
production network.
EXERCISE 2 Backing Up Exchange
Server
In this exercise, you use Windows Server Backup to perform a manual full
backup of Mailbox server VAN-EX1. Windows Server Backup needs to be
installed on VAN-EX1 before you proceed with this exercise. You can choose
to backup to a DVD drive, an internal or an external hard disk, or a network
share. Carry out the following procedure:
Log on to the Mailbox server VAN-EX1 using the Kim Akers
account.
Click Start, click Administrative Tools, and then click Windows
Server Backup.
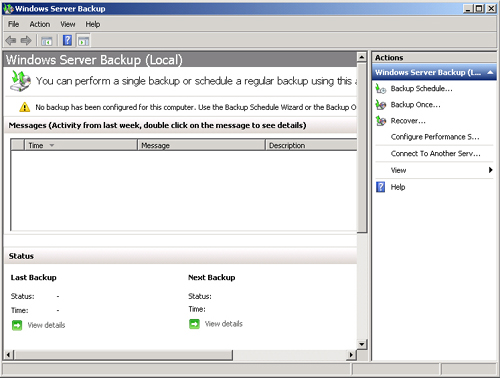
On the Actions pane of the Windows Server Backup dialog box, shown
in Figure 4, click Backup
Once. This starts the Backup Once Wizard.
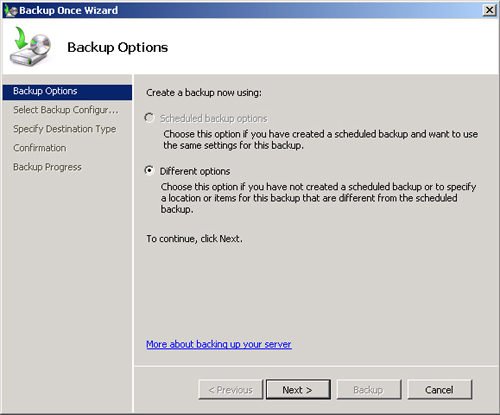
Select Different Options on the Backup Options page, shown in
Figure 5. Click Next.
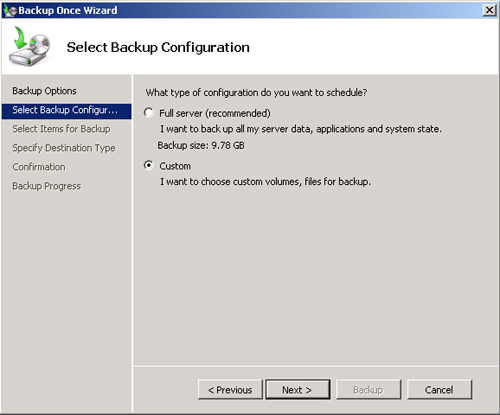
On the Select Backup Configuration page, select Custom, as shown
in Figure 6. Click
Next.
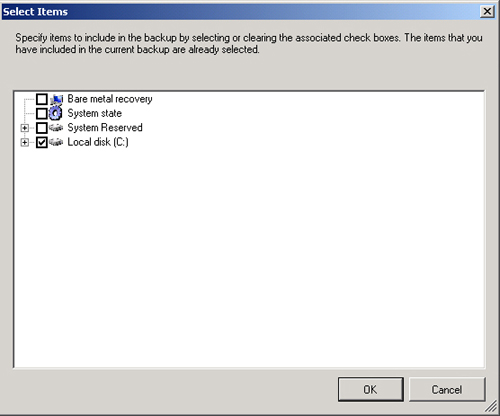
On the Select Items For Backup page, click Add Items. On the
Select Items page, select the items you want to back up—for
example, Local Disk (C:)—as shown in Figure 7. Click OK.
Click Next on the Select Items For Backup page.
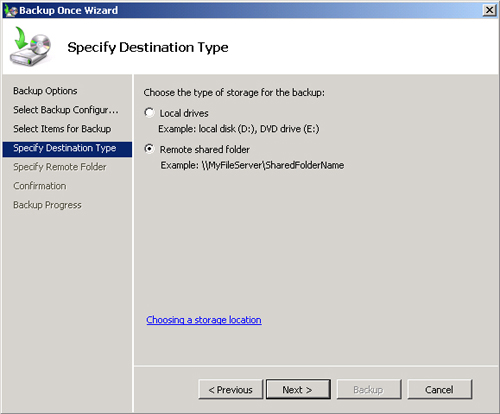
Select the location where you want to store the backup on the
Specify Destination Type page, shown in Figure 8. Click
Next.
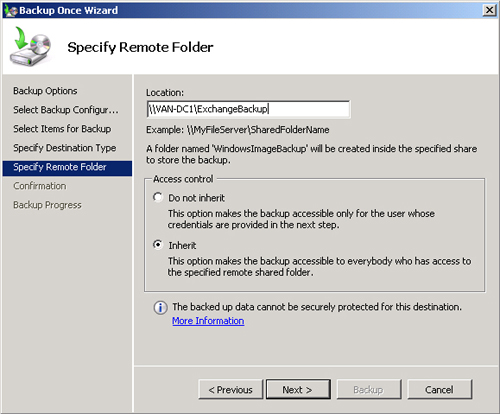
If you select Remote Shared Folder, you need to specify a UNC path
for the backup files and then select Inherit if you want the backup
to be accessible by everyone who has access to the remote folder.
Alternatively, select Do Not Inherit if you want the backup to be
accessed by specifying predefined user credentials. These settings
are available on the Specify Remote Folder page, shown in Figure 9. Click Next.
If required, select VSS Full Backup on the Specify Advanced
Options page and click Next. If you back up to a network share, this
option is already selected, and this step is not required.
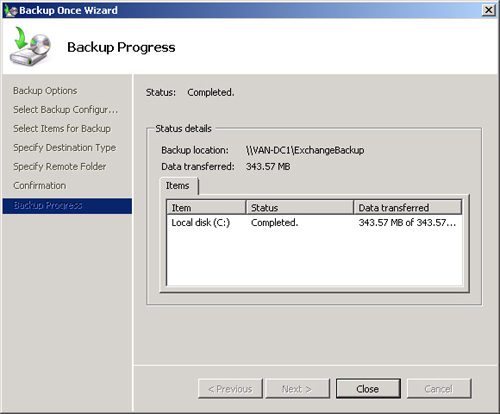
Click Backup on the Confirmation page. Click Close on the Backup
Progress page, shown in Figure 110, when
the backup is complete. If you want to, you can click Close before
backup completes, and backup will proceed in the background while
you perform other tasks.
Practice: Recovering a Hub Transport Server (Optional)
In this optional practice
session, you will format the hard disk on the Hub Transport server VAN-EX2
and then recover the server.
EXERCISE Recovering Hub Transport Server
VAN-EX2
In this exercise, you will reformat the hard disk on server VAN-EX2. If
you are using a virtual computer to host this server, you should not delete
this computer, as this would remove its account from Active Directory. Carry
out the following procedure:
Log on to the Hub Transport server VAN-EX2 using the Kim Akers
account.
Format the hard disk drive on VAN-EX1 that contains the operating
system.
Log on to the domain controller VAN-DC1 using the Kim Akers
account and open Active Directory Users And Computers.
Expand Adatum.com, click Computers, and then right-click VAN-EX2,
as shown in Figure 11.
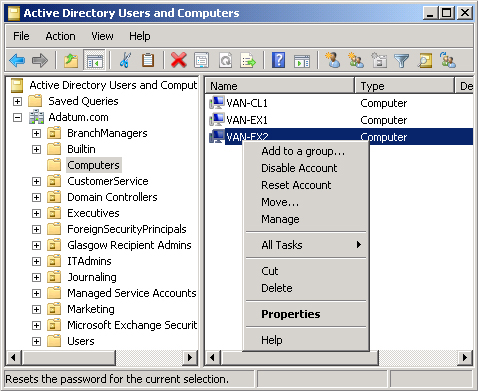
Reset the VAN-EX2 computer account.
Install Windows Server 2008 R2 on the newly formatted computer. Ensure
that you use the same installation media and install exactly the
same operating system that you installed when you originally set up
the server.
Assign the computer the name VAN-EX2 and join it to the Adatum.com
domain.
Log on to the member server VAN-EX2 using the Kim Akers
account.
Remove the operating system installation media and insert the
installation media you used to install Exchange Server 2010
Enterprise when you originally set up the computer.
If an Autorun box appears, close it.
Open the Command Prompt window and access the volume on the
computer that holds the installation media.
Enter the following command:
Setup /m:RecoverServer
When the recover routine completes, open the EMC on
VAN-EX2.
On the Console pane, expand Server Configuration. Check that the
Hub Transport server role is installed.