The first thing you should do when automating
maintenance tasks is to set up Database Mail. This will allow you to
receive automatic notifications for things like job failures and alerts.
After all, what good is automating tasks if you constantly have to go
out to each server and make sure everything looks okay?
There are a couple of ways to
configure Database Mail. One is using the Database Mail Configuration
Wizard and the other is good old T-SQL. First, we will walk you through
the wizard and explain the options available when setting up Database
Mail, and then we will provide a script using T-SQL that you can use to
perform the same actions.
1. Database Mail Configuration Wizard
Start the Database
Mail Configuration Wizard by expanding the Management folder in the SQL
Server Management Studio Object Explorer, right-click Database Mail,
and then select Configure Database Mail from the context menu. This will
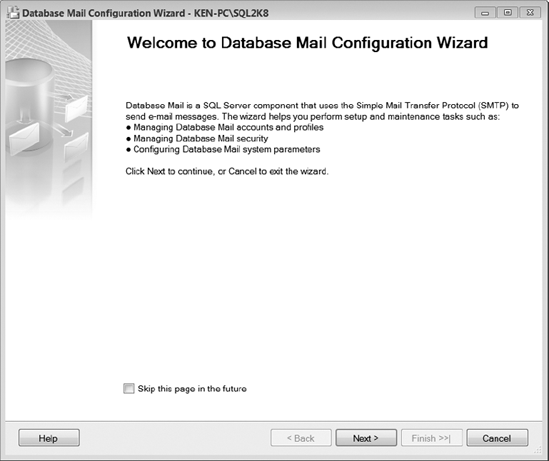
bring you to the Welcome screen shown in Figure 1.
Select Next to proceed to the Select Configuration Task screen, as shown in Figure 2. (You may also choose the option to skip the Welcome screen in the future.)
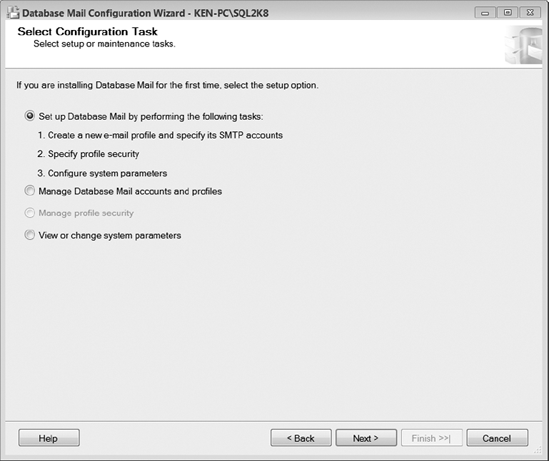
Since this is the first time
we are setting up Database Mail, we will select the first option that
will perform all the tasks required to initially set up Database Mail.
Select Next to continue. If you have not enabled Database Mail on the
server, you will be prompted to do so before continuing to the New
Profile screen shown in Figure 3.
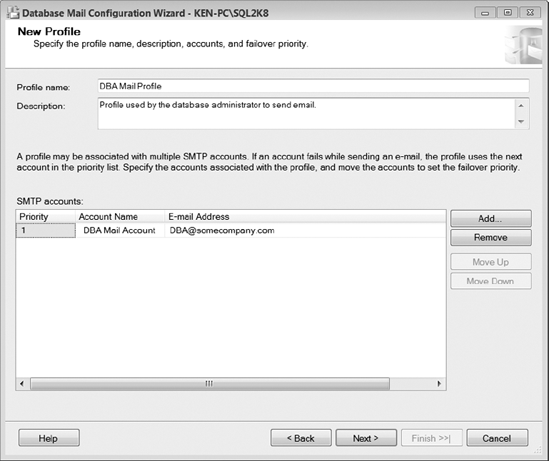
Enter the name and an optional
description for the new profile you are creating. A profile is a group
of database mail accounts you can prioritize to increase the chances of
receiving an email if one of the email servers is unavailable. To add an
account to the mail profile, select the Add button to display the New
Database Mail Account dialog box, shown in Figure 4.

The New Database Mail
Account dialog contains all the information needed for SQL Server to
send an email to a Simple Mail Transfer Protocol (SMTP) server. You must
create a separate mail account for each SMTP server you would like to
use. Enter the appropriate information for your organization. The
following list describes the available options when creating a new mail
account.
Account Name: Name that will be used to identify the database mail account.
Description: Optional description used to identify the database mail account.
E-mail Address:
Email address that the mail is being sent from. This does not have to
be an actual email account. You could use something like [email protected], just to indicate the email came from a specific server.
Display Name: Optional name that is displayed on email messages to indicate who the email is from.
Reply E-mail: Optional email address that will be used when someone replies to an email sent by this account.
Server Name: Server name or IP address of the SMTP server that is used to send emails for this account.
Port Number: Port number that is used to connect to the SMTP server.
This Server Requires a Secure Connection (SSL):
This option will encrypt communication between SQL Server and the SMTP
server. You must have a certificate installed for SQL Server in order to
use this option.
Windows Authentication Using Database Engine Service Credentials: This option will use the MSSQLServer service credentials to connect to the SMTP server.
Basic Authentication: This option allows you to specify a username and password in order to connect to the SMTP server.
Anonymous Authentication:
This option connects to SMTP servers without passing any login
credentials and is used for SMTP servers that do not require
authentication.
Once you have made
the proper configurations in the New Database Mail Account dialog box,
select OK to return to the New Profile screen. Repeat the process for
any additional mail accounts you would like to add to the profile. If
you add multiple mail accounts, you can configure their priority by
highlighting an account and selecting Move Up or Move Down. Once you
have configured all the new mail accounts, select Next to continue to
the Manage Profile Security screen, shown in Figure 5.
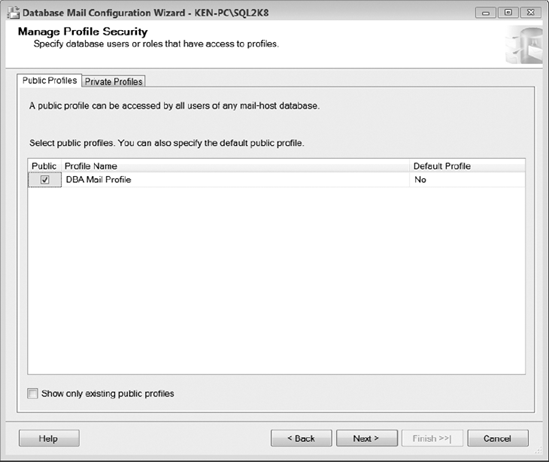
You can configure
Database Mail profiles as public profiles or private profiles. If you
configure the profile as public, anyone who can access the msdb
is allowed to use the profile to send mail. If you configure the
profile as private, the profile will be limited to only specific users.
You can also have one default public profile and one default private
profile. A default profile allows you to send mail without specifying a
profile name. When an account has access to both a default private
profile and a default public profile, the default private profile will
be used. If you would like to make the profile public, select the Public
check box next to the profile name; if you would like to make the
profile private, select the Private Profiles tab, as shown in Figure 6.
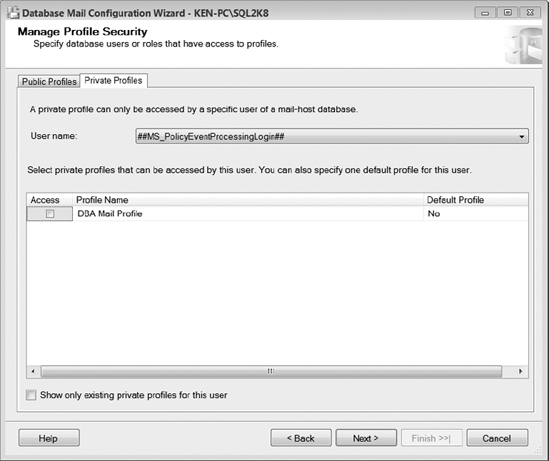
The key difference
between these two tabs is that the Private Profiles tab provides you
with a User Name drop-down list that will allow you to grant access to a
profile for a specific user. To grant profile access to multiple users,
select each username from the list, and then select the Access check
box next to the profile name. Once you have configured the profile
security, select Next to continue to the Configure System Parameters
screen, shown in Figure 7.
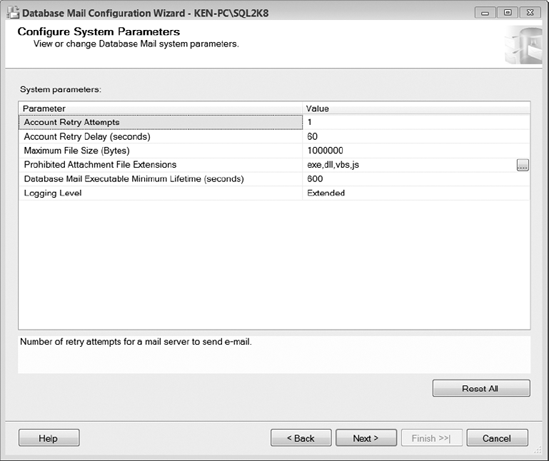
You can use the
Configure System Parameters screen to define the system parameters for
an entire instance of SQL Server; any changes you make here will apply
to all Database Mail profiles and accounts. The following list describes
the available options when configuring system parameters.
Account Retry Attempts:
Number of times Database Mail will retry to send mail using each
account in a profile. For example, if you set the Account Retry Attempts
parameter to three and you have two accounts in a profile, each account
will retry to send mail three times.
Account Retry Delay (Seconds):
Number of seconds Database Mail will wait between retries. This delay
is not the delay between each account in a profile. Database Mail will
attempt to use all accounts in a profile, and then wait the defined
number of seconds before trying all accounts again.
Maximum File Size (Bytes): Limits the size of an attachment.
Prohibited Attachment File Extensions: Comma-delimited list of file extensions that are not permitted as attachments when sending Database Mail.
Database Mail Executable Minimum Lifetime (Seconds):
The minimum time the external mail process will remain active even if
there are no items in the mail queue. If items are in the queue, the
external mail process will remain active until all items are processed.
Logging Level:
There are three logging levels you can use to send events to the
Database Mail log: Normal, Extended, and Verbose. The Normal logging
level will log errors. The Extended logging level will log errors,
warnings, and informational messages. (Extended is the default logging
level.) The Verbose logging level will log errors, warnings,
informational messages, success messages, and internal messages. You
should generally only use the Verbose logging level for troubleshooting
purposes.
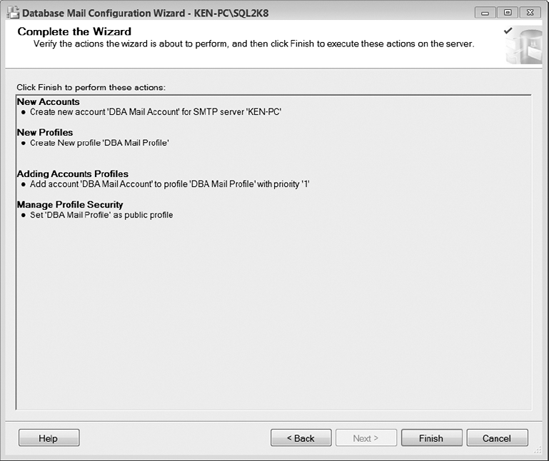
Once you have the system parameters configured, select Next to continue to the Complete the Wizard screen, shown in Figure 8. Review the configuration options and select Finish to complete the wizard.