Add Users’ Permissions Directly to or Remove Them from a Site
If
you do not want to add a user to a SharePoint group in a site, but
instead want to give that user a specific set of permissions unrelated
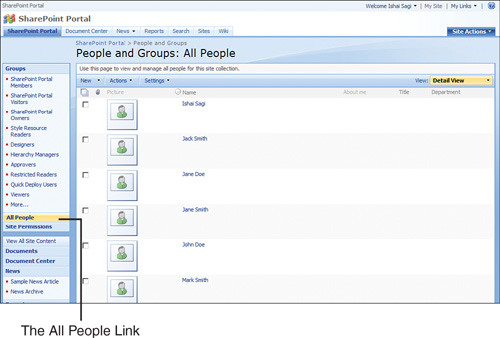
to a specific group, navigate to the site’s security page and click the
All People link on the left navigation bar (see Figure 5).

To
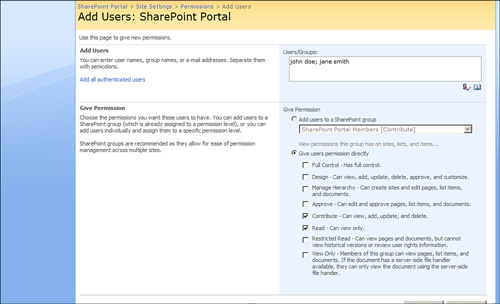
add users to the site, click the New button. This opens a page where
you can select the users and select what permissions they will have on
the site by choosing the Give Users Permission Directly option (see Figure 6).

You can either type the
names of the people you want to add in the Add Users box at the top or
click the address book icon to use a people search dialog to select the
users. Then select the permission levels you want the people to have on
the site; you can select more than one permission level—for example,
Contribute and Approve—which will allow the users you selected to add
list items and files to the site and approve documents that they or
other people have added. Remember, the higher permission always wins, so
the user or security group has all the permissions from all the
permission levels.
To remove users from a
site, select the users on the All People page, open the Actions menu on
the toolbar, and select Delete Users from Site Collection (see Figure 7). This removes the users from the site, including any SharePoint groups the users belonged to.
Change Users’ or SharePoint Groups’ Permissions in a Site
To change the
permissions that are allocated to a user or group in a site, navigate to
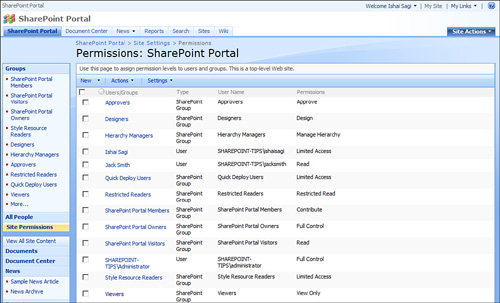
the site’s security settings page, and then click the Site Permissions link on the left navigation
bar. This opens a page showing what permission levels each user or
group has been allocated in the site (see Figure 8).

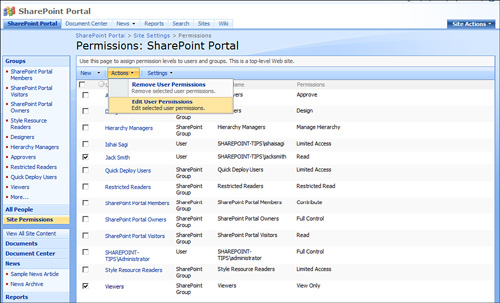
To change the
permission levels, select the users or groups that you want to change,
open the Actions menu on the toolbar, and select Edit User Permissions
from the menu (see Figure 9).

You then have the option to set what permissions those users or groups will have (see Figure 10). Select them, and click OK to set the permissions levels.