Virtual Server Overview
Microsoft Virtual Server is a
virtualization application that creates a virtual hardware environment
that can support multiple virtual machines running multiple operating
systems on the same physical hardware. The physical server is called the
“host” and each virtual operating system is called a “guest.” Guest
operating systems can be any operating system that runs on standard x86
hardware, including UNIX, Linux, MS-DOS, Microsoft Windows 3.1, Windows
9x, Windows NT, or any of the currently shipping and supported 32-bit
Windows operating systems.
Virtual
Server presents each guest operating system with an entirely segregated
and isolated virtual environment that simulates the necessary hardware
for the guest operating system to run. The guest has no awareness of
being in a virtual environment and is fully supported running under
Virtual Server.
Virtual Server is
an ideal environment for testing new applications and patches to
existing applications. You can create multiple guest virtual machines on
a single server, and test the new application under carefully
controlled and isolated conditions that accurately reflect your real
network conditions, without having to have many dedicated machines to
support.
Virtual Server is also a
great tool for testing new technologies, such as clustering, in a
controlled environment and without having to actually buy expensive
clustering hardware until you’re sure everything will work as you
expect.
Installing Virtual Server
Virtual Server 2005
R2 can be installed on any 32-bit version of Windows Server 2003, and on
x64 versions of Windows Server 2003. It can also be installed on
Windows XP Professional Service Pack 2 and Windows XP Professional x64
Edition. It is not, however, supported for production use when installed on Windows XP.
Installing Internet Information Services for Virtual Server
To install Virtual Server,
you need to first install Internet Information Services 6.0 (IIS6) on
either the host computer (the default) or on another computer with
access to the machine that will host Virtual Server. This is because all
configuration and maintenance of Virtual Server is done on the Virtual
Server Administration Website. This Web site is created on the host
machine by default, but if you need to configure Virtual Server to be
administered from a separate computer you should follow the instructions
in the Release Notes for Virtual Server. If you won’t be using IIS for
any other Web functionality, you should just install the minimum
components of IIS that are required for Virtual Server. These are:
Common Files, Internet Information Services Manager, and World Wide Web
Service. Installing these components will reduce the number of
unnecessary services and attack surfaces on your server. If you already
have IIS running somewhere on your network, do the installation of
Virtual Server as a split installation.
To install IIS for Virtual Server, follow these steps:
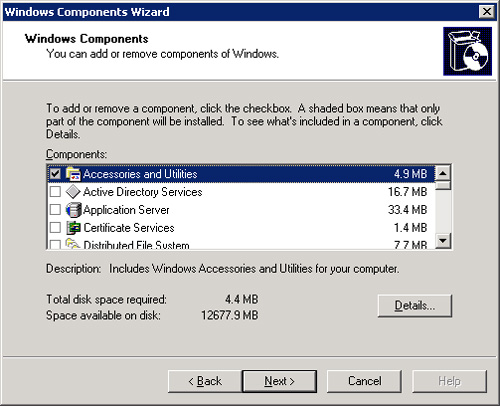
1. | Open Add/Remove Components, and select Add/Remove Windows Components to open the Windows Components Wizard, shown in Figure 1.
|
2. | Highlight Application Server, and click Details.
|
3. | Highlight Internet Information Services, and click Details.
|
4. | Select Common Files and Internet Information Server Management.
|
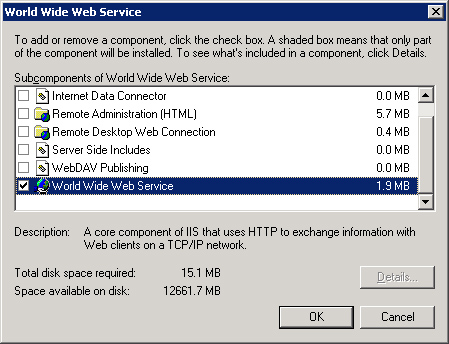
5. | Select World Wide Web Service, and click Details to open the World Wide Web Service page shown in Figure 2.
|
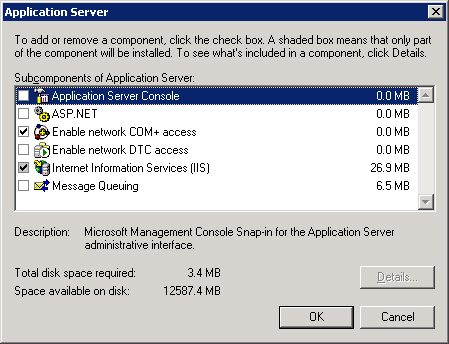
6. | Select
only World Wide Web Service and then click OK twice to return to the
Application Server page. You should have Enable Network COM+ Access
selected and Internet Information Services (IIS) partially selected, as
shown in Figure 3.
|
7. | Click OK one more time, and then click through the rest of the wizard to finish installing IIS.
|
If your intention is to
only use IIS for management and configuration of Virtual Server, you
should configure the Windows Firewall accordingly to block access to the
default Web site, especially from any externally facing IP address.
Performing the Installation
To install Virtual Server, follow these steps:
1. | Ensure that IIS is installed and started.
|
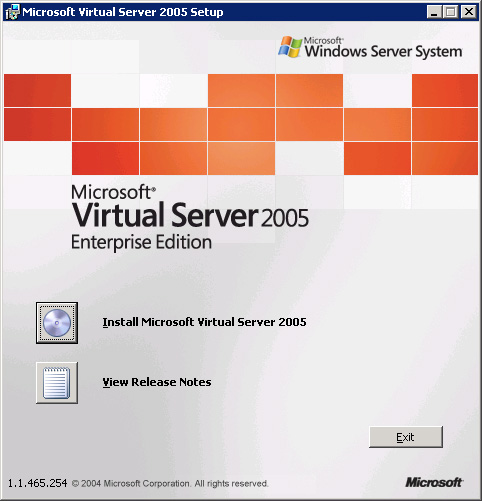
2. | Start
the Virtual Server 2005 installation program, setup.exe, from the CD or
other installation point to bring up the Microsoft Virtual Server 2005
Setup Wizard shown in Figure 4.
|
3. | Click Install Microsoft Virtual Server 2005, and then Accept the license agreement and click Next again.
|
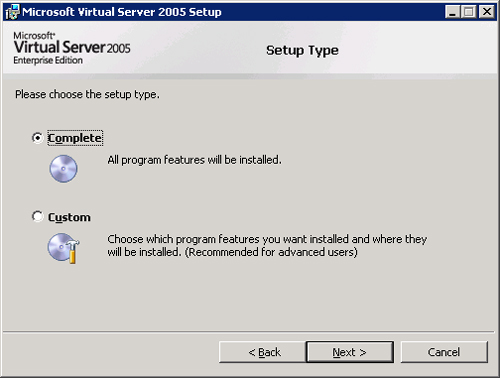
4. | Fill in the Customer Information dialog box, and click Next to bring up the Setup Type dialog box shown in Figure 5.
|
5. | Choose Complete if you are installing Virtual Server on a computer that has IIS already installed.
|
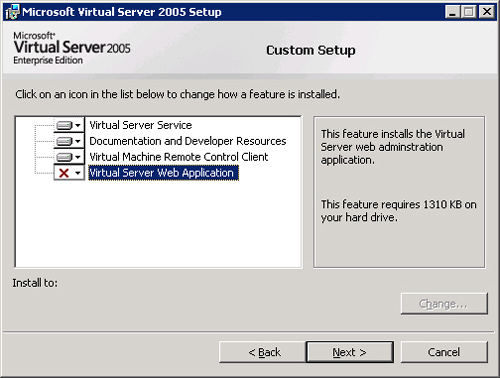
6. | If
you are doing a split installation, choose Custom, and then change
Virtual Server Web Application to This Feature Will Not Be Available, as
shown in Figure 6.
|
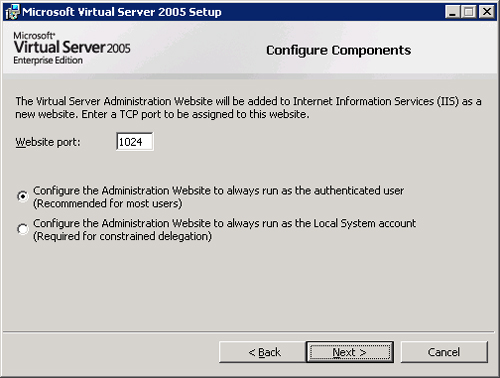
7. | Click Next to bring up the Configure Components dialog box shown in Figure 7 (available with a complete install only).
|
8. | Click Next, and select Enable Virtual Server exceptions in Windows Firewall.
|
9. | Click Next and then click Install to perform the actual installation.
|
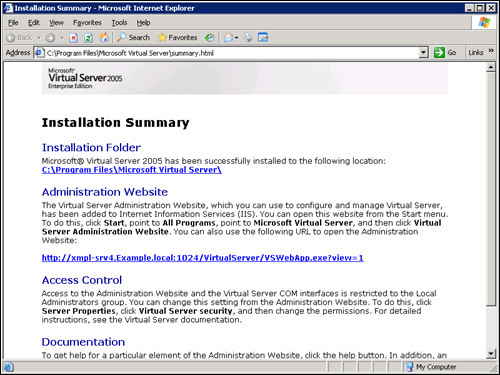
10. | When the installation completes, the Installation Summary page will be displayed, as shown in Figure 8. The exact contents of this page will vary, depending on exactly what components were installed.
|
11. | Note
the location of the Installation Summary page for future reference, or
add it to your Favorites. Finally, click Finish to close the
installation program. No reboot is required. |