3. Using WSUS: On the Client Side
To configure Windows XP to work with WSUS, first enable the Automatic Updates feature. In Windows XP, do the following:
Open the Control Panel. Navigate to the System applet and open it.
Click the Automatic Updates tab.
In Windows 2000, do the following:
Navigate to the Automatic Updates applet and double-click it to open it.
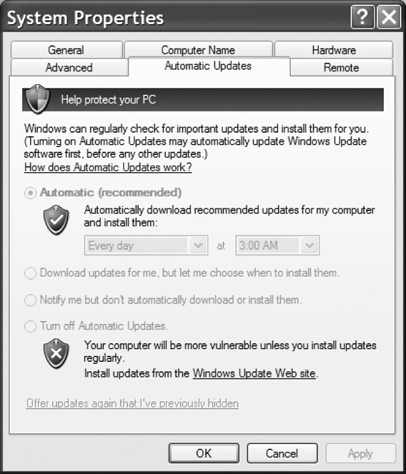
You'll see the System Properties dialog box for the feature, as shown in Figure 3.

As the administrator, you
select how updates are downloaded, signaled to the user, and
subsequently installed on client machines. The currently logged-on user,
if that person happens to have administrator credentials, is notified
through a small update icon in the system tray as well as an information
"bubble" that pops up when the download is complete. In addition, an
administrator can determine if updates have been downloaded by looking
at the system log. If the current user isn't an administrator, Windows
will wait until one logs on to offer the notification that updates are
available for installation.
3.1. Update download and installation
Updates are downloaded
in a background thread by the Background Intelligent Transfer Service
(BITS), which is an extension to Windows. BITS detects inactivity over a
network connection and uses it to download large amounts of data from
remote sites. BITS will detect when a user initiates activity over a
connection and then pause the download process, waiting for the next
idle period to resume it.
On the Automatic
Updates property sheet, click the first option to have the currently
logged-on user notified before downloading updates. The user will then
be notified again before installing the downloaded updates. Use the
second option if you want updates automatically downloaded, but want to
wait until a logged-on user acknowledges their presence and authorizes
the installation. Finally, click the third option if you want updates
automatically downloaded and installed on a schedule that you can set in
the boxes.
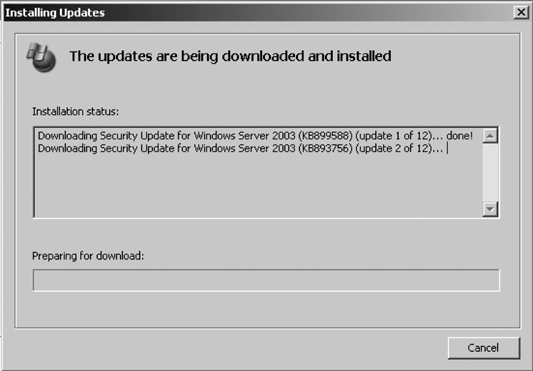
The update
installation process proceeds depending on what you select in the boxes.
When updates have finished downloading, the notification bubble will
appear in the system-tray area of the machine, and an administrative
user can double-click the bubble to open the Ready to Install dialog
box, shown in Figure 4.

You can click the Remind
Me Later button to defer the installation of updates for a set period
of time, ranging from half an hour to three days from the current time.
If you've configured
Automatic Updates to install fixes on a regular schedule, the updates
will be downloaded in the background and automatically installed on that
schedule. Automatic Updates installs the update and restarts the
computer if an update requires that, even if there's no local
administrator logged on. If an administrator is logged on, she will have
the chance to cancel the process; if a normal user is logged on, he
will receive a notification of the impending process and a countdown to
its initiation. However, if updates have finished downloading between
the configured install time and the current time, the notification will
appear in the system tray as described earlier in this section. The user
will not have the option to click Remind Me Later, but he can choose to
install the updates at that time to have the process over with before
the predetermined installation time.
3.2. Monitoring the client-side system
WSUS and the
Automatic Updates client provide several event templates that are
written to the system event log to describe the current status of the
update process, any errors that are encountered, and a brief notation of
what updates were successfully installed. You can program an event-log
monitoring tool to monitor for certain event IDs that are specific to
WSUS. This tool will give you a picture of your network's health with
regards to updates. Table 7-3 lists these events and their meanings and contexts.
Table 1. WSUS and AU client event log messages
| Event ID | Label | Description |
|---|
| 16 | Unable to connect | The
client can't connect to either the Windows Update site, the Microsoft
update site, or the WSUS server, but will continue trying indefinitely. |
| 17 | Install ready; no recurring schedule | Updates
have been downloaded and are ready to be installed, but an
administrator must log on and manually start the installation process. |
| 18 | Install ready, recurring schedule | Updates
have been downloaded and are ready to be installed. The date this
install is scheduled to occur is listed within the event description. |
| 19 | Install success | Updates have been successfully installed; these have been listed. |
| 20 | Install failure | Some updates didn't install correctly; these have been listed. |
| 21 | Restart required, no recurring schedule | Updates
have been installed, but a reboot is required, and until this reboot is
complete Windows cannot fetch more updates for installation. Any user
can reboot the machine. |
| 22 | Restart required, recurring schedule | Updates have been installed, but a reboot is required and has been scheduled within five minutes. |