3.4 USB Device Control
With Vista, you can now lock down USB devices,
once again through Group Policy. With iPods and other portable music
devices abounding, it is becoming more and more important for
organizations to control which devices users can connect to their
systems. For example, a user should not be able to connect their iPod to
their office PC to download music. In addition, they should not be able
to connect it to use as a hard drive to transport information they
gather from your network. For these reasons, you must configure the USB
Device Controls in Group Policy and control which devices are deemed
acceptable — mice, keyboards, smart phones, and printers — and which are
not — portable disk drives and flash memory devices, for example.
Although you can use these controls to prevent
installation of all devices, it is best to allow the installation of
authorized devices. To do this, you need to be able to identify devices.
There are two ways to do this:
You can use device identification strings,
which are contained both within the device and within the .INF file
that comes with the driver to block or authorize devices. There are two
different types of device ID strings. The first is the hardware ID.
These provide the most direct match between a device and its driver. The
second are compatible IDs. These provide a list of compatible drivers
that could give you at least basic functionality for the device. If you
use these IDs to allow or deny devices, then you must include all of the
possible IDs for the device. If not, multifunction devices especially,
might be blocked at one level, but not at another.
You can use device setup classes
to control devices. Classes divide devices into groups that use the
same installation process. Classes are identified by globally unique
identifiers (GUID) which are complex numbers that uniquely represent a
class of devices. For example, if you want to block USB disk drives,
then block the GUID for these devices and no USB disk drive will be able
to be installed on your systems.
Set up your authorizations through Group Policy.
Launch the Group Policy Management Console (GPMC), choose Start Menu =>
Search =>
gpmc.msc, and press Enter.
NOTE
If you are running Service Pack 1, you must download and install the GPMC onto your management PC before you can use it.
Because this policy affects every computer, apply it to the PCs OU . This can be applied through any GPO that would affect all PCs. If the GPO exists, right-click on and select Edit. If it doesn't, then create it, name it, link it to the PCs OU, and then edit it.
Go to the Device Installation settings (Computer Configuration =>
Policies =>
Administrative Templates =>
System =>
Device Installation). Also set up the policies for Removable Storage (Computer Configuration =>
Policies =>
Administrative Templates =>
System).
Set up the policies according to the recommendations in
Table 2.
Examine the explanation for each setting to learn more about its intent
and configuration possibilities. Each setting that is not configured
relies on the default behavior for that setting.
Test the settings with various devices of each type you authorized and de-authorized.
Table 2. Assigning Device Installation Settings
| Location | Setting | Recommendation |
|---|
| Device Installation | Treat all digitally signed drivers equally in the driver ranking and selection process | Not configured |
| | Turn off Found New Hardware balloons during device installation | Not configured |
| | Do not send a Windows Error Report when a generic driver is installed on a device | Not configured |
| | Configure device installation timeout | Not configured |
| | Do not create system restore point when new device driver installed | Not configured |
| | Allow remote access to the PnP interface | Not configured |
| Device Installation Restrictions | Allow administrators to override Device Installation Restriction policies | Configure only if you fully trust your administrators or anyone with administrative access rights. |
| | Allow installation of devices using drivers that match these device setup classes | Enable and add the appropriate GUID entries. |
| | Prevent installation of devices using drivers that match these device setup classes | Enable and add the appropriate GUID entries. |
| | Display a custom message when installation is prevented by policy (balloon text) | Enable and type in an appropriate violation of policy message. |
| | Display a custom message when installation is prevented by policy (balloon title) | Enable and type in an appropriate message title. |
| | Allow installation of devices that match any of these device IDs | Not configured |
| | Prevent installation of devices that match any of these device IDs | Not configured |
| | Prevent installation of removable devices | Not configured |
| | Prevent installation of devices not described by other policy settings | Enable. |
| Removable Storage Access | Time (in seconds) to force reboot | Not configured |
| | CD and DVD: Deny read access | Not configured |
| | CD and DVD: Deny write access | Enable only in very secure environments. Users often rely on this for backups. |
| | Custom Classes: Deny read access | Enable only if you have appropriate GUIDs. |
| | Custom Classes: Deny write access | Enable only if you have appropriate GUIDs. |
| | Floppy Drives: Deny read access | Not configured |
| | Floppy Drives: Deny write access | Enable only in very secure environments. |
| | Removable Disks: Deny read access | Not configured |
| | Removable Disks: Deny write access | Enable. |
| | All Removable Storage classes: Deny all access | Enable in very secure environments. |
| | All Removable Storage: Allow direct access in remote sessions | Enable in very secure environments. |
| | Tape Drives: Deny read access | Enable. |
| | Tape Drives: Deny write access | Enable. |
| | WPD Devices: Deny read access | Enable only if your users do not use smart phones or Pocket PCs. |
| | WPD Devices: Deny write access | Enable only if your users do not use smart phones or Pocket PCs. |
3.5 Windows Defender
Windows Defender is a spyware utility that
automatically protects your computer from malicious content, such as
spyware and rootkits, and automatically removes them if they are
identified. Defender is built into Vista and does not require an
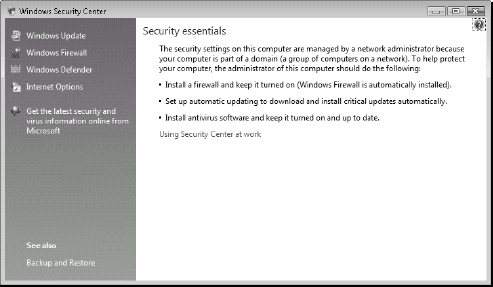
additional installation. As shown in Figure 8, you access it through the Vista Security Center (Control Panel => Security =>
Security Center). This center gives you access to Windows Update
settings, the Windows Firewall, Defender, and Internet Options, all of
which are related to the health of your PC.
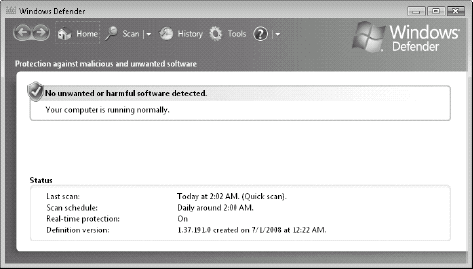
Defender is launched by clicking on its link in the left pane of the Security Center. As shown in Figure 9,
Defender offers a very simple control panel. From here you can perform a
quick or a full scan, look up your scanning history, and access
Defender tools. Most often, you will not access Defender through this
interface, but rather configure it through Group Policy.
Use the recommendations in Table 3
to configure Defender settings in your network. Rely on the procedure
outlined earlier for Device Control to modify the Group Policy that is
applied to all PCs. You can find Windows Defender settings by choosing
Computer Configuration => Policies => Administrative Templates => Windows Components.
Table 3. Configuring Windows Defender GPO Settings
| Location | Setting | Recommendation |
|---|
| Windows Defender | Turn on definition updates through both WSUS and Windows Update | Disable only if you have a custom Windows Server Update Services server in your network. |
| | Check for new signatures before scheduled scans | Not configured |
| | Turn off Windows Defender | Not configured |
| | Turn off Real-Time Protection prompts for unknown detection | Not configured. Your users should be aware of untoward behavior on their systems. |
| | Enable logging known good detections | Enable only in troubleshooting situations. |
| | Enable logging unknown detection | Enable only in troubleshooting situations. |
| | Download entire signature set | Not configured |
| | Configure Microsoft SpyNet reporting | Configure
only if you want to change your default participation in SpyNet. All
organizations should participate to SpyNet as it relies on massive
amounts of information to provide top-level protection. |
Automatic Update Management
Windows Vista obtains Windows Defender updates
from one of two sources: the Microsoft Update Web site or from an
internal Windows Server Update Services (WSUS) server. The latter
connects to Microsoft Update instead of the individual computers on your
network. Organizations with more than a few computers will want to
install their own WSUS server or servers so that they can better control
the application of updates for Windows Defender as well as those for
Windows itself. Because both updates originate from the same source,
they are managed in the same way.
When originally configuring PCs during
installation, one of the post-installation tasks you need to perform is
to configure Vista to obtain updates for more products than only
Windows. This lets you obtain updates for hardware components as well as
Microsoft Office tools. This way, you only need to use one single tool
for update configuration and management.
NOTE
Applying updates addresses tasks number
VA-17: Security Patch Update Management and VA-22: Service Pack
Deployment . Once again,
Updates are managed through Group Policy under Computer Configuration => Policies => Administrative Templates => Windows Components => Windows Update. Use the recommendations in Table 4
to configure your settings. Also rely on the procedure outlined
previously for USB Device Control to perform these modifications.
Table 4. Configuring Windows Update Settings through Group Policy
| Setting | Recommendation |
|---|
| Do not display 'Install Updates and Shut Down' option in Shut Down Windows dialog box | Enabled. You want to control when updates are deployed. |
| Do not adjust default option to 'Install Updates and Shut Down' in Shut Down Windows dialog box | Not configured |
| Enabling Windows Update Power Management to automatically wake up the system to install scheduled updates | Enabled.
This should be used in conjunction with the Power Management settings
in the GPO to reduce the power costs of PCs in your network. |
| Configure Automatic Updates | Enabled. Ideally, configure to obtain updates from your server and install them on a regular schedule. |
| Specify intranet Microsoft update service location | Enabled and point to your WSUS server(s). |
| Automatic Updates detection frequency | Not configured. The default setting is appropriate. |
| Allow non-administrators to receive update notifications | Not configured. You should let administrators be the only ones to get these notices. |
| Allow Automatic Updates immediate installation | Enable only if you set a schedule in the Configure Automatic Updates item above. |
| Turn on recommended updates via Automatic Updates | Enable. |
| No auto-restart for scheduled Automatic Updates installations | Enable only if you intend to deliver updates during daytime hours. |
| Re-prompt for restart with scheduled installations | Enable only if you think you need emergency updates because this will disrupt users' work. |
| Delay Restart for scheduled installations | Not configured. Your schedule should apply updates at night. |
| Reschedule Automatic Updates scheduled installations | Not configured. |
| Enable client-side targeting | Enable to create test beds for update testing. |
| Allow signed content from intranet Microsoft update service location | Enable and configure in highly secure networks. |
NOTE
Microsoft releases updates on the second
Tuesday of each month. Be sure to test all patches and service packs
fully before deploying them to your network.
Wireless and Wired Network configurations
When connected to a Windows Server 2008 network,
Vista allows you to configure the operation of a wired or wireless
network through Group Policy. In fact, these policy settings let you
configure exactly who or what can connect to your own internal network
through either wired or wireless networks. Settings in these policies
are controlled through the Network Policy Server role which is part of
Windows Server 2008's Network Access Protection. Basically, you
configure a network policy for both wired and wireless connections and
then set the policy controls in the Group Policy settings of each PC to
allow them to connect to the network. Any device that does not receive
this Group Policy setting cannot connect to the network. This provides
very tight control over rogue network devices, especially wireless
devices, which are a lot easier to spoof.
