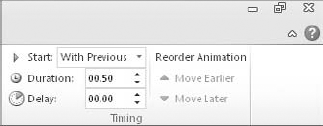
4. Setting Animation Timing
The timing controls for animations are located in the Timing group on the Animations tab, as shown in Figure 5.
By default, animations are set
to occur On Click. You can instead set them to occur automatically by
choosing one of these settings from the Start drop-down list on the
Animations tab:
With Previous:
The animation occurs simultaneously with the start of the previous
event in the Animation pane. If there is no previous event, the
animation occurs simultaneously with the appearance of the slide itself.
After Previous:
The animation occurs after the previous animation event has finished
occurring. If there is no previous event, the animation occurs after the
appearance of the slide itself.
The difference between those
two settings is subtle, because most animation events are very short in
duration. However, if an event is set to After Previous and the previous
event takes a long time to execute, the difference may be more
noticeable.
You can also set a Delay for the animation (Animations => Delay). This delays the animation's start for a specified number of seconds after the previous event.
The Duration setting (Animations => Duration) controls the speed at which the animation occurs. The higher the duration setting, the slower it will execute.
5. Copying Animation
The Animation Painter is a very
handy new feature in PowerPoint 2010 that enables you to copy an
animation effect from one object to another. To use it, follow these
steps:
Select the object that is already animated the way you want.
Choose Animations => Animation Painter.
Click the object to receive the copied animation. (You can navigate to a different slide before doing this.)
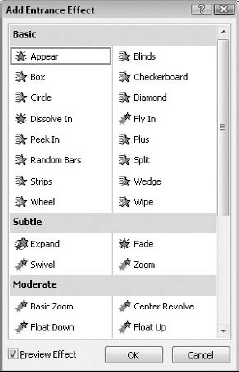
6. Special Options for Text Animation
When you are animating the text in a text box, some extra options become available.
For starters, you can choose
the grouping that you want to animate. For example, suppose that you
have three levels of bullets in the text box, and you want them to be
animated with each second-level bullet appearing separately. You can
specify the second level as the animation grouping, so that all
third-level bullets appear as a group, along with their associated
second-level bullet.
6.1. Changing the Grouping Level
The grouping level
is the detail level at which separate animations occur. For example, if
the animation is grouped by paragraph, each paragraph (that is, each
bullet point) is a separate event.
You can change the grouping level by choosing Animations => Effect Options and then choosing one of these options;
As One Object: Makes the entire content placeholder a single animation event.
All At Once:
Makes each paragraph a separate event, but assigns On Click to only the
first one; the others are set to animate With Previous, which means
they occur simultaneously with the first one.
By Paragraph: Animates each paragraph separately and assigns On Click to each event. This is the default.
If you have more than one
level of bullets, the subordinate-level bullet points are animated along
with their first-level parent when you use Animations => Effect Options => By Paragraph.
If you want bullets that are
other than first-level to be separately animated, you must set that up
in the Effect Options dialog box. Follow these steps:
In
the Animation pane, collapse the group (by clicking the double up
arrow). Then right-click the collapsed group and choose Effect Options.
In the Effect Options dialog box, click the Text Animation tab.
Open the Group Text drop-down list and choose the level at which you want to group bullet points. For example, in Figure 6, I am grouping by 2nd Level Paragraphs.
Click OK to accept the new grouping setting.

|
To animate the list in reverse order (that is, from the bottom up), mark the In Reverse Order check box (see Figure 6).
|
|
6.2. Animating Each Individual Word or Letter
By default, when a
paragraph animates, it does so all at once. You can optionally instead
set it to animate one word at a time, or even one letter at a time. (Be
careful with this, though; it gets annoying quickly!)
To set this up, do the following:
Right-click the animation event in the Animation pane and choose Effect Options. The Effect Options dialog box opens.
On the Effect tab, open the Animate Text drop-down list and choose a setting:
All at once
By word
By letter
7. Removing an Animation Effect
You can remove the animation
for a specific object, or remove all of the animation for the entire
slide. When an object is not animated, it simply appears when the slide
appears, with no delay. For example, if the title is not animated, the
slide background and the title appear first, after which any animation
executes for the remaining objects. To remove animation from a specific
object, do the following:
Display the Animation pane (Animations => Animation Pane).
If
the object is part of a group, such as a bulleted list, then expand or
collapse the list, depending on the effect that you want to remove. For
example, to remove an animation effect from an entire text box, you must
first collapse the list. To remove an animation effect from only a
single paragraph, such as a bulleted item, you must first expand the
list.
Select
the animation effect from the pane, and then press the Delete key on
the keyboard, or right-click and choose Remove, or choose None from the
Animation Gallery. PowerPoint removes the animation and then renumbers
any remaining animation effects.
8. Assigning Multiple Animation Effects to a Single Object
Some objects might need more
than one animation effect. For example, you may want an object to have
an Entrance and an Exit effect, or you may want a bulleted list to enter
one way and then emphasize each point in a different way.
To assign a new animation
effect to an object that is already animated, just select it and apply
another animation event to it with Animations =>
Add Animation. You don't have to do anything special to it just because
it already has an animation event. (You can't use the Animation Gallery
to add an animation to an object that already has an animation because
it will just change the existing event, not create a new event.)
NOTE
Keep in mind that the
numbers that appear next to the objects on the slides when the
Animations tab is displayed do not refer to the objects themselves —
they refer to the animation events. If an object does not have any
animation assigned to it, then it does not have a number. Conversely, if
an object has more than one animation effect assigned to it, then it
has two or more numbers.
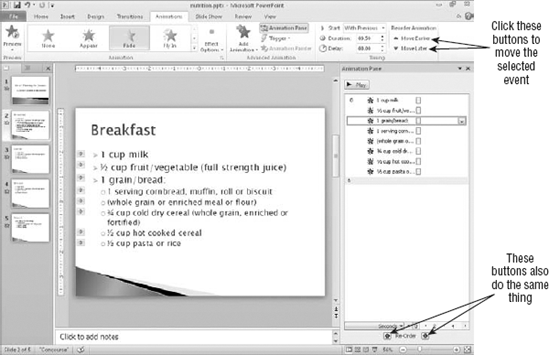
9. Reordering Animation Effects
By default, animation effects are numbered in the order that you created them. To change this order, do the following:
On the Animation pane, click the effect whose position you want to change.
Click
the Re-Order up- or down-arrow buttons at the bottom of the pane, or
the Move Earlier or Move Later buttons on the Animations tab, to move
the position of the animation in the list. See Figure 7.
You can
also drag-and-drop items in the animations list to rearrange them.
Position the mouse pointer over an object, so that the pointer turns
into a double-headed up or down arrow, and then drag the object up or
down in the list.
