3. Sharing Files with Public Folders
To share items in your Public folder and its subfolders with other users of your computer, you don't need to do a thing. By default,
all users with an account on your computer (including Guest) can log on
and create, view, modify, and delete files in the Public folders. The
person who creates a file in a Public folder (or copies an item to a
Public folder) is the file's owner and has Full Control access. All
others who log on locally have Modify access.
To share items in your Public folder with network users, in Advanced Sharing Settings, turn on Public
folder sharing, as described in the preceding section. You can't select
which network users get access, nor can you specify different access
levels for different users. Sharing via the Public folder is quick and
easy—but it's inflexible.
|
As an alternative to setting up an account for sharing, you can use anonymous
sharing (using the Guest account), which works much like Simple File
Sharing in Windows XP. Use this method only if you trust everyone on
your network—such as in a home network shared by your family.
To use this method, on each computer with resources to share, turn off
Password Protected Sharing. For each folder you want to share, use the
Share With command to share with Guest or Everybody; for this type of
open sharing, it doesn't really matter which you use. (Note that shared
homegroup libraries also need to be shared in this way.)
Users from any
computer can then gain access to any shared resource on your computer,
and they won't be prompted for a user name or password.
|
4. Sharing Files and Folders from Any Folder
Whether you plan to share
files and folders with other people who share your computer or those
who connect to your computer over the network (or both), the process for
setting up shared resources is the same as long as the Sharing wizard
is enabled. We recommend that you use the Sharing wizard, even if you
normally disdain wizards. It's quick, easy, and certain to make all the
correct settings for network shares and NTFS permissions—a sometimes
daunting task if undertaken manually. Once you've configured shares with
the wizard, you can always dive in and make changes manually if you
desire.
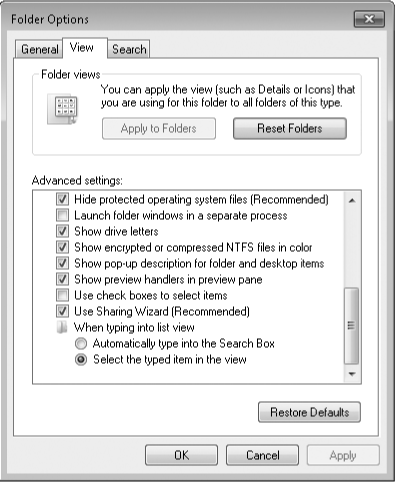
To be sure the Sharing wizard is enabled, open Folder Options. (Type folder
in the Start menu search box or, in Windows Explorer, click Organize,
Folder And Search Options.) Click the View tab, and near the bottom of
the Advanced Settings list, see that Use Sharing Wizard (Recommended) is
selected.
With the Sharing wizard at the ready, follow these steps to share a folder or files:
In Windows Explorer, select the folders or files you want to share. (You can select multiple objects.)
On
the toolbar, click Share With, Specific People. (Alternatively,
right-click and choose Share With, Specific People.)
In the entry box, enter the names of
the users with whom you want to share. You can type a name in the box
or click the arrow to display a list of available names; then click Add.
Repeat this step for each person you want to add.
The list includes all users who have an account on your computer, plus Everyone.
Guest is included if password-protected sharing is turned off. If you
want to grant access to someone who doesn't appear in the list, click
Create A New User, which takes you to User Accounts in Control Panel. (This option appears only if your computer is not joined to a homegroup.)
Note:
If you select Everyone
and you have password-protected sharing enabled, the user must still
have a valid account on your computer. However, if you have turned off password-protected sharing, network users can gain access only if you grant permission to Everyone or to Guest.
For each user, select a permission level. Your choices are
Read Users with this permission level can view shared files and run shared programs, but they cannot change or delete files. Selecting Read in the Sharing wizard is equivalent to setting NTFS permissions to Read & Execute.
Read/Write Users assigned the Read/Write permission have the same privileges you do as owner: they can view, change, add, and delete files in a shared folder. Selecting Read/Write sets NTFS permissions to Full Control for this user.
Note:
You might see other permission levels if you return to the Sharing
wizard after you set up sharing. Contribute indicates Modify
permission. Custom indicates NTFS permissions other than Read &
Execute, Modify, or Full Control. Mixed appears if you select multiple
items and they have different sharing settings. Owner, of course,
identifies the owner of the item.
Click Share. After a few moments, the wizard displays a page like the one shown in Figure 2.
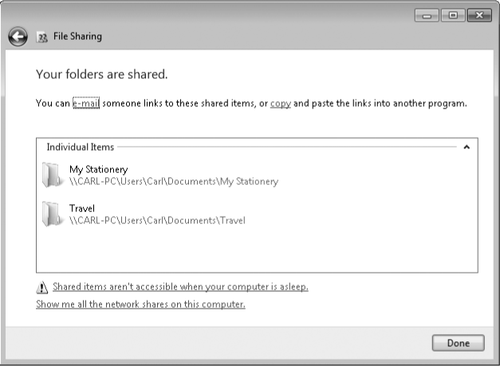
In the final step of the wizard, you can do any of the following:
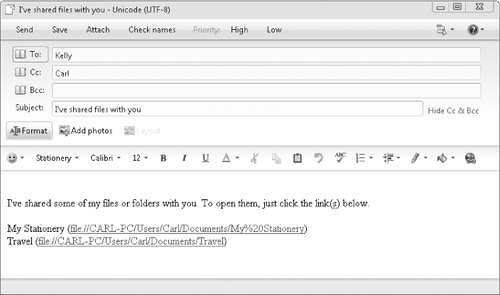
Send an e-mail message to the people with whom you're sharing. The message includes a link to the shared folder or file.
Copy the network path to the Clipboard. This is handy if you want to send a link via instant messenger or other application.
Double-click a share name to open the shared item.
Open a search folder that shows all the folders and files you're sharing.
When you're finished with these tasks, click Done.
Creating a
share requires privilege elevation, but after a folder has been shared,
the share is available to network users no matter who is logged on to
your computer—or even when nobody is logged on.
Confusingly, when you share one of your profile
folders (or any other subfolder of %SystemDrive%\Users), Windows
creates a network share for the Users folder—not for the folder you
shared. This isn't a security problem; NTFS permissions prevent network
users from seeing any folders or files except the ones you explicitly
share. But it does lead to some long Universal Naming Convention (UNC)
paths to network shares. For example, if you share the Travel subfolder
of Documents (as shown in Figure 18-6),
the network path is \\CARL-PC\Users\Carl\Documents\Travel. If this same
folder had been anywhere on your computer outside of the Users folder,
no matter how deeply nested, the network path would instead be
\\CARL-PC\Travel. Other people to whom you've granted access wouldn't
need to click through a series of folders to find the files in the
intended target folder.
Network users, of
course, can map a network drive or save a shortcut to your target folder
to avoid this problem. But you can work around it from the sharing side
too: use advanced sharing to share the folder directly. (Do this after
you've used the Sharing wizard to set up permissions.) For more
information, see Section 18.2.6Section 18.2.6.
(And while you're doing that, be sure the share name you create doesn't
have spaces. Eliminating them makes it easier to type a share path that
works as a link.) on
