7. Sharing a Printer
Although Windows
doesn't have a Sharing wizard for sharing a printer over the network,
the process is pretty simple. You configure all options for a
printer—whether you plan to share it or not—using the printer's
properties dialog box, which you access from the Devices And Printers
folder in Control Panel.
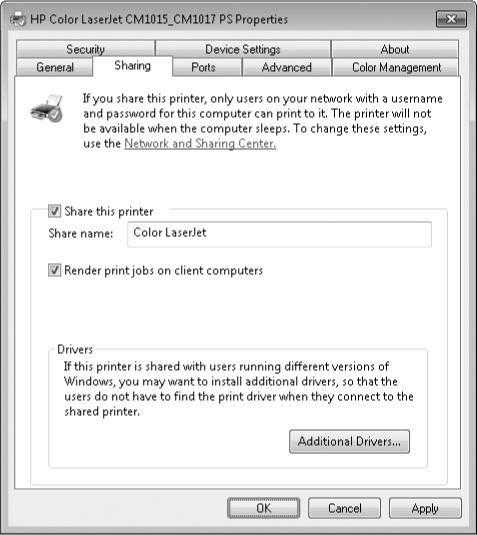
To make a
printer available to other network users, right-click a printer and
click Printer Properties. On the Sharing tab, select Share This Printer
and provide a share name, as shown in Figure 4.
Unlike shared
folders, which maintain separate share permissions and NTFS permissions,
a single set of permissions controls access to printers, whether by
local users or by network users. (Of course, only printers that have
been shared are accessible to network users.)
When you set up a
printer, initially all users in the Everyone group have Print permission
for documents they create, which provides users access to the printer
and the ability to manage their own documents in the print queue. By default, members of the Administrators group also have Manage Printers
permission, which allows them to share a printer, change its
properties, remove a printer, and change its permissions; and Manage
Documents permission, which lets them pause, restart, move, and remove
all queued documents. As an administrator, you can view or modify
permissions on the Security tab of the printer properties dialog box.
8. Setting Server Properties
In addition to
setting properties for individual printers by using their properties
dialog boxes, you can set other properties by visiting the Print
Server Properties dialog box. To get there, on the toolbar of the
Devices And Printers folder, click Print Server Properties.
The first three tabs control the list of items you see in the properties dialog box for a printer:
The Forms tab
controls the list of forms that you can assign to trays using the Device
Settings tab in a printer's properties dialog box. You can create new
form definitions and delete any that you create, but you can't delete
any of the predefined forms.
The Ports tab offers the same capabilities as the Ports tab in a printer's properties dialog box.
The Drivers
tab offers a list of all the installed printer drivers and provides a
centralized location where you can add, remove, or update drivers.
The Advanced tab offers a potpourri of options:
You can specify the location of spool
files. You might want to change to a folder on a different drive if,
for example, you frequently run out of space on the current drive when
you attempt to print large documents.
The Beep On Errors Of Remote Documents check box causes the print server to notify you audibly of problems with a remote printer.
The two Show Informational Notifications…check boxes control pop-up status messages near the notification area.
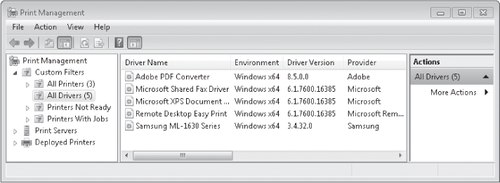
Users of Windows 7
Professional, Enterprise, or Ultimate edition have a tool that places
all print management tasks in one convenient console. Print Management
(Printmanagement.msc), shown here, provides a place for managing
printers, drivers, queues, and shares. If your edition includes Print
Management, you can start it by typing print in the Start menu search
box and then clicking Print Management.