If you’ve ever taken a photo indoors, chances are the
photo came out with kind of a yellowish tint. Unless you took the shot
in an office, and then it probably had a green tint. If you just took a
shot of somebody in the shade, the photo probably had a blue tint. Those
are white balance problems, and if we properly set our white balance in
the camera, we won’t see these color problems (the photos will just
look normal), but since most of us shoot with our cameras set to Auto
White Balance, we’re going to run into them. Luckily, we can fix them
pretty easily.
Step One. | Adjusting
the white balance is usually the very first thing I adjust in my own
Camera Raw workflow, because getting the white balance right will
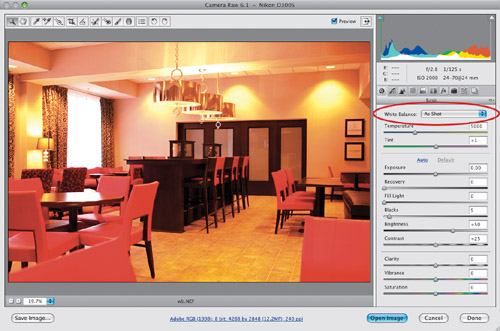
eliminate 99% of your color problems right off the bat. At the top of
the Basic panel (on the right side of the Camera Raw window), are the
White Balance controls. If you look to the right of the words “White
Balance,” you’ll see a pop-up menu (shown circled here in red), and by
default it shows you the “As Shot” white balance (you’re seeing the
white balance you had set in your camera when you took the shot). For
this shot, I had my white balance set to Auto for shooting outdoors, and
then I walked into a hotel lobby where I took this shot, and that’s why
the white balance is way, way off.
 | Step Two. | There
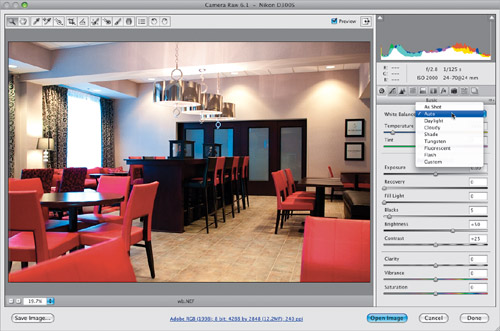
are three ways to change the white balance in your photo, and the first
is to simply choose one of the built-in White Balance presets. Fairly
often, that’s all you need to do to color correct your image. Just click
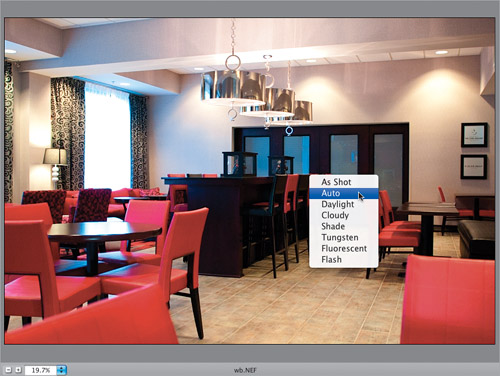
on the White Balance pop-up menu, and you’ll see a list of white
balance settings you could have chosen in the camera. Just choose the
preset that most closely matches what the lighting situation was when
you originally took the photo (for example, if you took the shot in the
shade of a tree, you’d choose the Shade preset). Here I tried each
preset and Auto seemed to look best—it removed the yellowish tint. I
also tried Tungsten, which looked pretty good, as well. That’s why it
doesn’t hurt to try each preset and simply choose the one that looks
best to you. (Note: This is the one
main area where the processing of RAW and JPEG or TIFF images differs.
You’ll only get this full list of white balance presets with RAW images.
With JPEGs or TIFFs, your only choice is As Shot or Auto white
balance.)
 | Step Three. | The
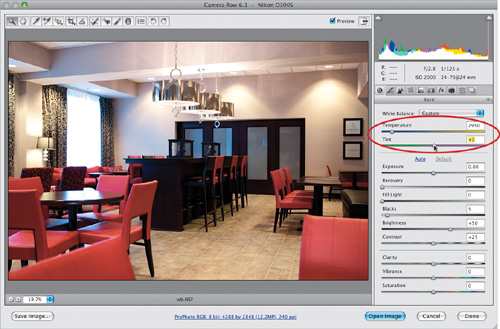
second method is to use the Temperature and Tint sliders (found right
below the White Balance preset menu). The bars behind the sliders are
color coded so you can see which way to drag to get which kind of color
tint. What I like to do is use the built-in presets to get close (as a
starting point), and then if my color is just a little too blue or too
yellow, I drag in the opposite direction. So, in this example, the Auto
preset was close, but made it a little too blue, so I dragged the
Temperature slider a little bit toward yellow and the Tint slider toward
magenta to brighten the reds (as shown here).
 | Step Four. | Just
a couple of other quick things about manually setting your white
balance using the Temperature and Tint sliders: If you move a slider and
decide you didn’t want to move it after all, just double-click directly
on the little slider “nub” itself, and it will reset to its previous
location. By the way, I generally just adjust the Temperature slider,
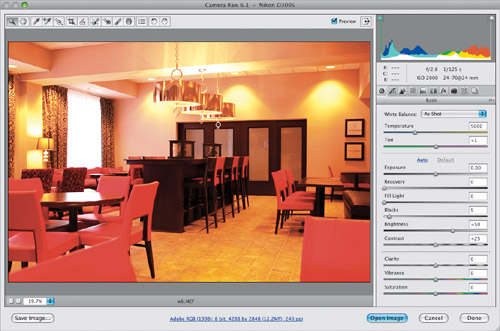
and rarely have to touch the Tint slider. Also, to reset the white
balance to where it was when you opened the image, just choose As Shot
from the White Balance pop-up menu (as seen here).
 | Step Five. | The
third method is my personal favorite, and the method I use the most
often, and that is setting the white balance using the White Balance
tool (I). This is perhaps the most
accurate because it takes a white balance reading from the photo itself.
You just click on the White Balance tool in the toolbar at the top left
(it’s circled in red here), and then click it on something in your
photo that’s supposed to be a light gray (that’s right—you properly set
the white balance by clicking on something that’s light gray). So, take
the tool and click it once on a light shadow area on the glass in the
back door (as shown here) and it sets the white balance for you. If you
don’t like how it looks, then just click on a different light gray area.

Tip: Quick White Balance Reset
To quickly reset your white balance to the As Shot setting, just double-click on the White Balance tool up in the toolbar.
| Step Six. | Now,
here’s the thing: although this can give you a perfectly accurate white
balance, it doesn’t mean that it will look good. White balance is a
creative decision, and the most important thing is that your photo looks
good to you. So don’t get caught up in that “I don’t like the way the
white balance looks, but I know it’s accurate” thing that sucks some
people in—set your white balance so it looks right to you. You are the
bottom line. You’re the photographer. It’s your photo, so make it look
its best. Accurate is not another word for good. By the way, you can
just Right-click on your image to access the White Balance pop-up menu
(as shown here).
 | Step Seven. | Here’s
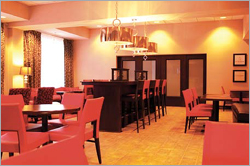
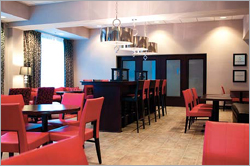
a before/after so you can see what a difference setting a proper white
balance makes (by the way, you can see a quick before/after of your
white balance edit by pressing the letter P on your keyboard to toggle the Preview on/off).
Before: The As Shot white balance has a yellowish tint
After: With one click of the White Balance tool, everything comes together
|
|