Capturing Images with BDD 2007
In
BDD 2007, creating an image is essentially a Lite Touch installation
(LTI) process (containing applications, language packs, and various
customizations), which ends by capturing an image of the destination
computer in the lab. The following list outlines the overall process
(illustrated in Figure 1) for using Deployment Workbench to create and capture operating system images:
Prepare the distribution share
Prepare the distribution share by storing operating system source
files, applications, out-of-box device drivers, and packages in it.
Create and configure a build A build
associates an operating system with an unattended-setup answer file
(Unattend.xml) and a sequence of tasks to run during installation, also
called a task sequence.
A build essentially represents an operating system configuration,
including a product key, installation and configuration tasks, and other
settings.
Create and configure a lab deployment point A deployment point
provides the information necessary to connect to the distribution share
and install a build from it. Some deployment points are copies of the
distribution share that you can distribute to other locations. Lab
deployment points always connect to the distribution share directly,
however. Deployment points also provide the Windows PE boot images
necessary to start destination computers and connect to the deployment
point.
Run the Windows Deployment Wizard on the lab computer
Start the destination lab computer using the Windows PE image that the
lab deployment point provides, and then install a build from the
distribution share. During the initial interview, the Windows Deployment
Wizard will prompt you whether to create a custom image after LTI is
complete.
Add the custom image as an operating system source
After capturing the custom image, you add it to the distribution share
as an operating system source. You can then deploy this custom image by
using LTI or ZTI (Zero Touch Installation).
Navigating Deployment Workbench
To
start Deployment Workbench, click Start, point to All Programs, point
to BDD 2007, and then click Deployment Workbench. The console tree shows
the following items:
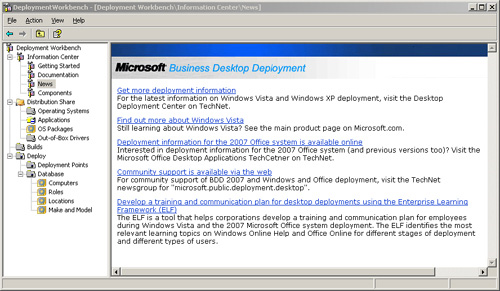
Information Center
This item provides access to the documentation, breaking news about BDD
2007, and the components required for using Deployment Workbench.Figure 2 shows Deployment Workbench with all items expanded and the News item selected.
Distribution Share
Under this item are the operating systems, applications, operating
system packages, and out-of-box drivers that the distribution share
contains. Files you add to the distribution share are simply source
files that BDD 2007 uses to create builds.
Builds You
see a list of builds in the details pane. Builds associate source files
from the distribution share, particularly operating systems, with
configurations (settings and task sequences).
Deploy
The Deploy item contains two items below it: Deployment Points and
Database. In Deployment Points, you see a list of deployment points in
the details pane. Deployment points contain the settings and files
necessary to install builds from the distribution share or copies of the
distribution share. In Database, you see the BDD 2007 database.
Note
The
default view in Deployment Workbench includes the action pane. The
action pane often gets in the way of viewing the entire details pane.
You can remove the action pane by authoring the management console. To
author the console, run C:\Program Files\BDD 2007\Bin\BDDWorkbench.msc
/a. Click View, click Customize, clear the Action Pane check box, and
then click OK. Save your changes by clicking File, and then clicking
Save on the main menu. When prompted whether you want to display a
single window interface, click Yes. |
