When you print a file, you
aren’t seeing the vector path; you’re seeing the appearance that was
specified for that path. An example of an attribute might be a
particular fill or stroke.
When you specify
attributes, they appear listed in the Appearance panel. We know this
sounds like a late-night infomercial, but if you keep only one
Illustrator panel open on your screen while you’re working, make it the
Appearance panel. In fact, the Appearance panel is probably the most
important panel in Illustrator—ever. To open the Appearance panel,
choose Window > Appearance.
Like
X-ray vision, the Appearance panel enables you to look at your files
and see how they were built or created. This panel also gives you access
to every attribute of an object. You can also specify appearance
attributes directly from the Appearance panel. But before we get ahead
of ourselves, let’s start with the basics.
Understanding Attributes and Stacking Order
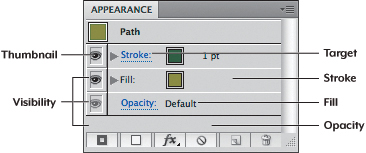
When a path is selected, the Appearance panel displays a thumbnail icon and the word Path,
which is the target. The panel also lists—from the bottom up—the
target’s opacity, its fill, and its stroke. To the left of each
attribute are visibility icons (Figure 1).
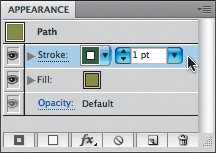
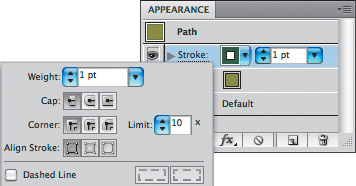
Clicking an attribute in the Appearance panel enables you to modify it,
and clicking an attribute name that is underlined in blue opens the
panel that controls all the settings for that attribute. For example,
click anywhere to the right of the word Stroke to change its color or weight (Figure 2); click the word Stroke, and the Stroke panel appears, where you can specify cap, join, and dash settings (Figure 3).
The
order in which the listed items appear in the Appearance panel isn’t
arbitrary. From the bottom up, these attributes control the overall
appearance of the object. To better illustrate this important concept,
let’s first understand a core aspect of how vector objects are drawn in a
document.
Objects are drawn in a
hierarchy, determined by the order in which you create your art. For
example, if you draw one shape and then draw a second shape, the second
shape appears higher in the document’s hierarchy than the first object.
The easiest way to see this is to create two overlapping objects (Figure 4). In Illustrator, this hierarchy is called the stacking order.
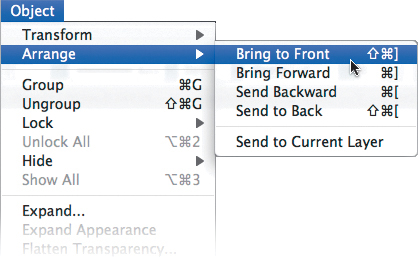
You can change an object’s place in the stacking order by selecting it
and choosing an item from the Object > Arrange menu (Figure 5).

What most people don’t realize
is that a single object also has a stacking order. By default,
Illustrator defines an overall Opacity value for an object and then
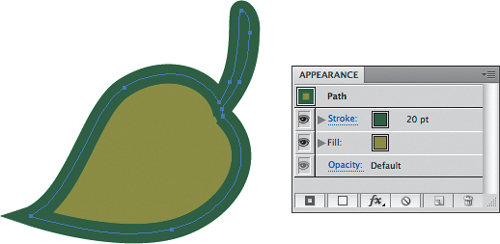
paints the fill and the stroke in that specific order. Why? One reason
could be that strokes are painted along the centerline of a path. That
means if the weight of a path is set to 20 pt, the weight is distributed
so that 10 pts appear on both sides of the path (Figure 6).
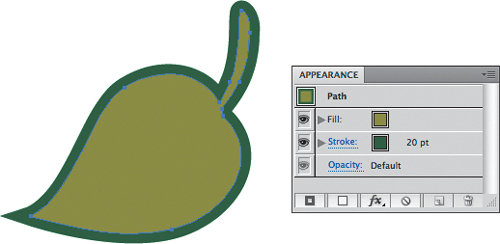
If Illustrator painted the fill after the stroke, the 10 pts of the
stroke width that falls on the inside of the path would be covered or
hidden by the fill (Figure 7).
What’s great about the
Appearance panel is that not only can you use it to change the
appearance of an attribute, but you can also use it to see the order
that those attributes are applied in. Even better, you can change the
stacking order. For example, dragging the Stroke attribute in the
Appearance panel so that it appears listed beneath the Fill attribute
instructs Illustrator to paint the Stroke attribute before it paints the
fill (thus hiding half the weight of the stroke, as in Figure 7).
