Logo
programming4us
programming4us
programming4us
programming4us
Home
programming4us
XP
programming4us
Windows Vista
programming4us
Windows 7
programming4us
Windows Azure
programming4us
Windows Server
programming4us
Windows Phone
 
programming4us
Windows 7

Microsoft Visio 2010 : Setting Theme Options

- Free product key for windows 10
- Free Product Key for Microsoft office 365
- Malwarebytes Premium 3.7.1 Serial Keys (LifeTime) 2019
7/24/2011 4:49:52 PM
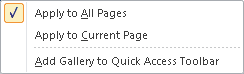
When you apply a theme, you can apply it to the current page or to all pages in your drawing. The default action when you click the thumbnail for a theme is for Visio to apply it the same way the previous theme was applied. If you’re not sure how that was done, right-click the theme thumbnail instead of left-clicking it and you can make an explicit choice from the menu.

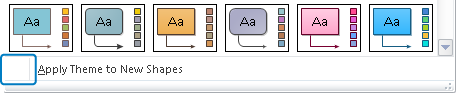
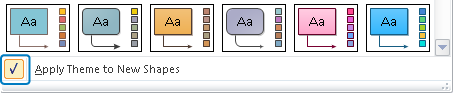
You can choose whether Visio should automatically apply a theme to shapes as they are dropped on the page. You set your preference by selecting or clearing the check box at the bottom of the Themes gallery. If the check box is cleared, as shown in the upper graphic of the following pair of graphics, the current theme will not be applied; the selected check box shown in the lower graphic indicates that the selected theme will be applied to new shapes.


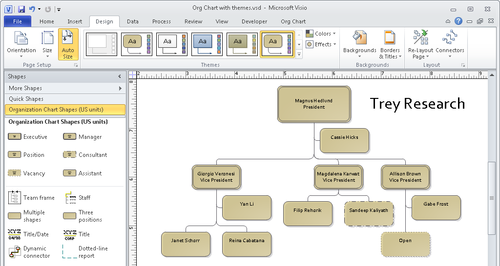
If you choose the option to apply a theme to new shapes, Visio also applies your theme settings to the masters in the current stencil, as you can see in the following graphic.


Tip:

If you want to copy a theme from one Visio drawing to another, merely copy a shape containing the theme from the first drawing and paste it into the second one. You can then delete the shape—the theme will remain behind. Your copied theme will not appear in the Theme gallery but will appear under the Custom heading in the Colors gallery, the Effects gallery, or both, depending on what your theme contains.

You cannot delete the built-in colors, effects, or themes. However, you can delete custom colors and effects. To do so, open the appropriate gallery, right-click the custom object, and then click Delete.

Other -----------------
- Microsoft Visio 2010 : Customizing Themes
- Managing Disks : Troubleshooting Disk Management & Managing Data Compression
- Managing Disks : Managing Dynamic Storage - Creating an Extended Volume
- Visual Studio 2010 : Deploying Web Applications
- Visual Studio 2010 : Deploying Smart Client Applications (part 2) - Making a Windows Installer
- Visual Studio 2010 : Deploying Smart Client Applications (part 1) - From No Touch to ClickOnce
- Microsoft Visio 2010 : Applying Themes to Your Diagrams (part 2)
- Microsoft Visio 2010 : Applying Themes to Your Diagrams (part 1)
- Microsoft Visio 2010 : Turning Off the Grid
- Managing Disks : Using the Disk Management Utility (part 2) - Understanding the Disk Management Utility
 
 
Top 10
- Microsoft Visio 2013 : Adding Structure to Your Diagrams - Finding containers and lists in Visio (part 2) - Wireframes,Legends
- Microsoft Visio 2013 : Adding Structure to Your Diagrams - Finding containers and lists in Visio (part 1) - Swimlanes
- Microsoft Visio 2013 : Adding Structure to Your Diagrams - Formatting and sizing lists
- Microsoft Visio 2013 : Adding Structure to Your Diagrams - Adding shapes to lists
- Microsoft Visio 2013 : Adding Structure to Your Diagrams - Sizing containers
- Microsoft Access 2010 : Control Properties and Why to Use Them (part 3) - The Other Properties of a Control
- Microsoft Access 2010 : Control Properties and Why to Use Them (part 2) - The Data Properties of a Control
- Microsoft Access 2010 : Control Properties and Why to Use Them (part 1) - The Format Properties of a Control
- Microsoft Access 2010 : Form Properties and Why Should You Use Them - Working with the Properties Window
- Microsoft Visio 2013 : Using the Organization Chart Wizard with new data
 
programming4us
Windows Vista
programming4us
Windows 7
programming4us
Windows Azure
programming4us
Windows Server