2. Making a Windows Installer
Visual Studio 2010 provides
setup projects you can use to deploy your applications. Setup projects
create a Windows Installer file with the extension .msi.
These setup projects are available in Visual Studio:
Setup projects create an installer file
that you can use to deploy a program on a target machine or to a
virtual directory on a Web site. Visual Studio provides a wizard to walk
you through creating setup projects.
Merge module projects create reusable setup components for consumption by setup projects.
A Cab project creates a CAB file from the items added to Solution Explorer. CAB files are often used to distribute components, such as ActiveX controls. The .cab file format (short for Microsoft Cabinet) is used for compressing files.
You can distribute the
resulting MSI (Microsoft Installer) files by using CDs or DVDs, or a
file share for installation across a network. MSI files can install an
application on a target machine in a Windows application or on a Web
site in a Web application.
The installation projects
provided by Visual Studio take advantage of Windows Installer, which is
an installation framework available on Windows operating systems. The
installer takes care of how everything gets installed; you just focus on
what you need to install. For example, the installer can create
Registry entries, shortcuts, and Open Database Connectivity (ODBC)
connections for you. You use a Visual Studio setup project to tell
Windows Installer what to install. You don't have to write the code to
make any of this installation happen. Windows Installer gets it
installed for you.
Applications installed by using Windows Installer can
NOTE
Windows Installer is sophisticated, and there's nothing you can't install with it.
2.1. Creating a setup project for an existing application
Although you can create
standalone setup projects, you usually add setup projects to an existing
solution that you want to deploy. To create a setup project for an
existing application, follow these steps:
Open a solution that includes a project you want to deploy.
Right-click the solution in Solution Explorer.
A shortcut menu appears.
In the Add New Project window, expand the Other Project Types category and select Setup and Deployment.
You
can choose either Install Shield 2010 or Windows Installer. If you
choose Windows Installer, a list of project templates appear.
Type a name for the project and then click OK.
The Setup Wizard appears.
Click Next.
The Choose a Project Type page appears.
Select the Create a Setup for a Windows Application option.
You can use the wizard to create a Web setup project, a merge module, or a CAB file.
Click Next.
The
Choose Project Outputs page appears. The project output from the other
projects in the solution appears on this page. If no other projects are
in the solution, this page doesn't appear. You have to add files to the
setup project manually.
Select the project output groups you want to deploy with your setup project.
You want, at a minimum, content files and the primary output, which is the assembly created by your project.
|
Specify that a file should be included as a content file by accessing the file's properties in Solution Explorer.
|
|
Add any files you want to deploy with your setup project.
Click Next.
The Create Project page appears.
Click Finish.
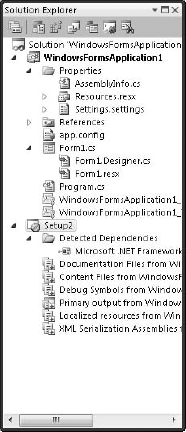
The project is created, and the content is added to Solution Explorer, as shown in Figure 10.
Setup projects have a number of editors you can use to build your installer, including the ones in this list:
File System: Identifies which files and shortcuts are created on the file system of the target machine
Registry: Creates Registry entries
File Types: Associates file extensions with applications
User Interface: Customizes the installation wizard
Custom Actions: Customizes the installation process
Launch Conditions: Creates conditional installation steps
These editors
are fairly straightforward to use after you realize that you're taking
the perspective of the target computer. You have to start by asking
yourself what you want the target machine to look like when the
installer is complete and then figure out how to make that happen by
using these editors.
2.2. Putting the installer to work
To install a simple application and create shortcuts on the user's desktop and Start menu, use the File System Editor:
Create a new setup project, as described in the preceding set of steps.
The File System Editor opens by default.
You can open any of the editors by using the View menu or the icons on the Solution Explorer toolbar.
The
File System Editor displays the file system of the target machine. You
can elect to install files or shortcuts to special folders that are
common to all Windows computers, such as a User's Desktop or Favorites
folder.
By default, the
Application Folder, User's Desktop, and User's Program Menu folders are
added to the editor. Right-click the File System on Target Machine
option to add more folders.
Select Application Folder.
The folder's contents appear in the pane on the right.
If
you added your setup project to a solution with an existing project,
the projects' output selected in the wizard appears. Right-click
Application Folder and choose from the menu to add more files.
Use the Properties window to set an installation folder for Application Folder.
Right-click Primary Output in the Application folder.
A shortcut menu appears.
Choose Create Shortcut.
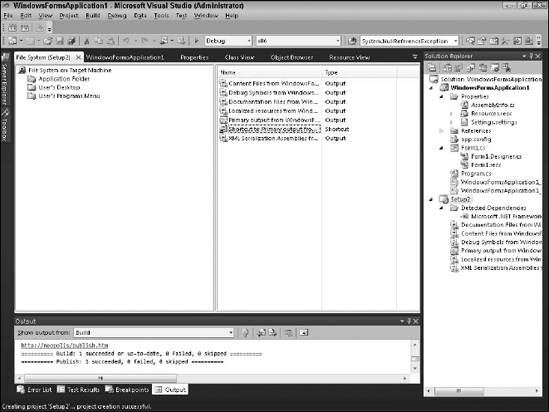
A new shortcut appears, as shown in Figure 11.
Type a name for the shortcut.
|
You want the shortcut to appear on the target computer.
|
|
Right-click the shortcut and choose Cut.
Right-click User's Desktop and choose Paste.
The shortcut appears in the folder.
Right-click the User's Programs Menu folder.
Choose Add=>Folder from the shortcut menu.
Type a name for the folder.
|
You want the folder to appear on the user's Program menu.
|
|
Repeat Steps 3 through 7 to add a shortcut to the new folder.
You now have an installer
that installs your application and creates shortcuts on the user's
desktop and then adds a folder with a shortcut to the Program menu.
Here's how to test the installer:
Right-click the setup project in Solution Explorer.
Choose Build from the shortcut menu.
The project builds and packages the files.
If
you choose to build the entire solution, the setup project isn't
included in the solution's build configuration in Configuration Manager.
Either enable it to be built or build the project from the Build menu.
Repeat Step 1 and choose Install from the shortcut menu.
The installation wizard appears.
Step through the wizard to install your application.
2.3. Sharing assemblies
Most of the time, you want
your assemblies to be private. Only your application can access private
assemblies. If you want to share your assemblies with other
applications, you need to place them in the GAC. Examples of assemblies
you may find in the GAC are the assemblies of the .NET Framework. When
you place the assemblies in the GAC, all applications have access to
them.
To publish an assembly to the
GAC, it must use a strong name, which guarantees that all assemblies in
the GAC have a unique name. A strong name
comprises the assembly name, version number, public key, and digital
signature. Suppose that your company creates an assembly named OrderEntry.
Another company could feasibly create an assembly with the same name. A
strongly named assembly creates a unique assembly, even if the assembly
names were identical.
If you attempt to publish to the GAC an assembly that isn't strongly named, you receive an error message.
Visual Studio 2010 provides a way
to strongly name assemblies and publish them to the GAC. To strongly
name an assembly, follow these steps:
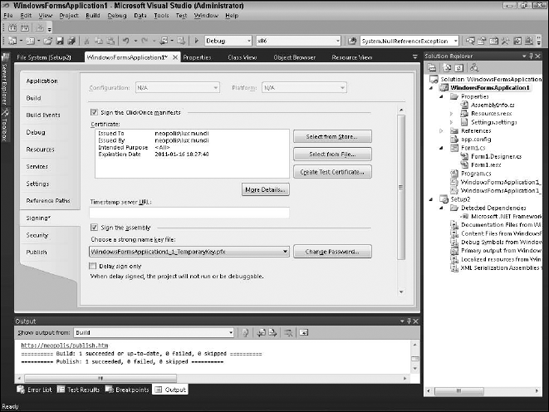
Go to the Signing tab of Project Designer for the assembly you want to sign.
Select the Sign the Assembly option.
Open the Choose a Strong Name Key File drop-down list.
Click Browse to reuse an existing key file or click New to create a new key file.
If you click New, the Create Strong Name Key window appears. Type a name for the key file and a password to protect the file.
The key file appears on the tab, as shown in Figure 12.
To install the assembly in the GAC by using a setup project, follow these steps:
Open the File System Editor in the setup project.
Right-click File System on Target Machine.
A shortcut menu appears.
Choose Add Special Folder=>Global Assembly Cache Folder.
A GAC folder appears in the editor.
Right-click Global Assembly Cache Folder in the editor.
Choose Add=>Project Output.
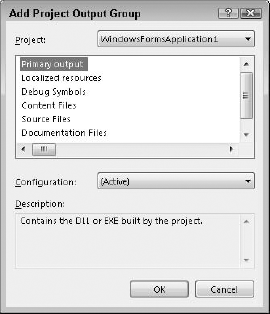
The Project Output Group window appears.
Select the project from the Project drop-down list and then choose Primary Output, as shown in Figure 13.
Click OK.
The primary output appears in the editor.
Build the setup project and
install it on a test machine. To view the GAC to ensure that the
assembly was installed, take these steps:
Open Administrative Tools in Control Panel.
Double-click Microsoft .NET 4 Configuration.
The configuration management console appears.
Select Manage the Assembly Cache.
Select the View List of Assemblies in the Assembly Cache option.
A list of assemblies appears.
