2.3 c360 CTI for Microsoft CRM
c360
CTI (Computer Telephony Integration) is a third-party application that
enables integration between telephone systems (via TAPI) and Microsoft
Dynamics CRM. Similar to the Cisco and Avaya products, this product also
detects incoming phone calls (displays the caller’s name and number),
automatically produces activities for incoming and outgoing calls, and
much more. The CTI provides the following capabilities:
Connects telephone systems with Microsoft Dynamics CRM
Detects incoming calls and displays caller information
Opens a contact or an account upon the lifting of the receiver
Creates activities for incoming and outgoing calls
Simplifies the process of making outgoing calls
This CTI application has been successfully tested on the following phone systems:
To install c360 CTI, you first need to install the server component, as follows:
1. | Download
the setup from the c360 website. (Typically, the setup is sent in an
email to every customer.) Then launch the setup by running Telephone
Integration Setup.msi.
|
2. | On the Welcome screen, click Next.
|
3. | Select English on the Language Selection screen, and then click Next.
|
4. | On the Destination Folder screen, select the appropriate location for the installation, and then click Next.
|
5. | On the Ready to Install the Program screen, click Install.
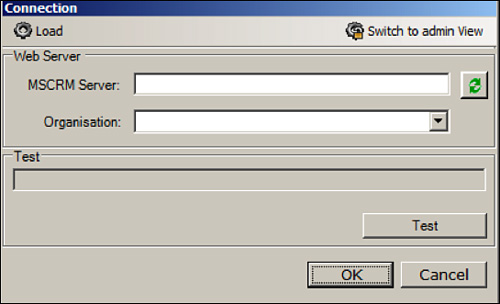
Once the files are copied to the server, a server connection configuration screen will display, as shown in Figure 12.
|
6. | Enter the appropriate server name and organization, and then click OK.
|
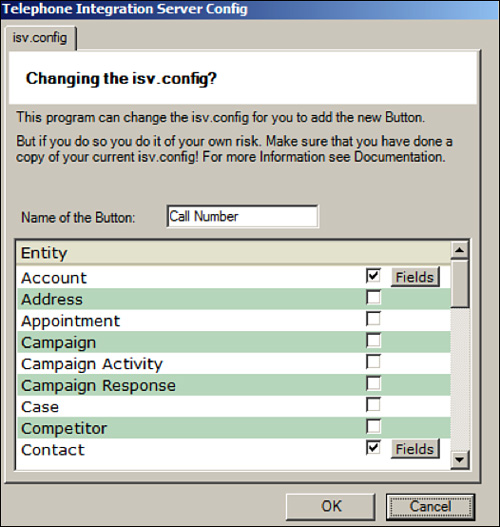
7. | During the installation, configure ISV.config. Select the appropriate entities that require CTI within your organization (see Figure 13).
|
8. | By default, Accounts and Contacts is selected. You can make any changes if needed.
|
9. | Click Finish to complete the installation.
|
After the server component has been installed, you will see the Call Number button shown in the Figure 14

System administrators may change the
configuration if desired at a later stage. To configure additional
settings for c360, follow these steps:
1. | Click Start.
|
2. | Click All Programs.
|
3. | Click c360.
|
4. | Click Telephone Integration for MSCRM 4.
|
5. | Click Telephone Integration Setup to launch the same configuration as shown during setup (refer back to Figure 7.13).
|
Note
Click the Fields button to view the more advanced functions (to select the fields to search) that are available.
To install the client component, follow these steps:
1. | Locate the installer and launch setup.
|
2. | On the Welcome screen, click Next.
|
3. | Agree to the license agreement, and then click Next.
|
4. | Select English on the Language screen.
|
5. | Select the following in the Startup Options screen:
Automatically Start TI When Windows Starts.
Start TI After Setup.
Then click Next.
|
6. | Choose the installation folder, and then click Next.
|
7. | Click Install to begin installation
|
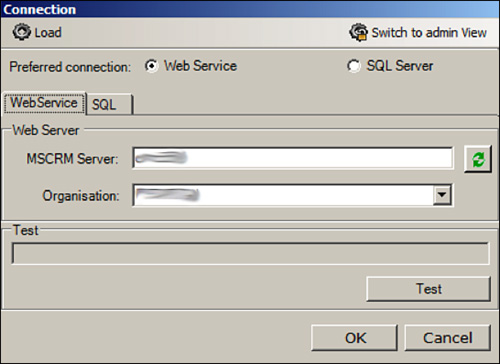
8. | Enter the following server connection options (see Figure 15):
MSCRM Server.
Organization.
Then click OK.
|
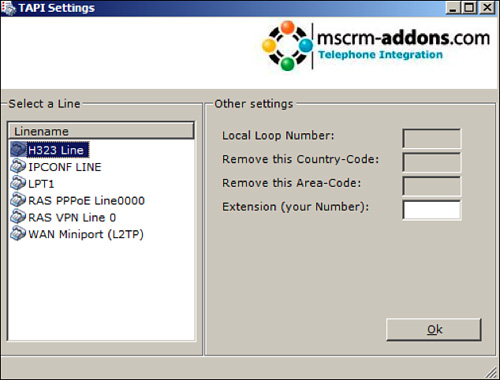
9. | Select the appropriate TAPI device. Figure 16 shows all the TAPI devices available from the Windows system.
|
10. | Click Finish.
|
3. Logging Call Actions
With CTI, the incoming and outgoing calls are automatically logged in the Microsoft Dynamics CRM system. Figure 7.17
shows the log of the phone calls in the CRM database. The creation of
the activities happens automatically; this action is performed with the
security context of the person placing or receiving the phone call.
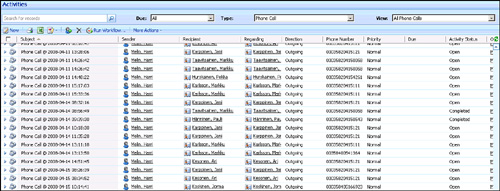
The following attributes about the call are automatically logged in Microsoft Dynamics CRM:
Start time
Duration
Call direction (incoming/outgoing)
Call priority (set to Normal by default)
Activity status (set to Open by default)
Sender (CRM user placing or receiving the call)
Owner (CRM user placing or receiving the call)
Regarding (customer record participating in the call)